What is a project management timeline? Steps, templates, and tools

Even the most talented project managers, the clearest scope, and the best resources cannot keep a project from drifting off course if a clear picture of what and when isn’t there.
When the work should happen, what depends on what, and whether the project is actually on track — these are the questions that a good project timeline answers. It turns a list of tasks into a view of the project in time, connecting deadlines, milestones, dependencies, and progress in one place, helping teams track progress every step of the way.
This is a breakdown of what a project timeline is, how to build one step by step, which tools work best, and where to find timeline templates you can start using right away.
TL;DR
- A project timeline turns tasks into a chronological plan, showing deadlines, milestones, and dependencies.
- A well-built timeline keeps everyone aligned, gives your team and stakeholders a shared view of progress, priorities, and what’s coming next.
- Choose the right timeline tool for your workflow — and if you use Jira or Trello, Planyway adds powerful visual planning without disrupting how your team works.
What is a project timeline?
A project timeline is a visual representation of a project’s work across time that shows tasks, milestones, and deadlines in chronological order. The difference from a project plan is that it basically is a project plan, put on a calendar in a way that visualizes the work from start to finish, functioning as a living project schedule the whole team can follow.
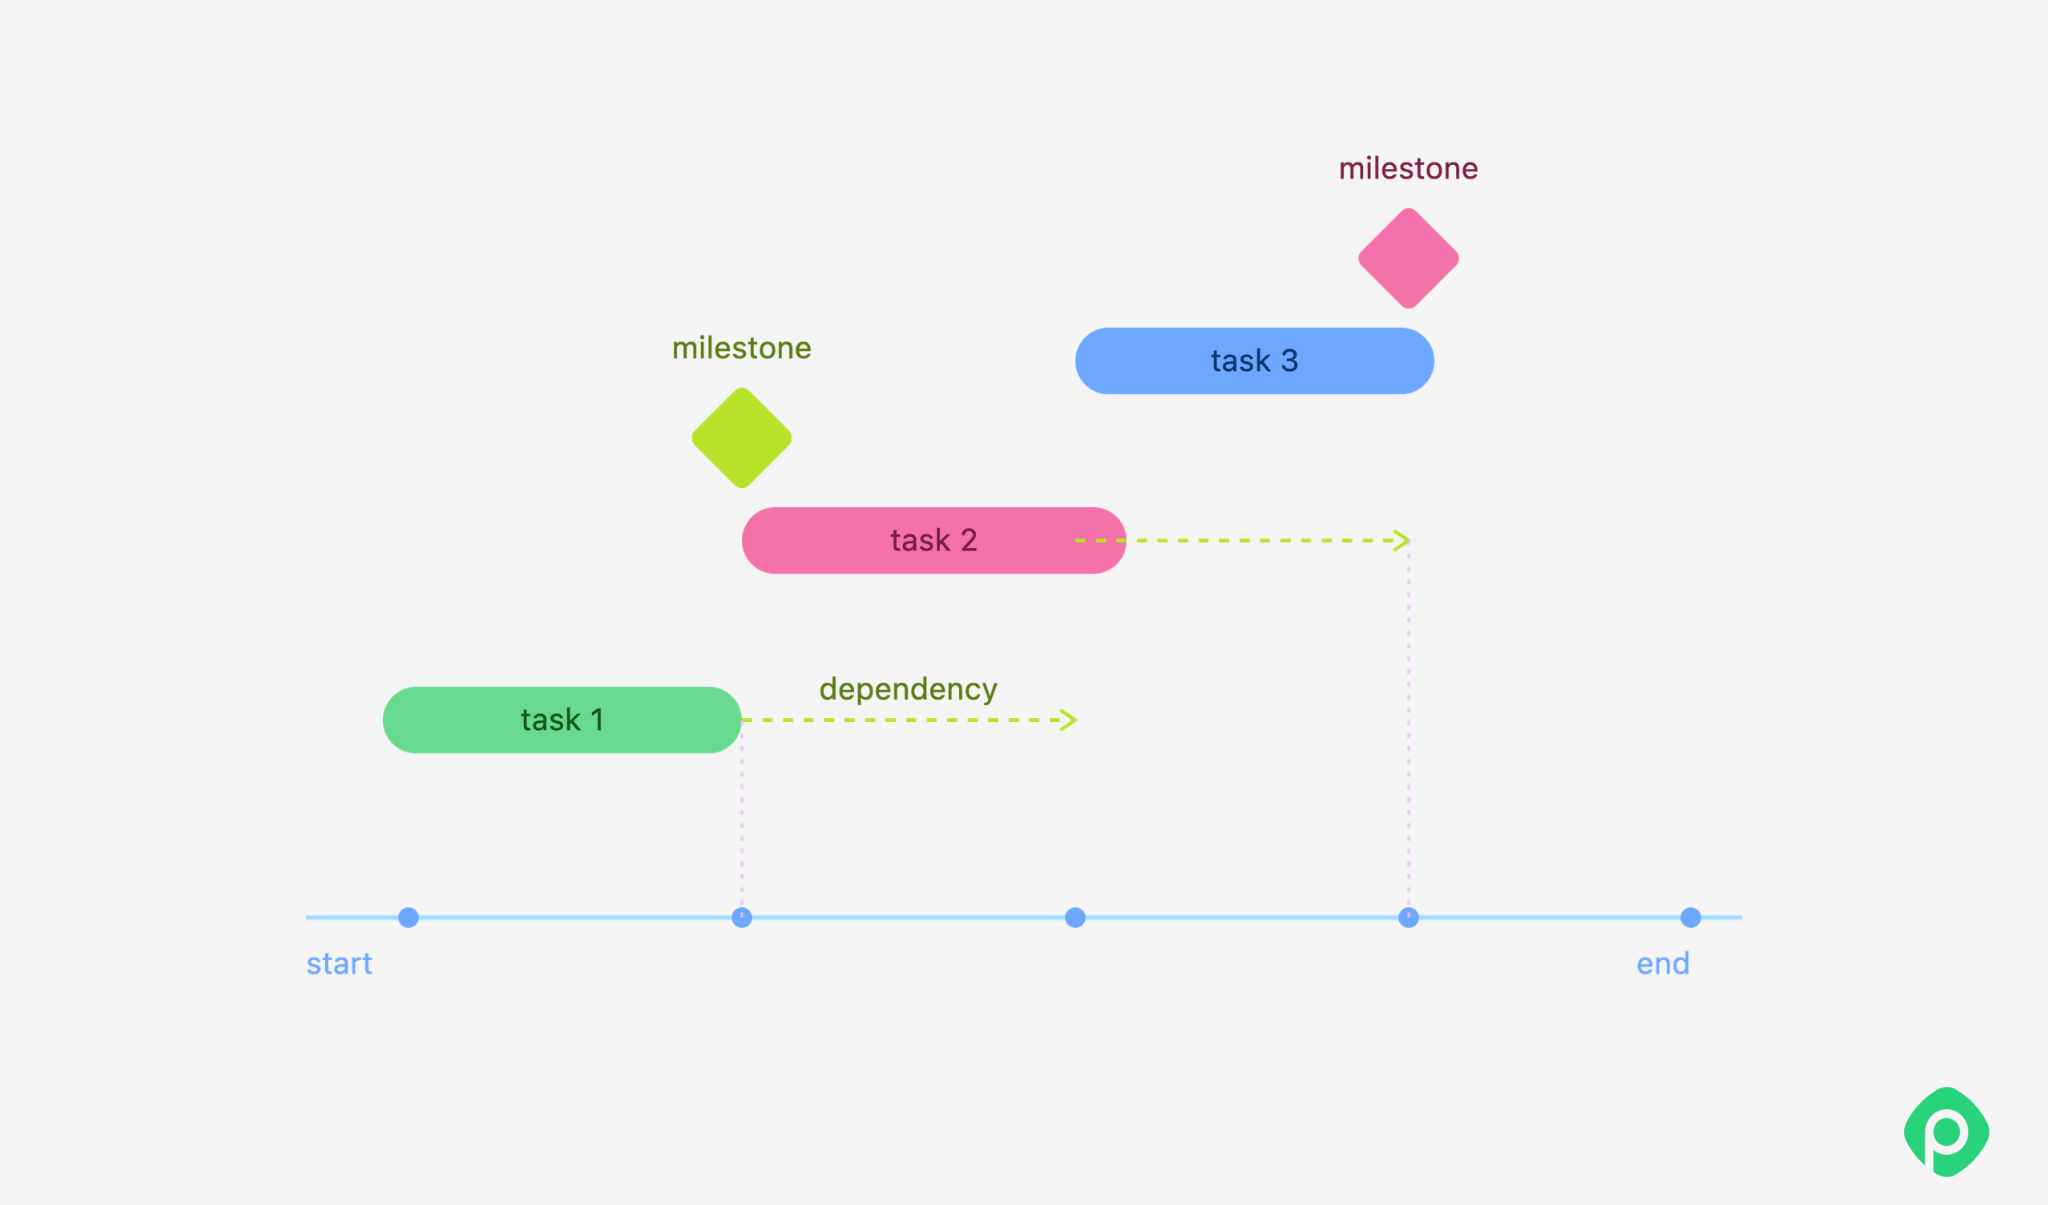
The timeline of a project can have many looks, but typically it runs from left to right, with time along the horizontal axis (days, weeks, or months). It usually includes:
- Tasks and activities
- Start and end dates
- Duration
- Milestones
- Dependencies
A timeline can just be a series of milestones, or it may be a more detailed artifact: say, a Gantt chart with specific tasks, durations, dependencies, and progress. The level of detail usually depends on who will use it: a project team may need a detailed working timeline, while stakeholders and the C-level may only require major project phases and milestones.
It’s easy to confuse a project timeline with some other project management artifacts that may sound similar, though.
Timeline vs. Gantt chart vs. roadmap
While these terms are often used interchangeably, they’re not quite identical. Here’s the difference:
| Timeline | Gantt chart | Roadmap |
|
|
|
Basically, your roadmap can include multiple timelines; some of these timelines may or may not be Gantt charts. To make the distinction easier, remember that a roadmap is a strategic artifact, and a timeline — a tactical one.
What makes project timelines important
- Only 36% of organisations always or mostly complete projects on time, Wellingtone’s 2026 study found.
- For example, in construction projects, only 2.5% of firms say their initiatives consistently finish both on time and on budget, according to FMI’s 2026 Project Management Study.
- Four out of five complex projects experience fallout from poor handling of complexity. Missed deadlines are one of the most impactful factors, experienced by 55% of respondents included in PMI’s Pulse of the Profession 2026 report.
The data above makes it clear that ignoring basic business management tools like project timelines can significantly reduce the probability of your overall project success. While timelines surely can’t guarantee that success, they do serve several critical purposes.
- Clarity. Timelines force you to think through what needs to happen and in what order, keeping your project objectives front and center. Creating project timelines without understanding the project’s scope is impossible.
- Communication. They give your team and stakeholders a shared view of the plan and the work that needs to be done to achieve your business goals, keeping both internal and external stakeholders aligned. In PMI’s Pulse 2026 report we mentioned above, 39% of high-performers in project management established a shared understanding of what success looks like before execution began.
- Accountability. When tasks have dates and owners, people know what's expected of them and how their results will be measured, which keeps task completion on schedule. It helps everyone stay on the same page.
- Bottleneck prevention. Thanks to highlighting task dependencies and resource allocation, timelines help you spot potential problems and blockers, including scope creep, before they derail the project. In 2025, another PMI report found that 45% of successful projects were once at risk of failure, but adaptability and communication were key to recovery. A timeline is but one tool that can provide you with that kind of adaptability.
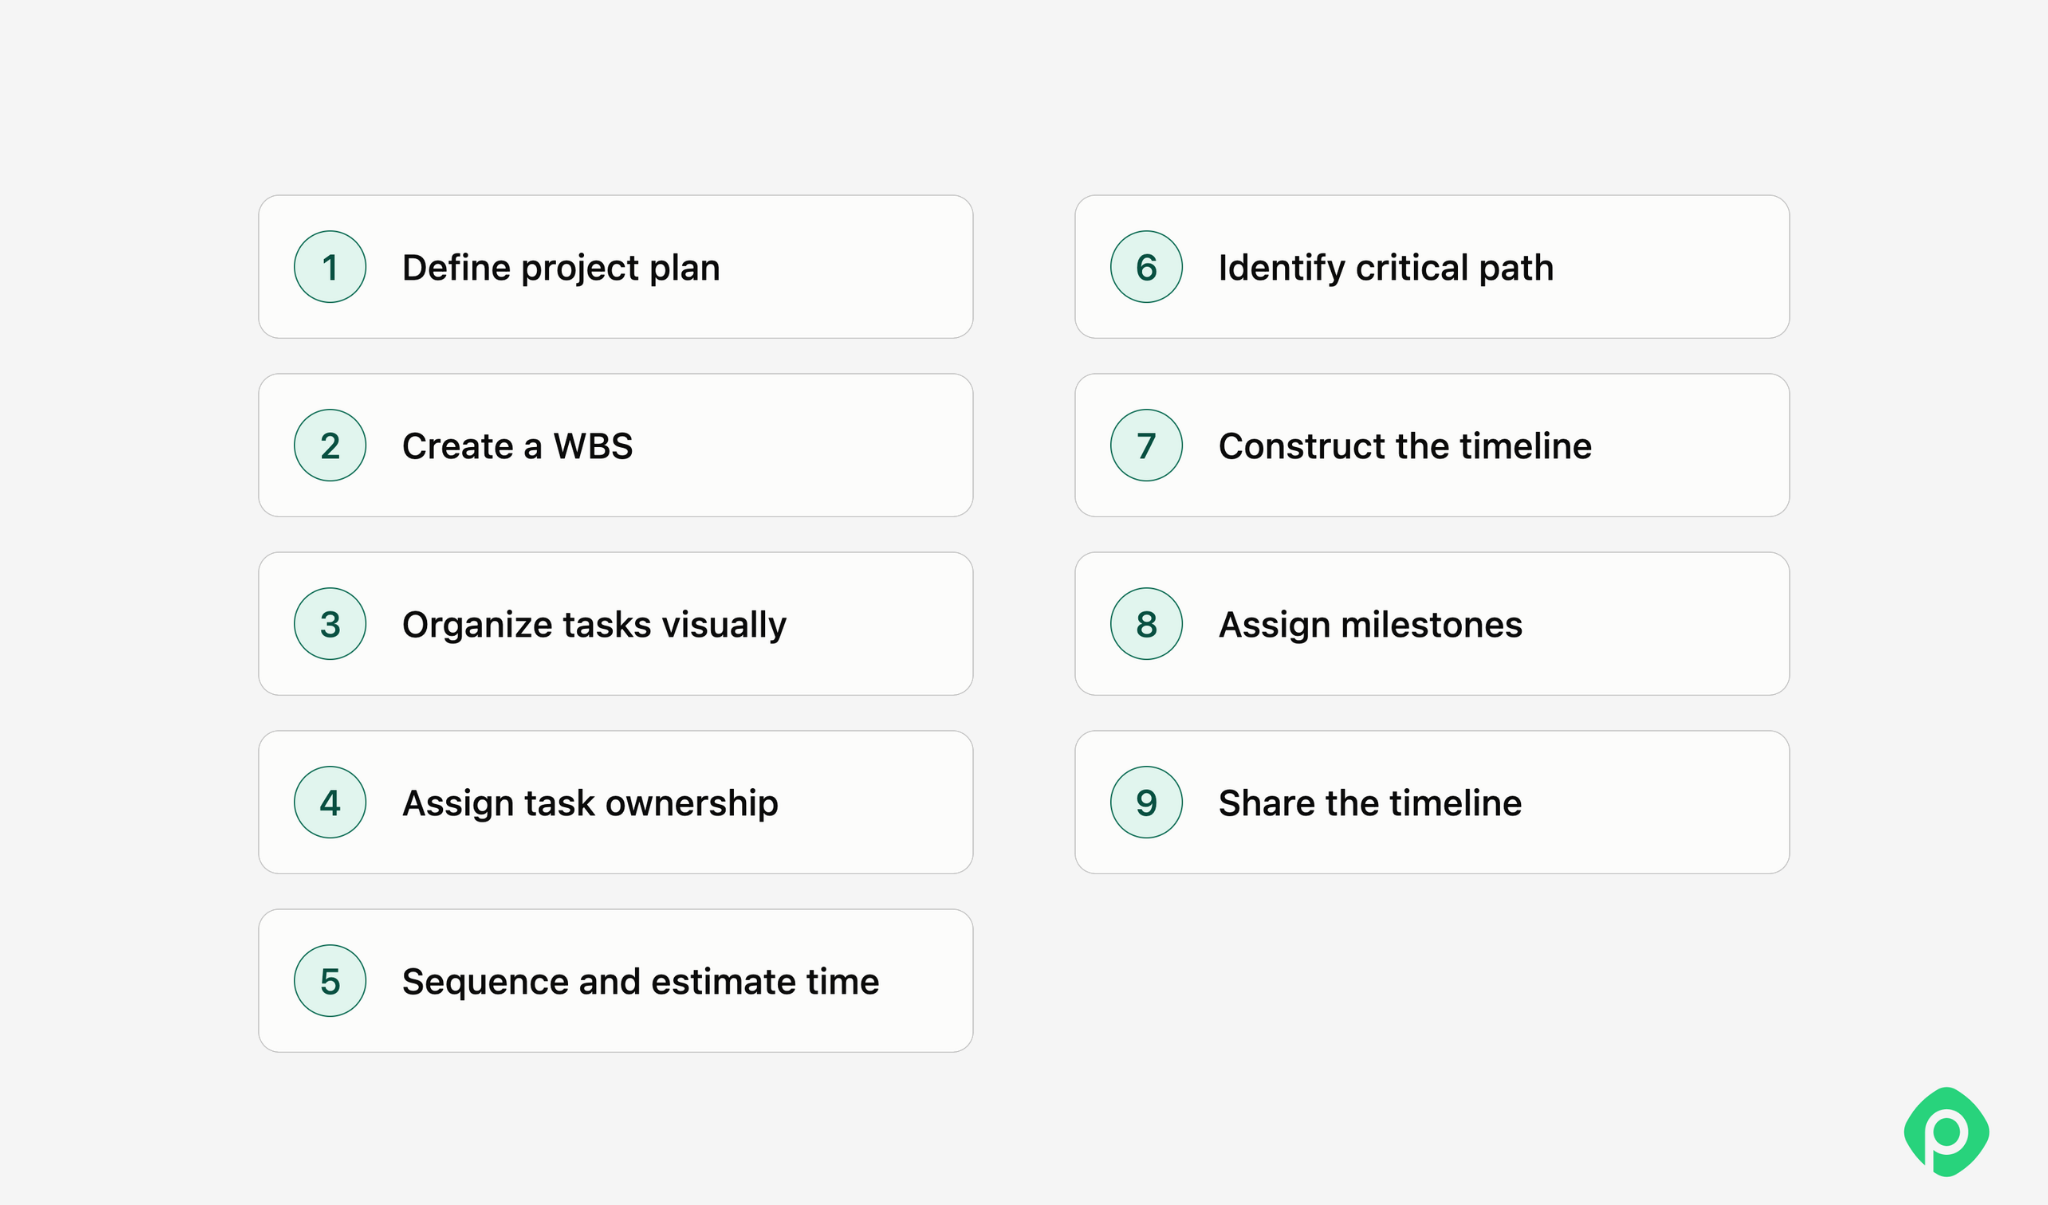
How to сreate a project timeline: 10 practical steps
Creating an effective project timeline is good in theory, but how do you achieve that in practice? Here’s a step-by-step approach to building a timeline that you can try with your next project.
Step 1: Define your project plan
Before building a timeline, sit down with key stakeholders and answer the fundamental questions. Who will benefit from the project, what does the desired outcome look like, how will success be measured — these and other questions set the first layer of any successful project.
Learn more about effective project planning ->
Step 2: Create a Work Breakdown Structure (WBS)
Another essential step is breaking the project down into smaller deliverables and subtasks. It’s not time to worry about sequencing or scheduling just yet — right now, the main task is to get everything written down.
Step 3: Organize tasks visually
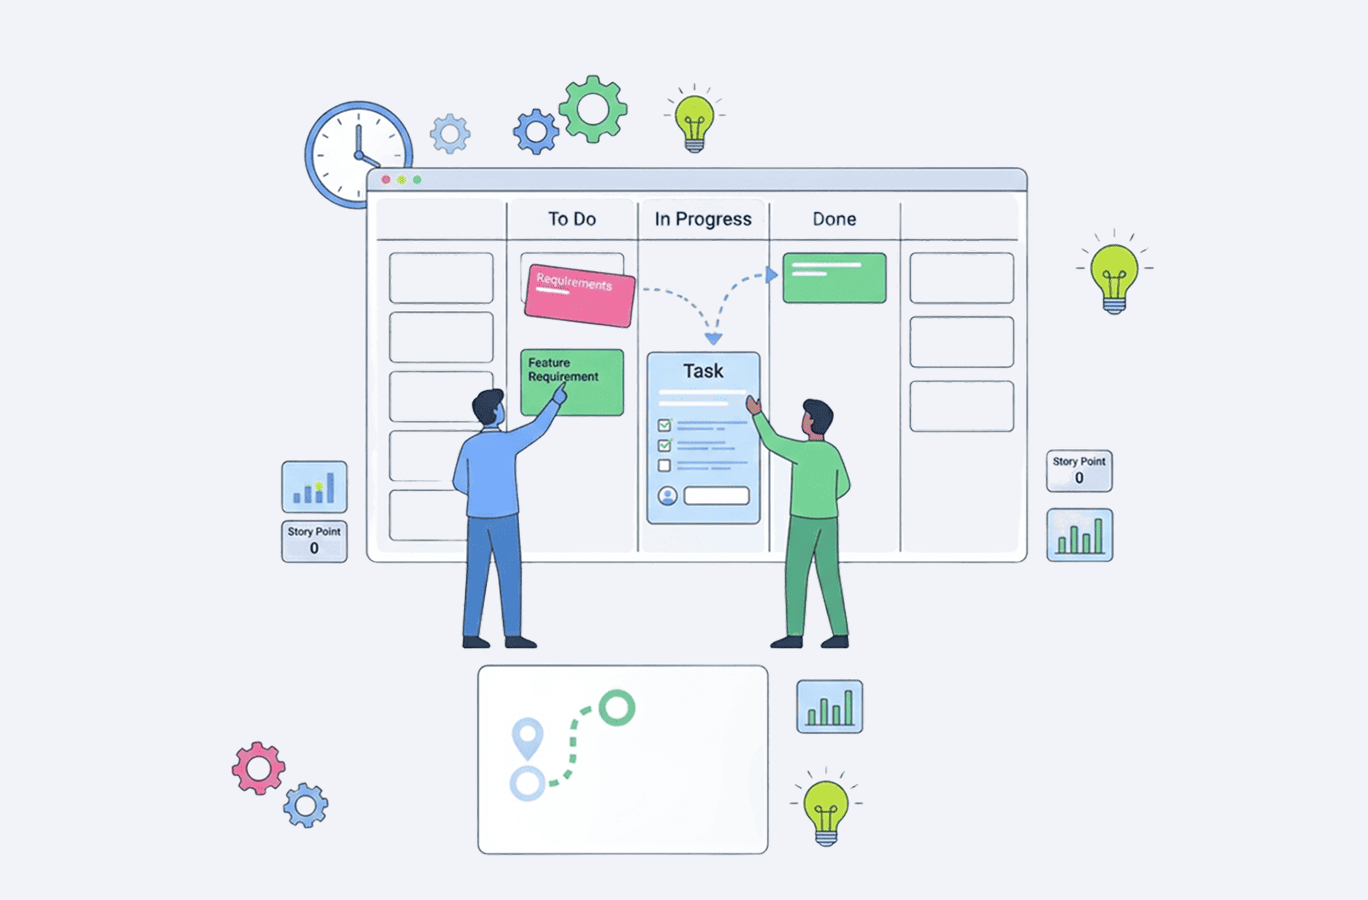
For that, you can use a Kanban board or a similar visual tool that will help you sort tasks with a hierarchy in mind. You will get a clear layout of all key tasks that comprise the project flow.
If your team already manages projects in Jira, there’s no need to recreate your task list in a separate timeline tool. Planyway for Jira visualizes your existing work on a timeline, letting you organize issues by space, epic, team, assignee, or component. You can also add dependencies and key milestones to make the schedule easier to plan and track.
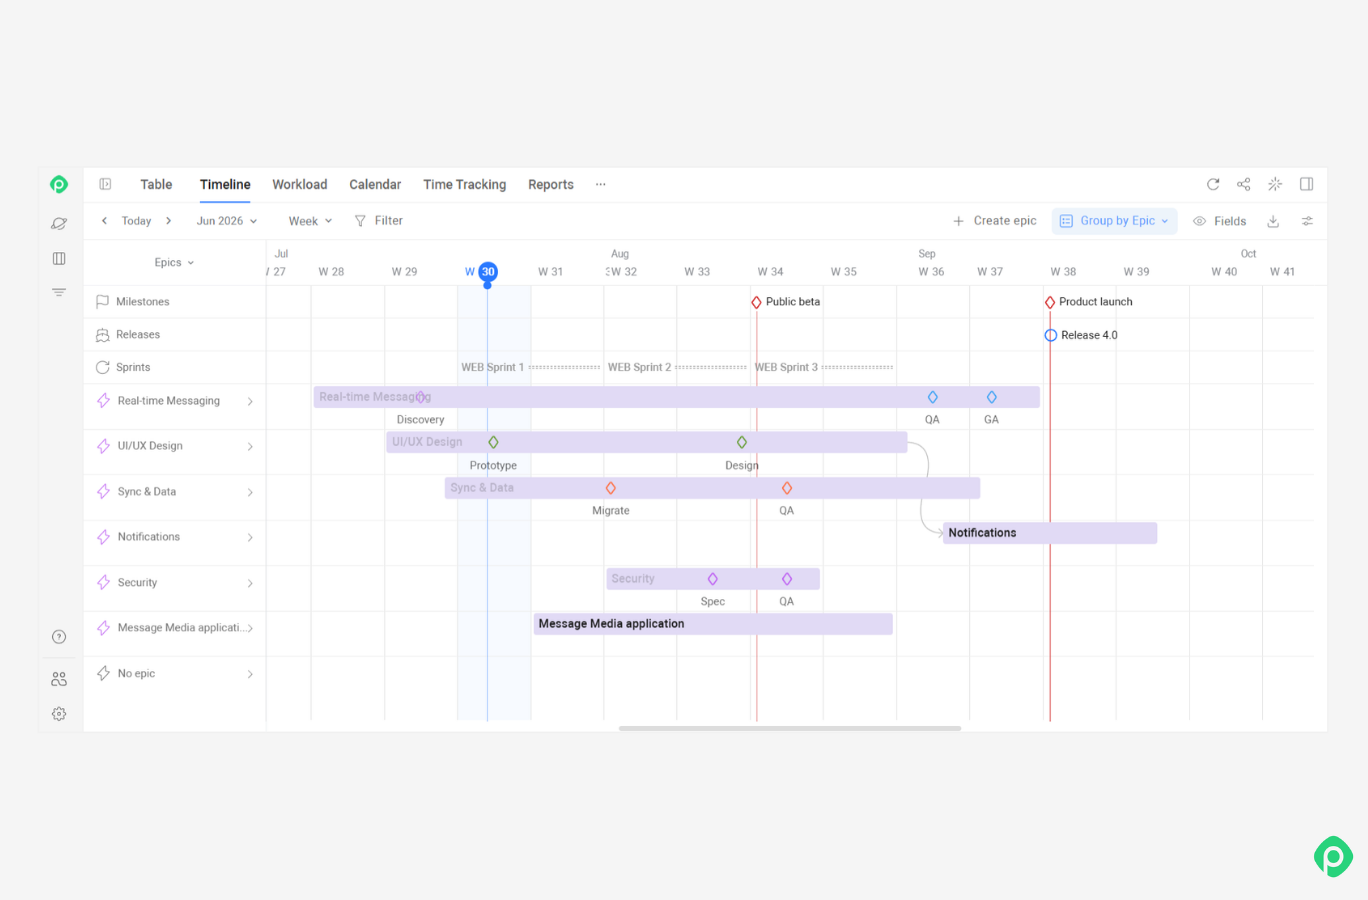
Step 4: Assign task ownership
Determine who's responsible for each task. Ideally, you should have already discussed with your team who will handle the key components.
Step 5: Sequence steps and estimate time
Put your tasks in a (chrono)logical order and estimate how long each will take.
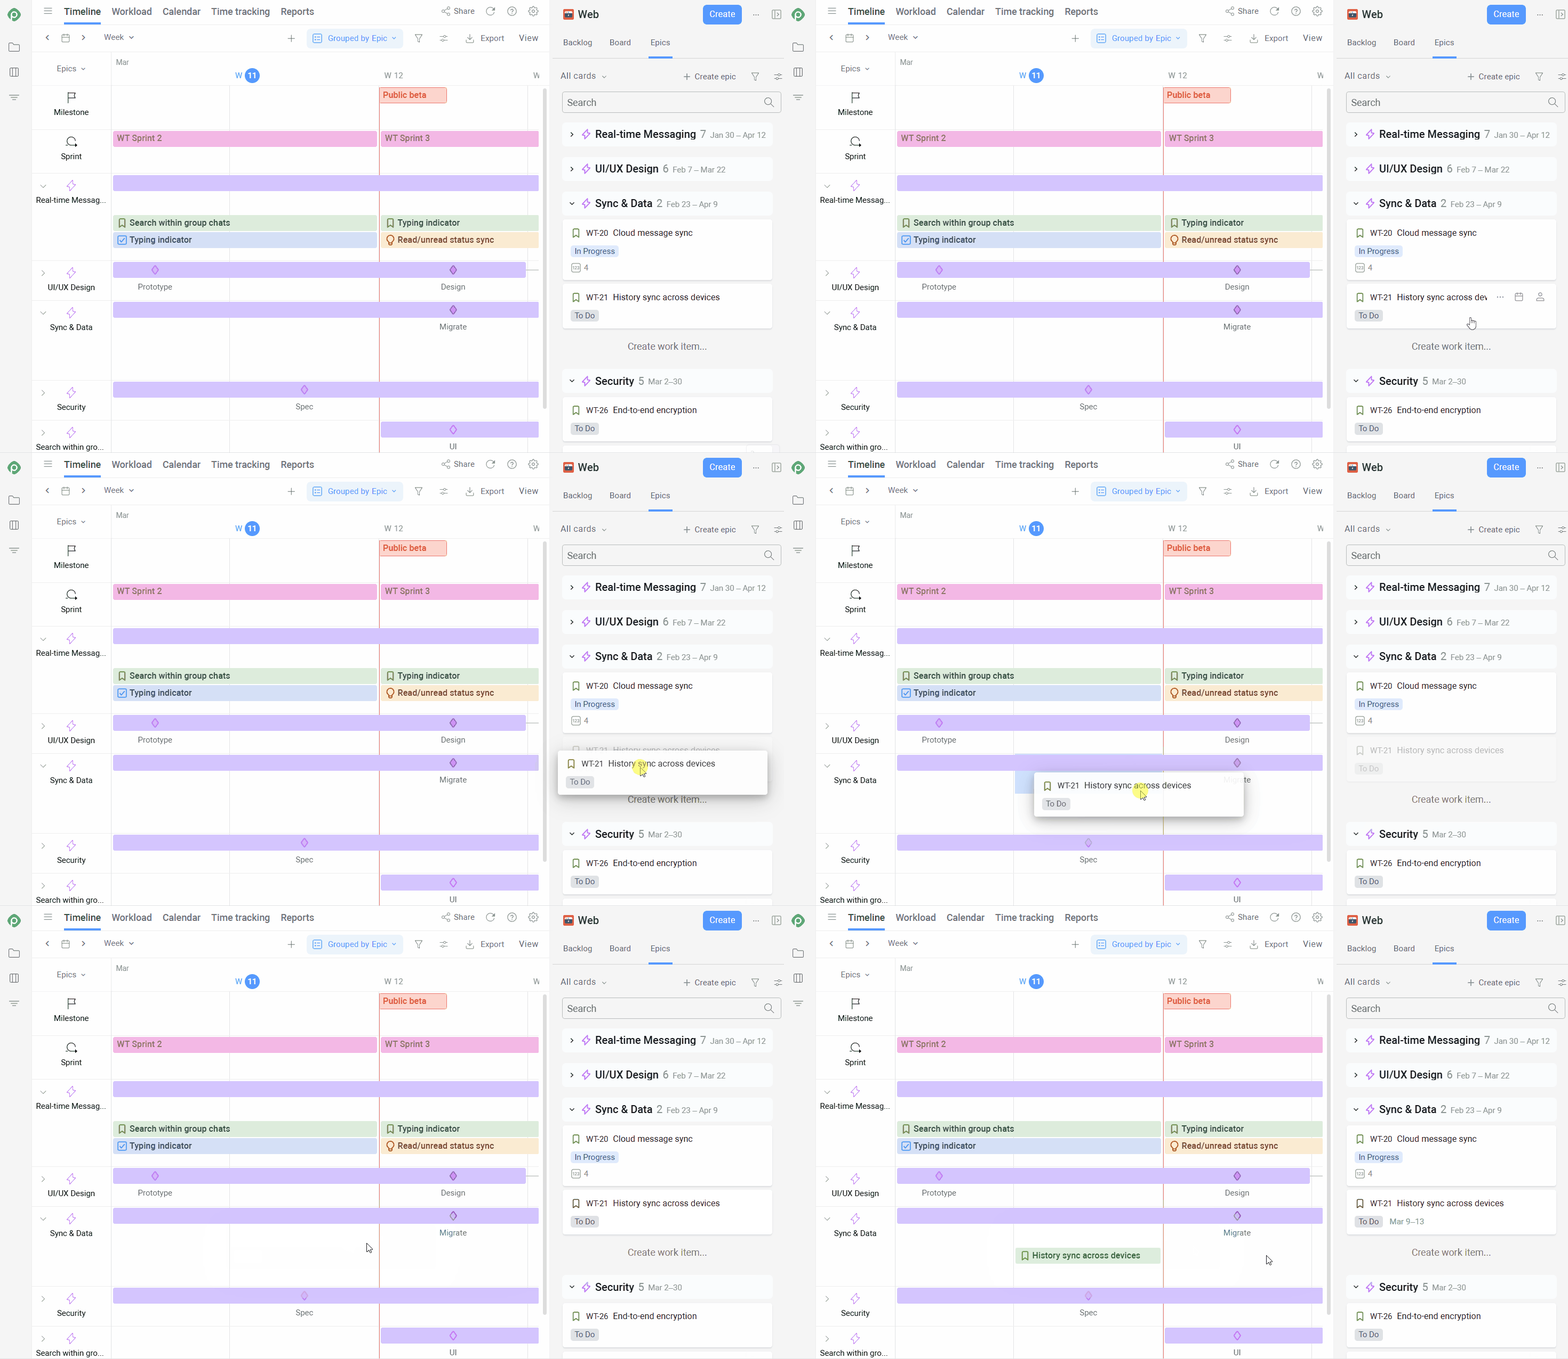
In Planyway, you can drag tasks onto the timeline to schedule them, then adjust their dates and duration based on your team’s capacity.
Step 6: Identify dependencies and critical path
As you sequence tasks, identify which of them must be completed before others can begin — that’s what dependencies mean. This is also a great chance to spot potential bottlenecks and think about how to prevent them.
Once you’ve mapped task dependencies, identify the critical path — the sequence of dependent tasks that determines the earliest possible project completion date. This is the core idea behind the Critical Path Method (CPM).
Tasks on the critical path have no room for delay without pushing back the overall project. Knowing which tasks are critical helps you focus attention where it matters most, while giving you a clearer picture of where schedule flexibility exists.
More on how to use Critical Path Method in 2026 ->
Step 7: Construct your timeline
Now, it’s time to put everything together: list all deliverables and subtasks from the WBS, organize them on your timeline, assign tasks, and use color coding or labels to highlight dependencies.
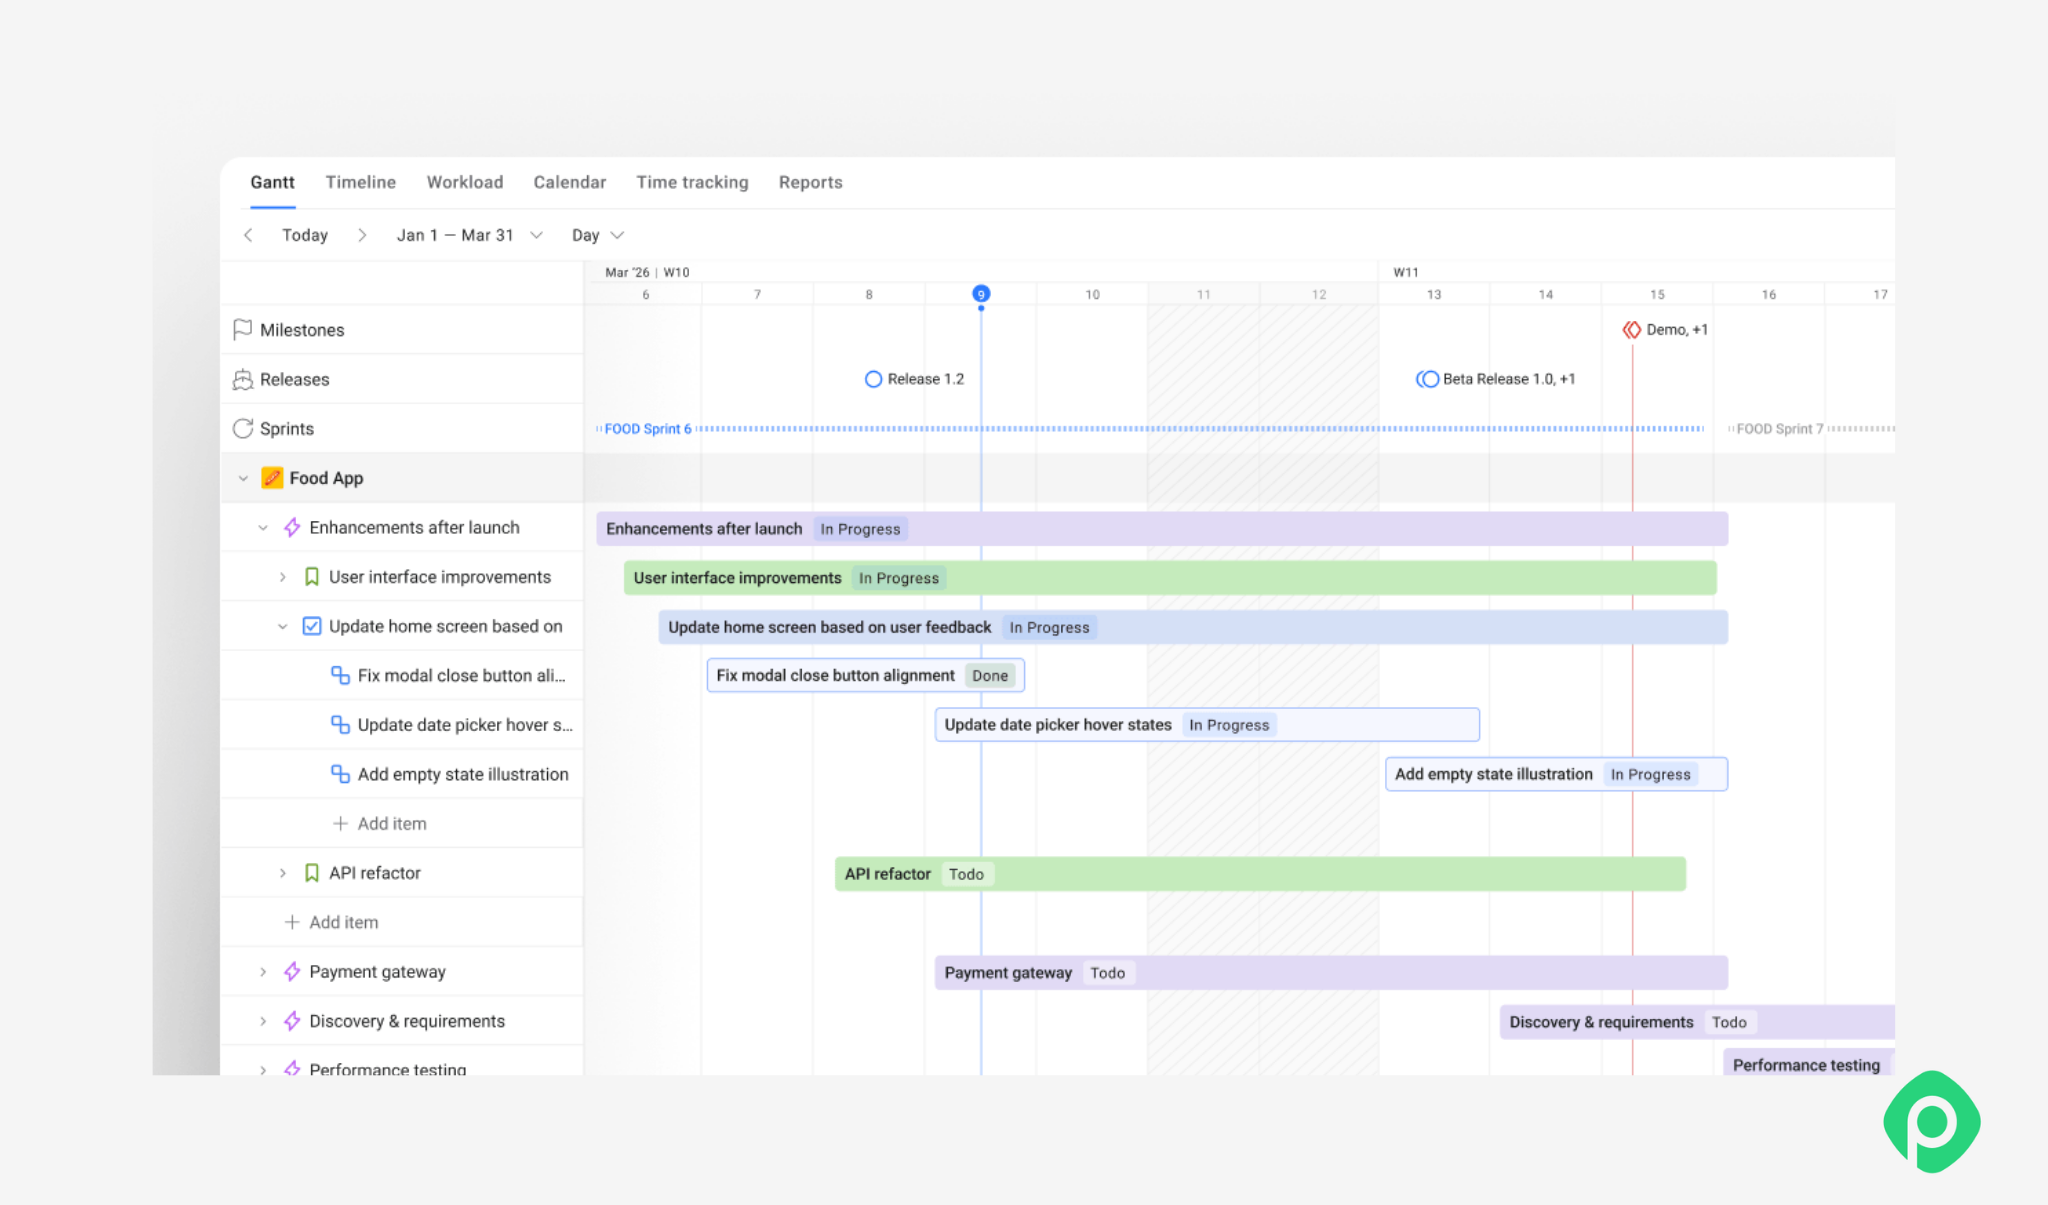
We have already mentioned that, for complex projects with multiple levels of work, a Gantt view can make the plan easier to structure. In Planyway for Jira, the Gantt chart combines the schedule with Jira’s work hierarchy, so you can see Epics, Stories, Tasks, and Subtasks alongside their dates and dependencies.
Step 9: Assign milestones
Throughout the project lifecycle, there are important checkpoints called milestones. They allow stakeholders to quickly track the project’s progress without deep diving into every detail. They also serve as key review points.
Step 10: Share the timeline
A timeline should work for everyone in your team, not just for you. Bring it to everyone’s attention in your next meeting, post it in your project channel, or share it via email. Make sure everyone knows where to find it.
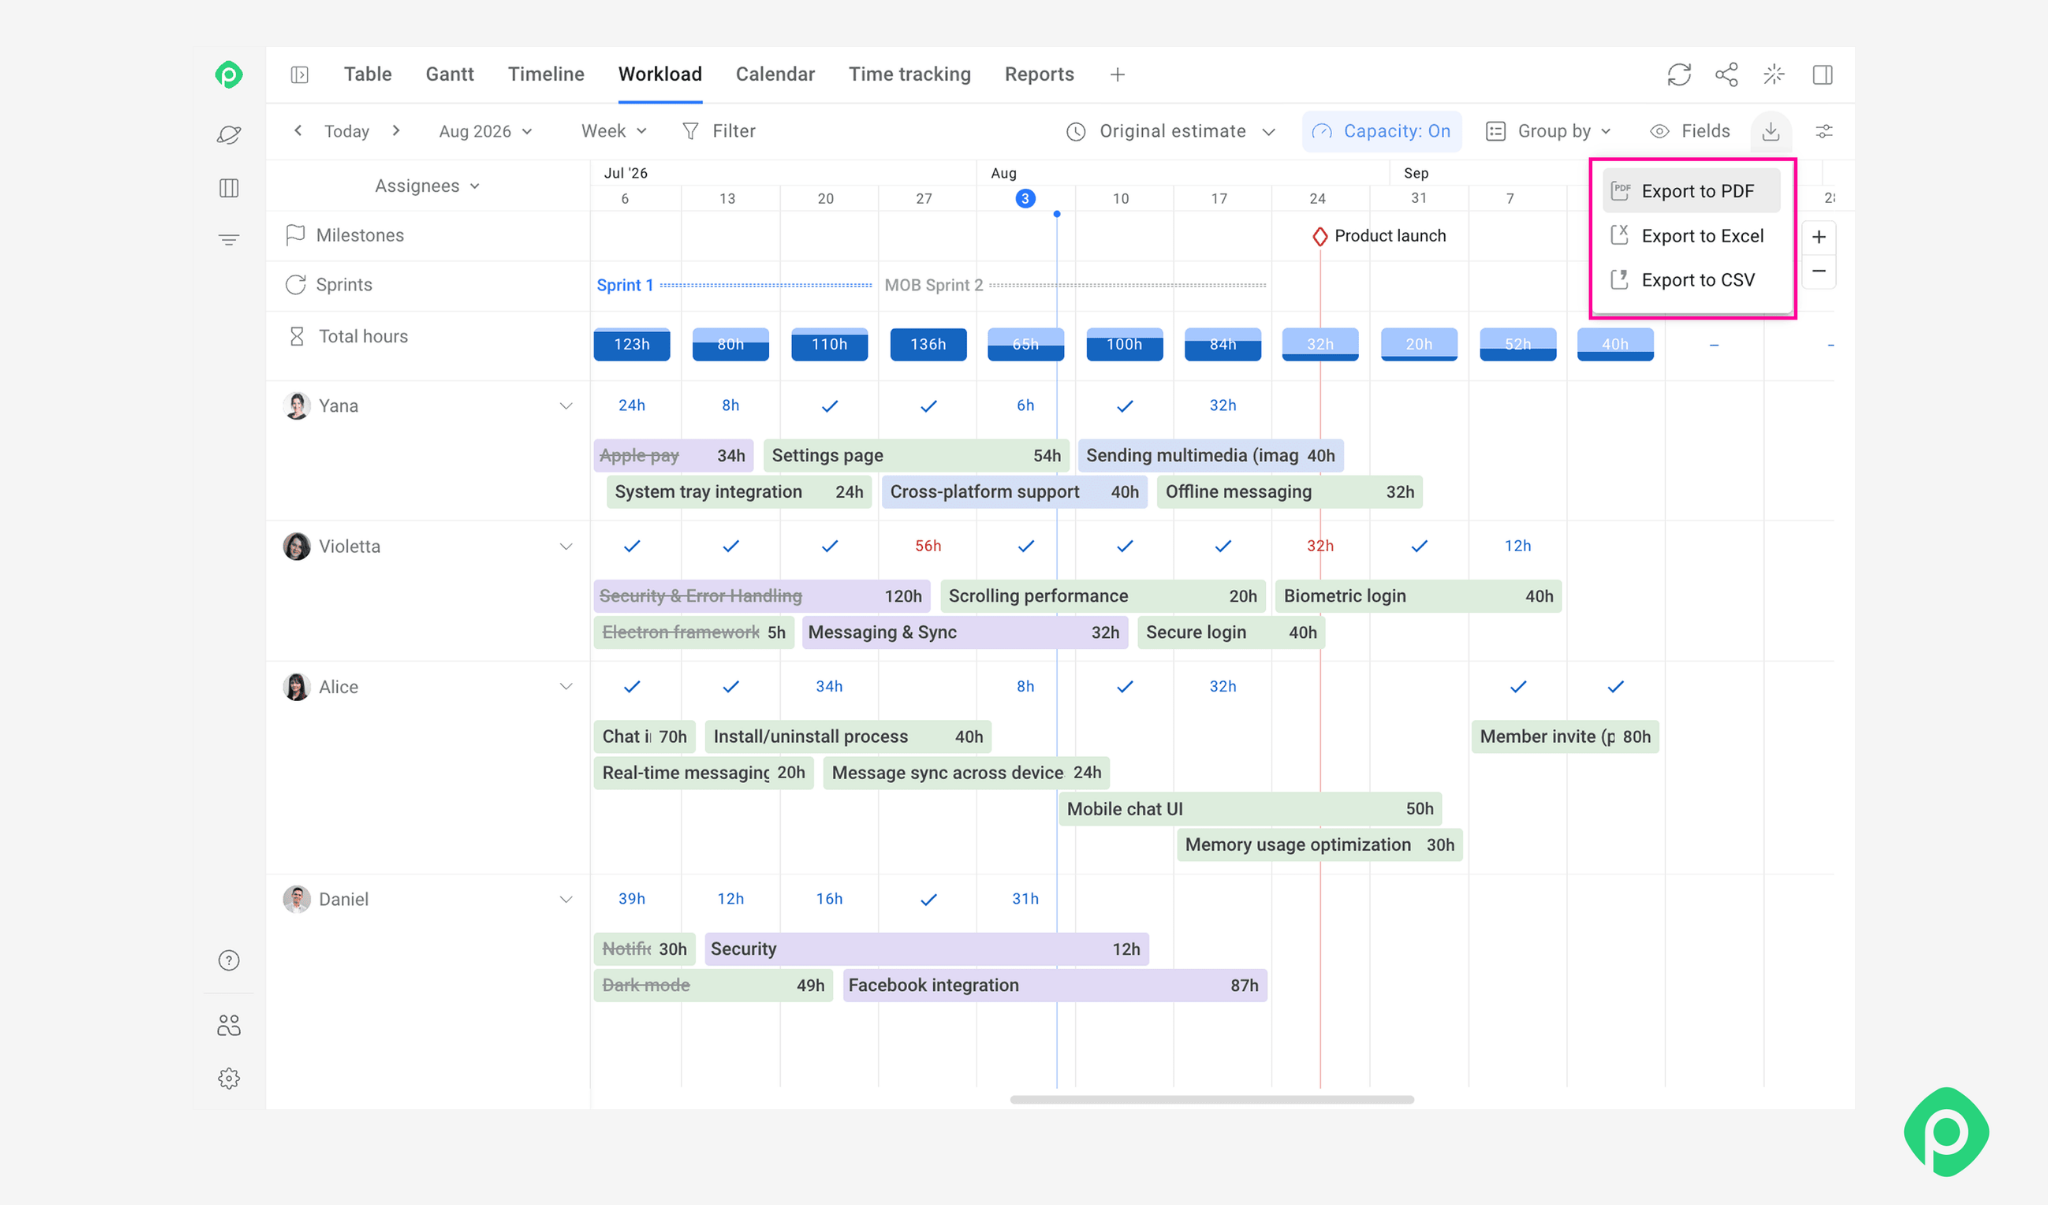
Project timeline tools
Now that you know how to build your timeline, it’s time to pick a tool. Choosing the right project timeline software can make or break your experience, so let’s have a good look at the options.
Excel
A common go-to starting point, Excel can do many things, including helping you build a timeline. There are several ways to create a project timeline in Excel.
| SmartArt | The quickest way; has built-in templates |
| Scatter charts | Good for visualizing complex data |
| Free templates | Downloadable from various sources |
For some projects, Excel timelines can do just fine. To save you manual spreadsheet work, we have two Excel templates below: an overall project timeline and a milestone timeline.
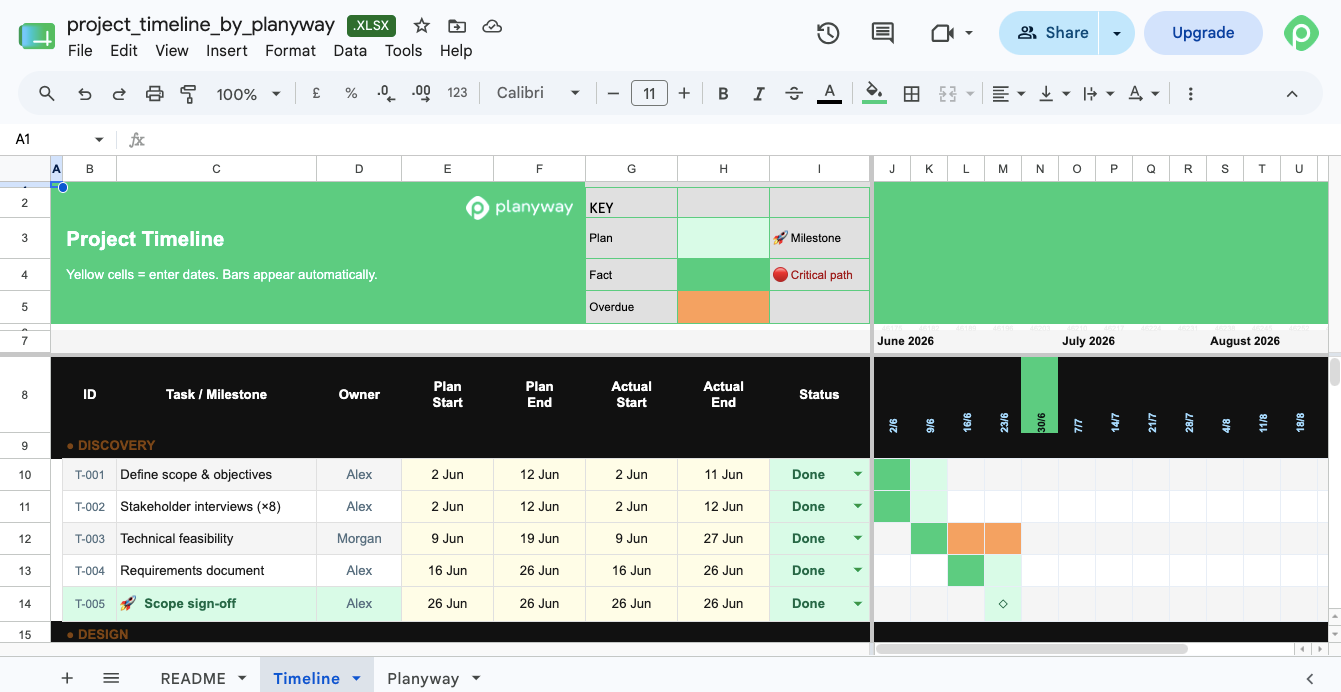
Download the general project timeline template
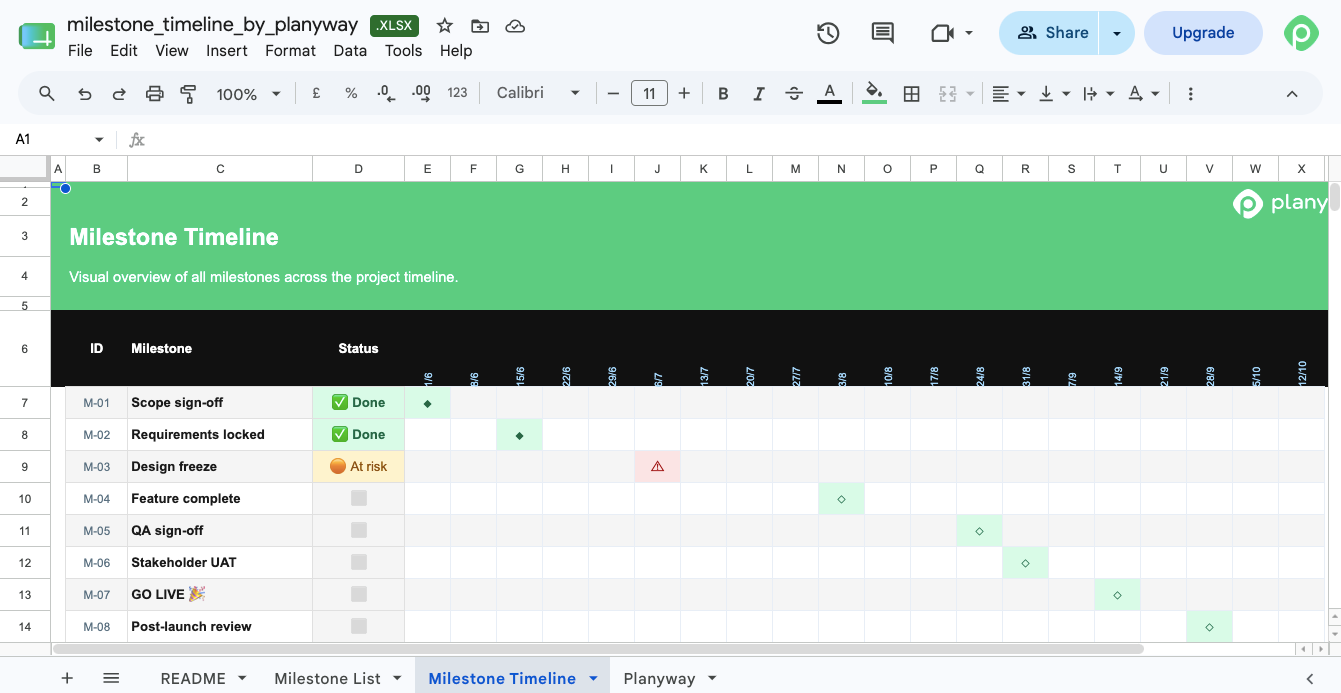
Download milestone project timeline template
But keep in mind that Excel still has its drawbacks. One of the biggest ones is that it requires manual entry for almost everything — from calculating task durations to linking key dates to project milestones. Besides, you won’t be able to set dependencies between project tasks, and real-time collaboration is highly limited (as is customization).
Dedicated project management tools
When project work becomes a bit too complex for basic spreadsheets, modern PM tools like Asana, Notion, Trello, and Jira come in. There is no right choice there — usually, it’s about where your team already prefers to work, how much structure your project needs, and what you need from your project view.
Here’s a quick look at all four:
- Asana. Good fit for cross-functional teams managing projects with clear deadlines, dependencies, and handoffs.
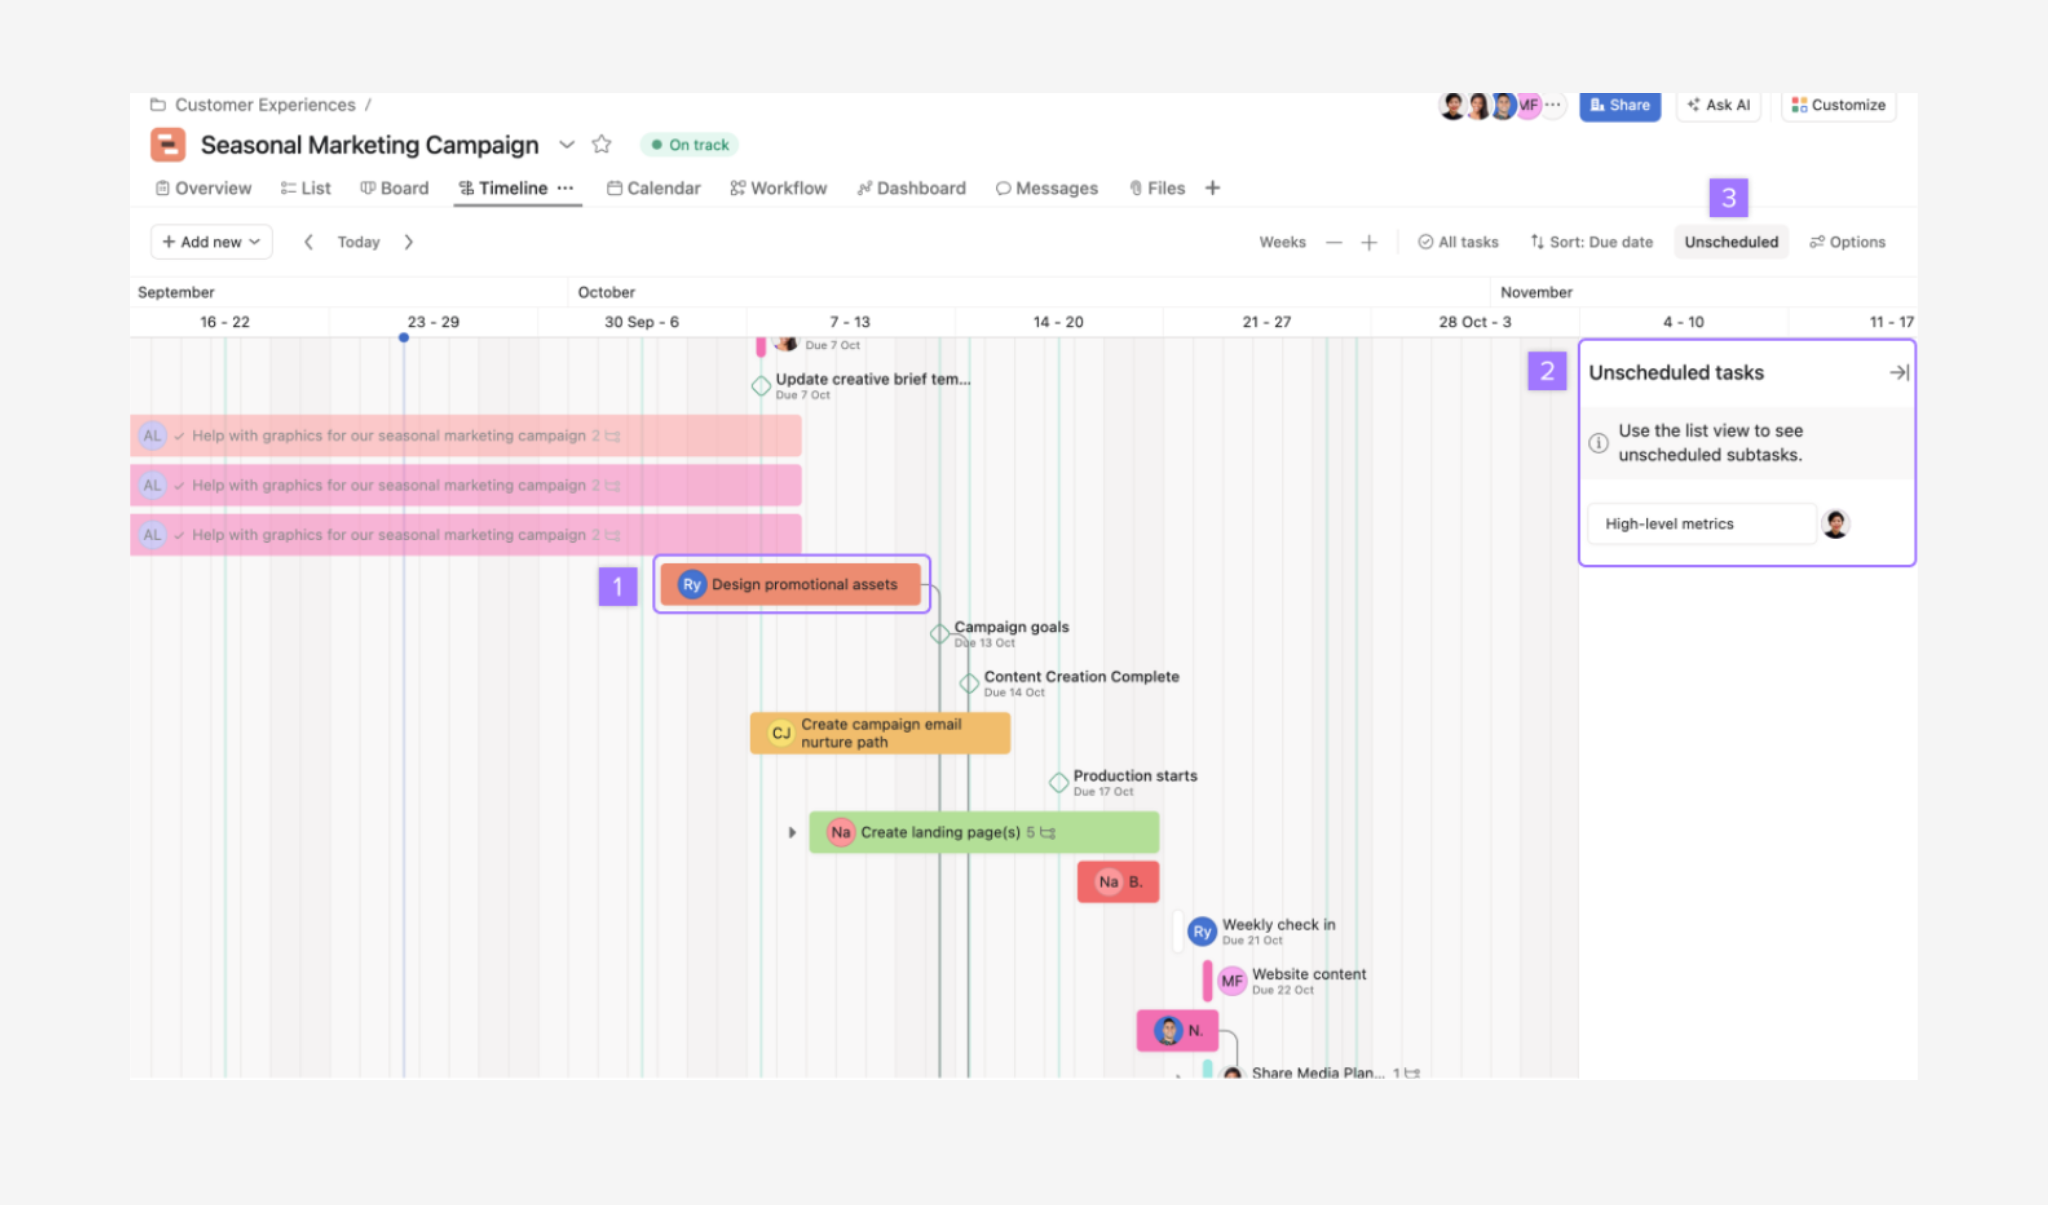
Source: Asana Help
Asana’s Timeline and Gantt views are useful when you need to see how specific tasks connect and adjust schedules as plans change.
- Notion. It works best for teams that want project planning, documentation, notes, and knowledge in one workspace.
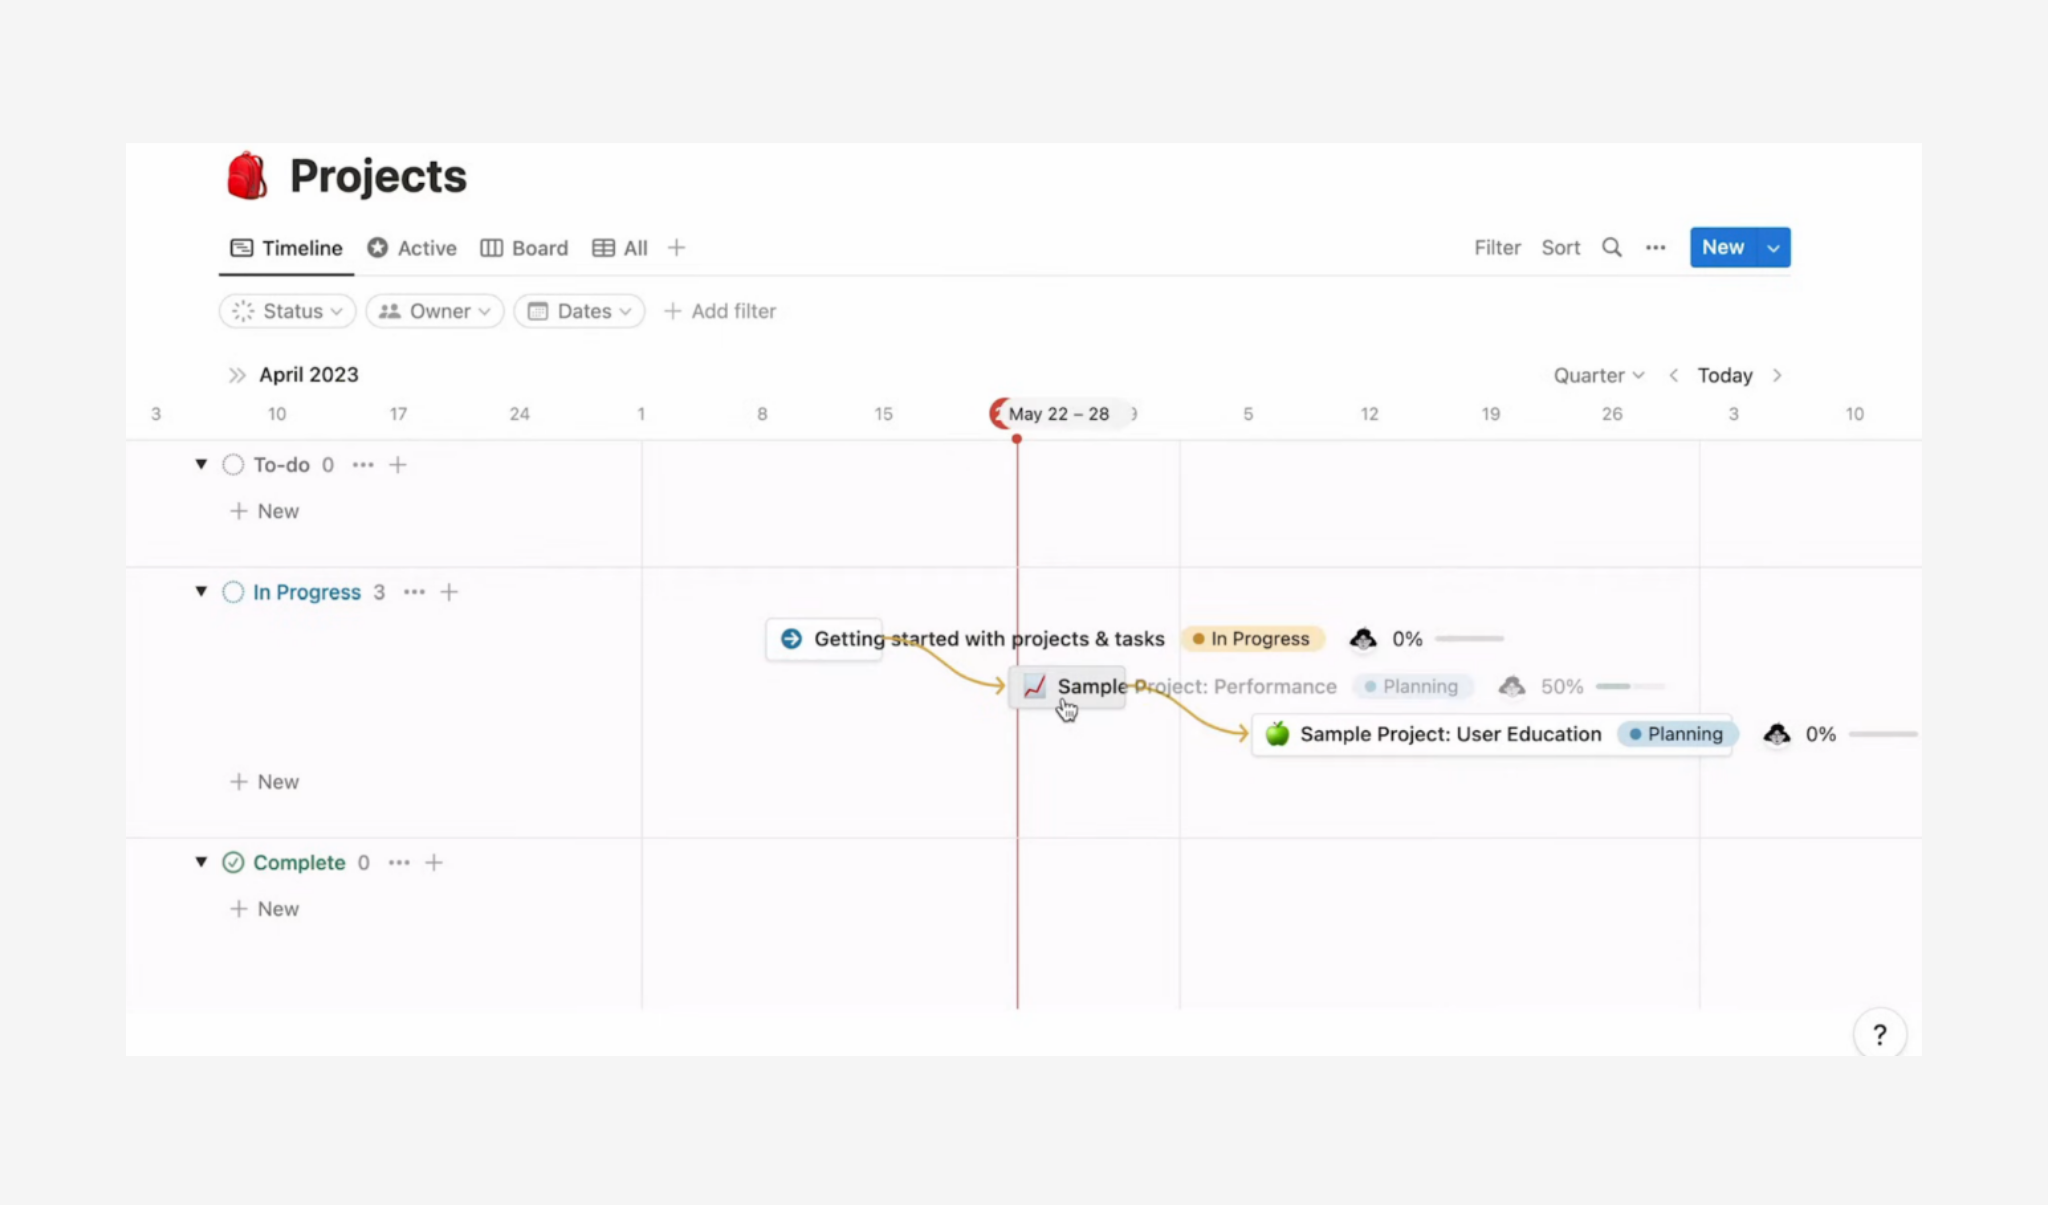
Source: Notion
Notion’s Timeline view is flexible and database-like, making it a natural choice for lighter project plans and roadmaps.
- Trello. This one is a good choice for teams that prefer a visual, card-based workflow.
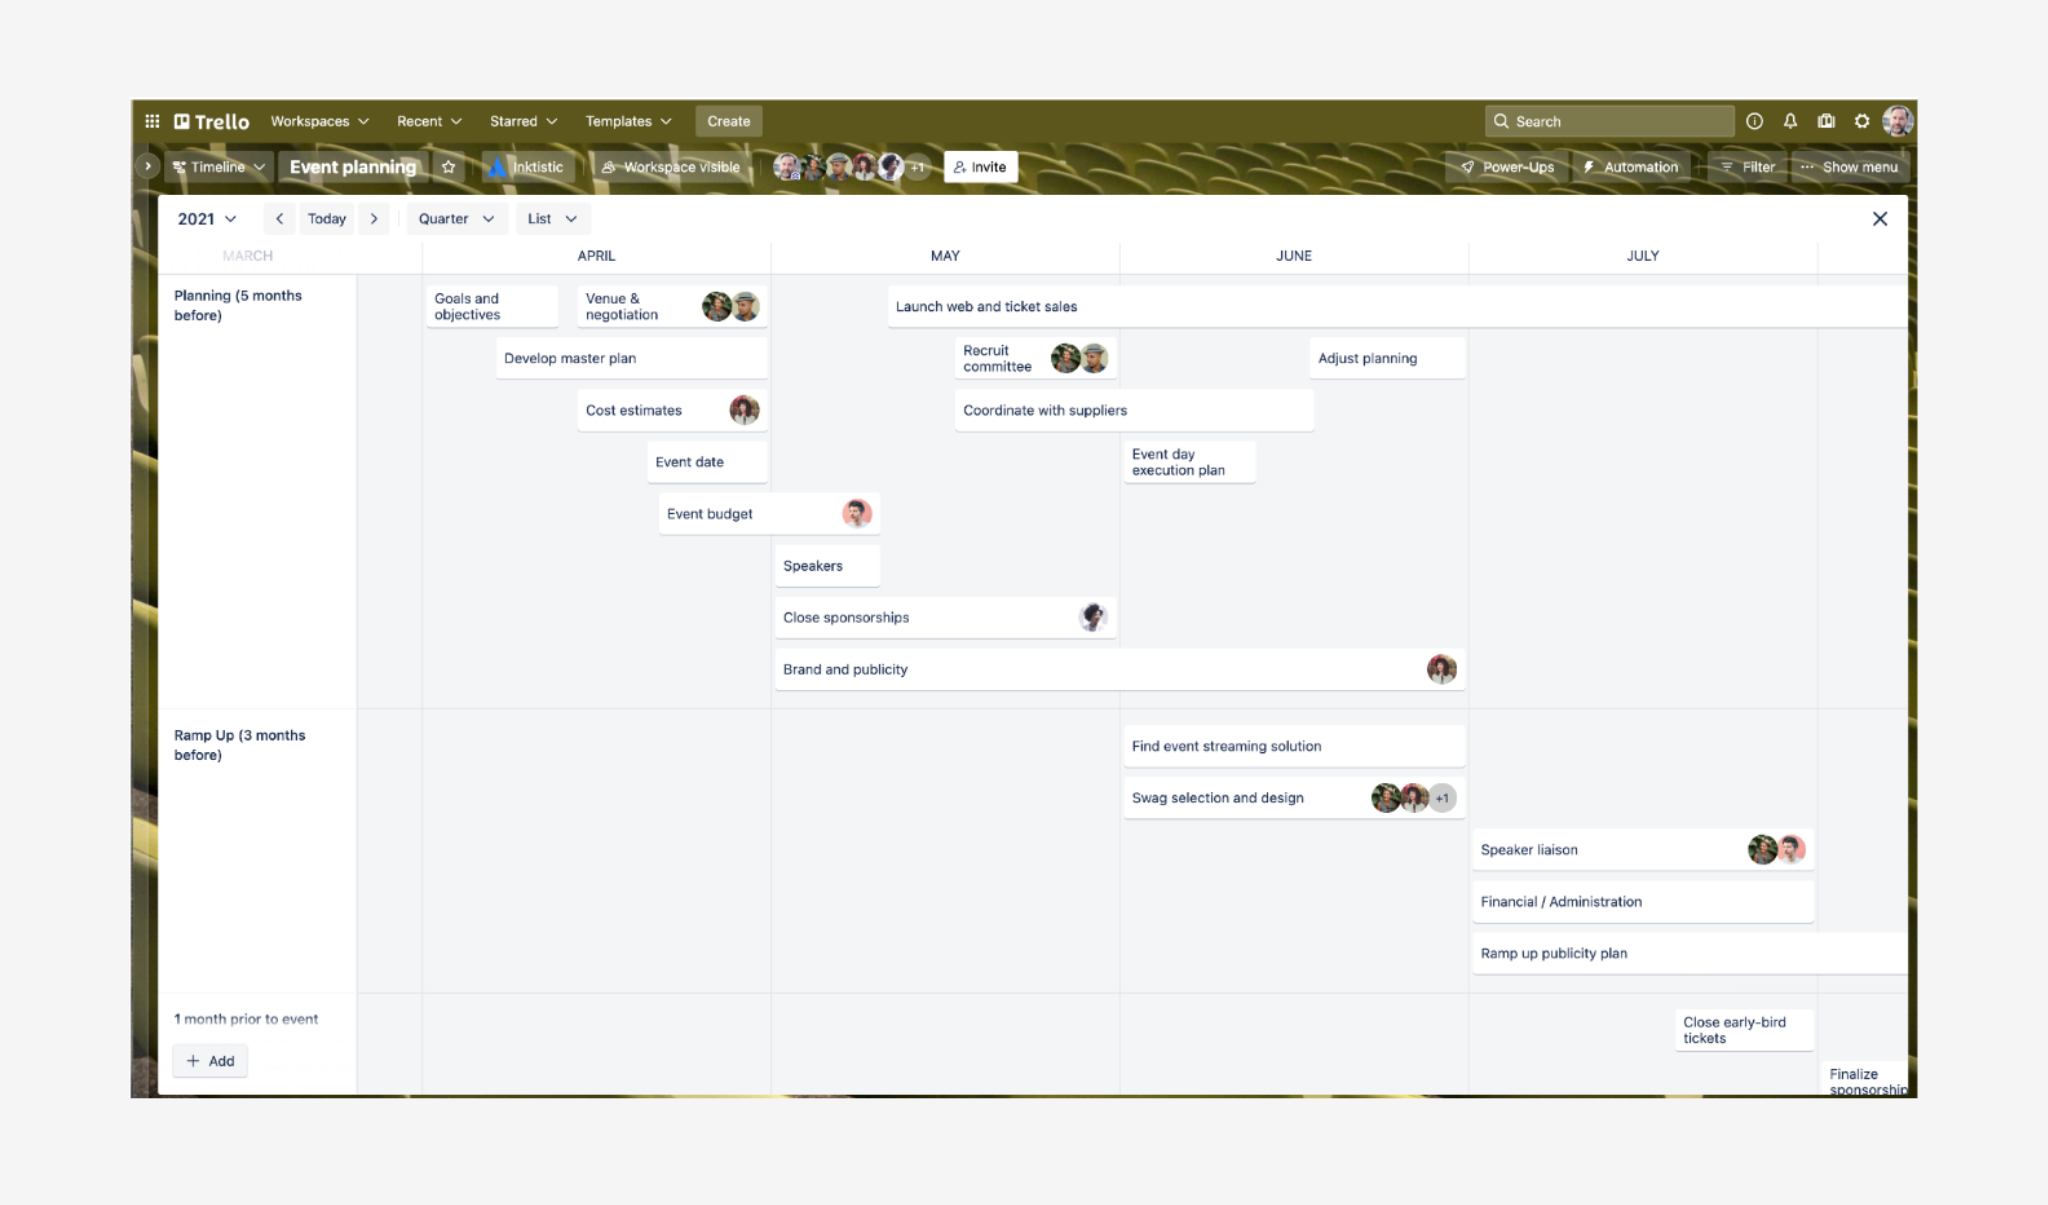
Source: Trello
Trello’s Timeline view adds a time-based perspective to boards, so it works especially well for marketing campaigns, smaller initiatives, and teams that want simple planning without a heavy PM setup.
- Jira. Works best for software and product teams already managing their work as issues, epics, and sprints.
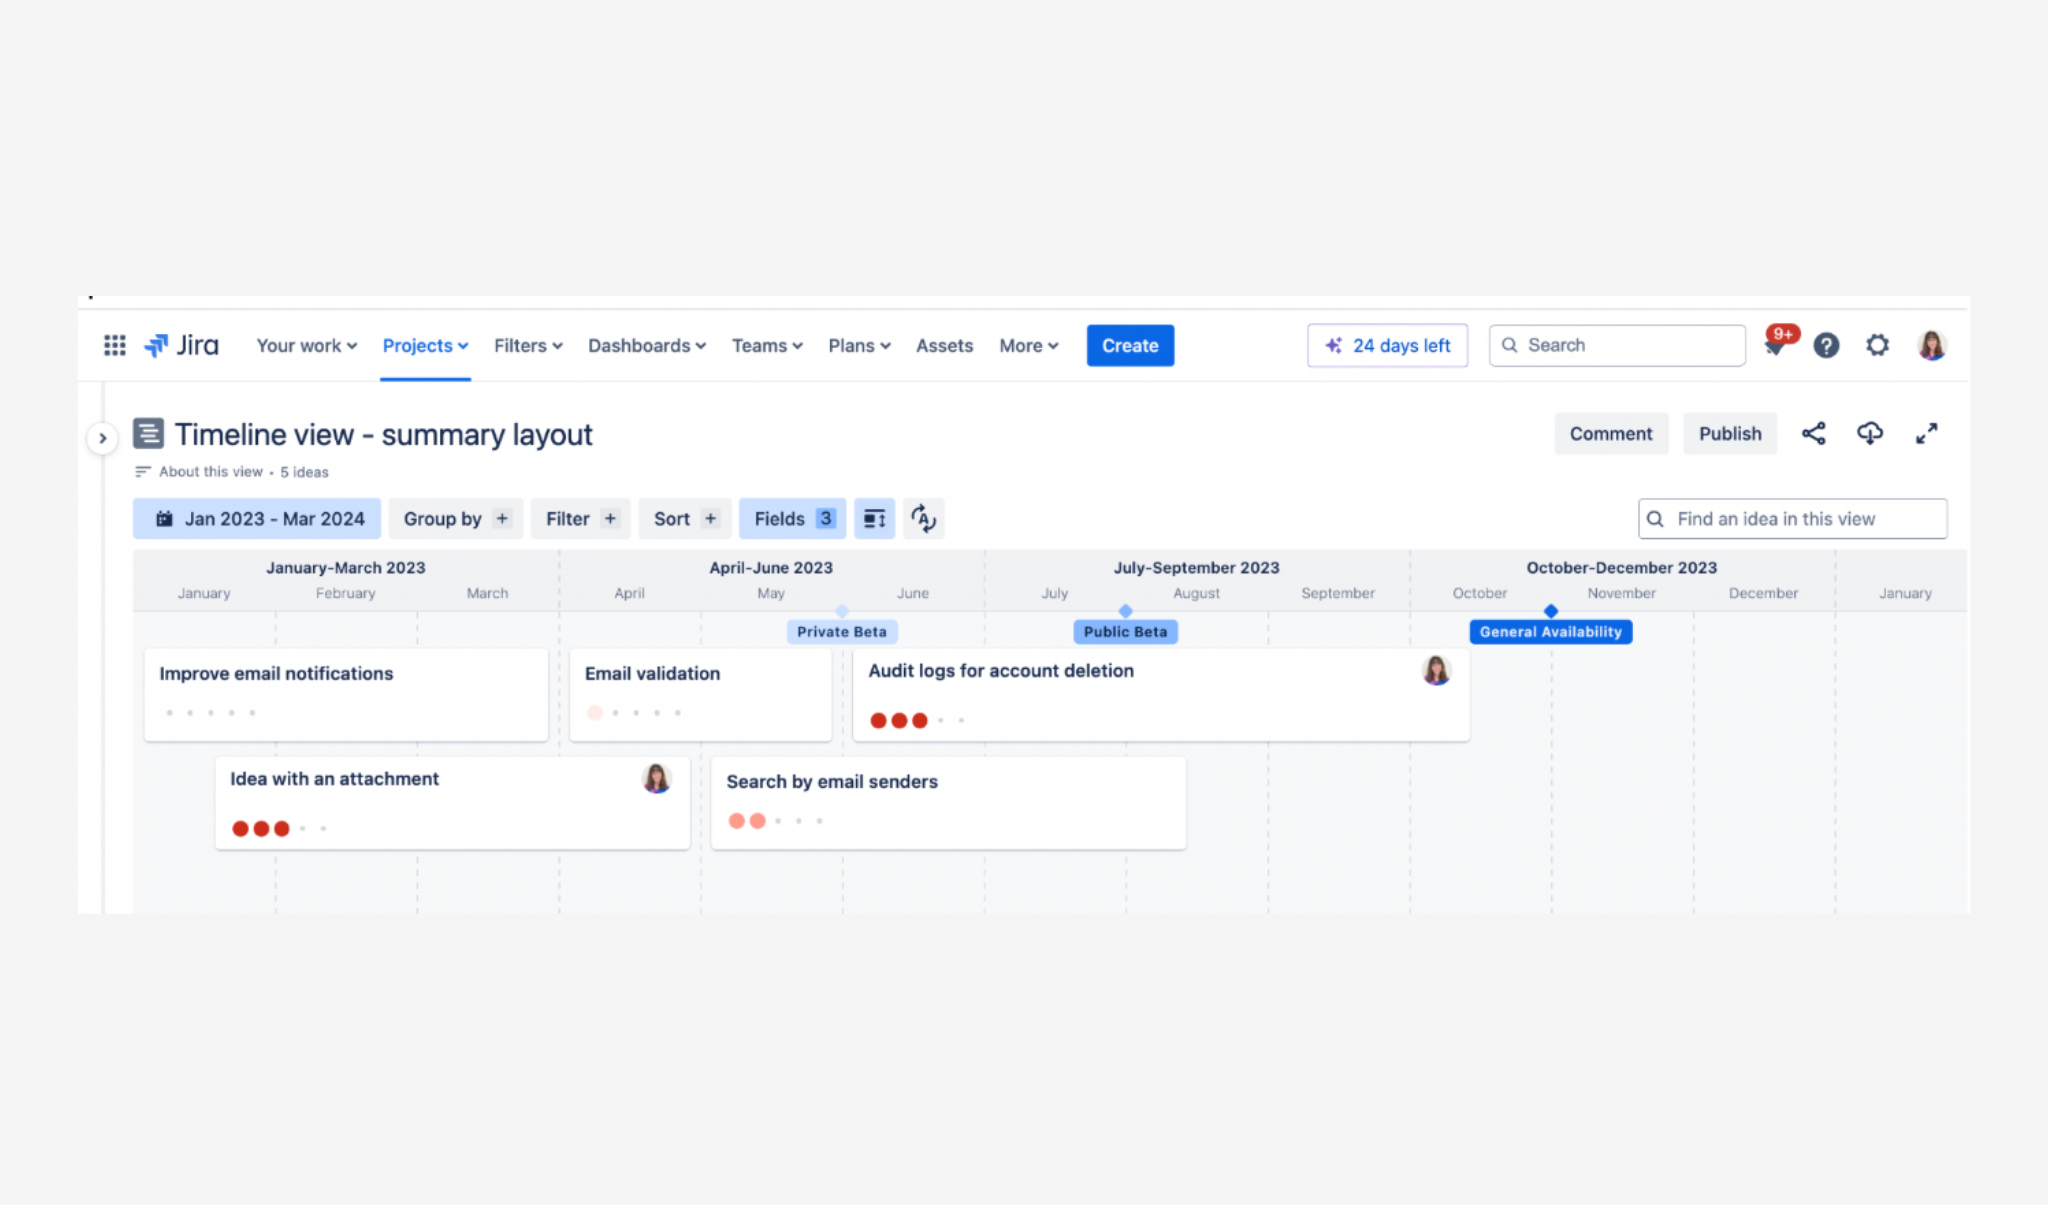
Source: Atlassian Support
In Jira, Timeline view adds scheduling, duration, and dependency planning on top of that workflow, making it useful for coordinating development work and releases. You can also add Planyway on top to connect project schedules with team capacity, so you can see whether planned work is actually realistic.
The project management software examples listed above all focus on different goals and outcomes. But in most cases that involve complex project planning, using them is quicker and more effective than struggling with manual inputs in Excel.
Best practices for maintaining your timeline
A project timeline is a living artifact that changes as a project evolves. Sometimes, tasks take longer (or shorter) than expected, new work appears, and priorities shift. All these little tweaks need to get reflected in your timeline.
Here’s how you can keep it useful without overloading yourself:
- Review and update your timeline regularly. Weekly at minimum works fine for most projects;
- Update dates when they slip. Outdated information doesn’t belong on your timeline;
- Add new tasks as they emerge;
- If a milestone changes, flag it immediately;
- Tailor views for different audiences. Your team will want a detailed one, and your stakeholders will prefer a high-level summary;
- Reserve 15–20% of your timeline for potential risks and unexpected challenges.
Your timeline should help keep a project on track
An accurate timeline shows how the pieces of a project fit together, makes deadlines and dependencies easier to follow, and gives everyone a shared view of what needs to happen next.
The best approach to building an artifact like this is picking the one your team can maintain. Start with the key phases, tasks, milestones, and dependencies, then choose a timeline tool that fits the way you already work.
For teams using Jira or Trello, there’s no need to rebuild their workflow from scratch to get the tools needed for effective project planning. Planyway brings timelines, dependencies, milestones, and resource planning together, turning your existing work into a complete project plan.


FAQ
To make a project timeline, start by defining the project goal and key deliverables. Then break the work into tasks or phases, estimate their duration, set start and end dates, add milestones, and map dependencies between tasks. Finally, assign owners and review the timeline with your team.
The best program depends on the type of project and how your team works. Jira is a strong choice for software and product teams, while Trello works well for teams that prefer a simple, visual workflow. Asana is suited to cross-functional project planning, and Notion is useful when project plans and documentation need to live together. If your team already uses Jira, Planyway adds timelines, Gantt charts, dependencies, milestones, and workload planning without requiring you to move your existing work elsewhere.
A project plan timeline is a broad visual overview of project events, phases, milestones, and deadlines in chronological order. A Gantt chart is a more detailed type of timeline that typically shows individual tasks as bars across a calendar, along with their duration, dependencies, and progress.
The best project timeline tool is one that fits your team's existing workflow and provides the level of detail your project requires. For software teams already working in Jira, Planyway is useful for turning issues into visual timelines and Gantt charts while adding dependencies, milestones, workload planning, and roadmaps. Trello teams can use Planyway in a similar way to add more structured time-based planning to their boards.
There are three common project timeline examples: linear timelines, Gantt timelines, and roadmap timelines. A linear timeline shows events or milestones in chronological order. A Gantt timeline adds task duration, dependencies, and progress. A roadmap timeline provides a higher-level view of major phases, releases, or strategic goals over a longer period.