
How to Build Jira Timeline in 2025
March 20, 2024 · 15 min read
If you're looking to add more visualization to your Jira project management, a timeline is the perfect tool for the job.
In this article, we will also clarify why you need a timeline and tell you how to create a Jira timeline view.
Tools to build a Jira timeline:
- Jira native timeline — built-in, basic, functional
- Planyway for Jira — easy-to-use, combines with capacity and time tracking
- Project TimeLine — streamlined, straightforward, efficient
- Timeline by Addonrock — customizable, user-friendly, dynamic
- Timeline by Doitbetter — detailed, intuitive, modern
- Activity Timeline — resource-focused, interactive
- Staffing Timeline — staffing-centric, structured, practical
What is a Jira timeline?
A project timeline is the visualization of your project breakdown from the very beginning to the competition covering all tasks and milestones, with assigned deadlines.
The timeline view lets you keep track of due dates and coordinate work so that you deliver the project on time.
Here are the main reasons why timeline is so helpful for project management:
- All teammates get access to the clear project overview
- Project steps become visible
- You schedule project from the start to an end
- Each task has a visible due date
- Tasks are allocated to team members
- It can be shared with external stakeholders
- Updates happen in real time
How to Create a Jira Timeline
Jira now offers a Timeline feature by default in its standard subscription, providing users with a visual way to plan, track, and manage tasks directly within their projects. 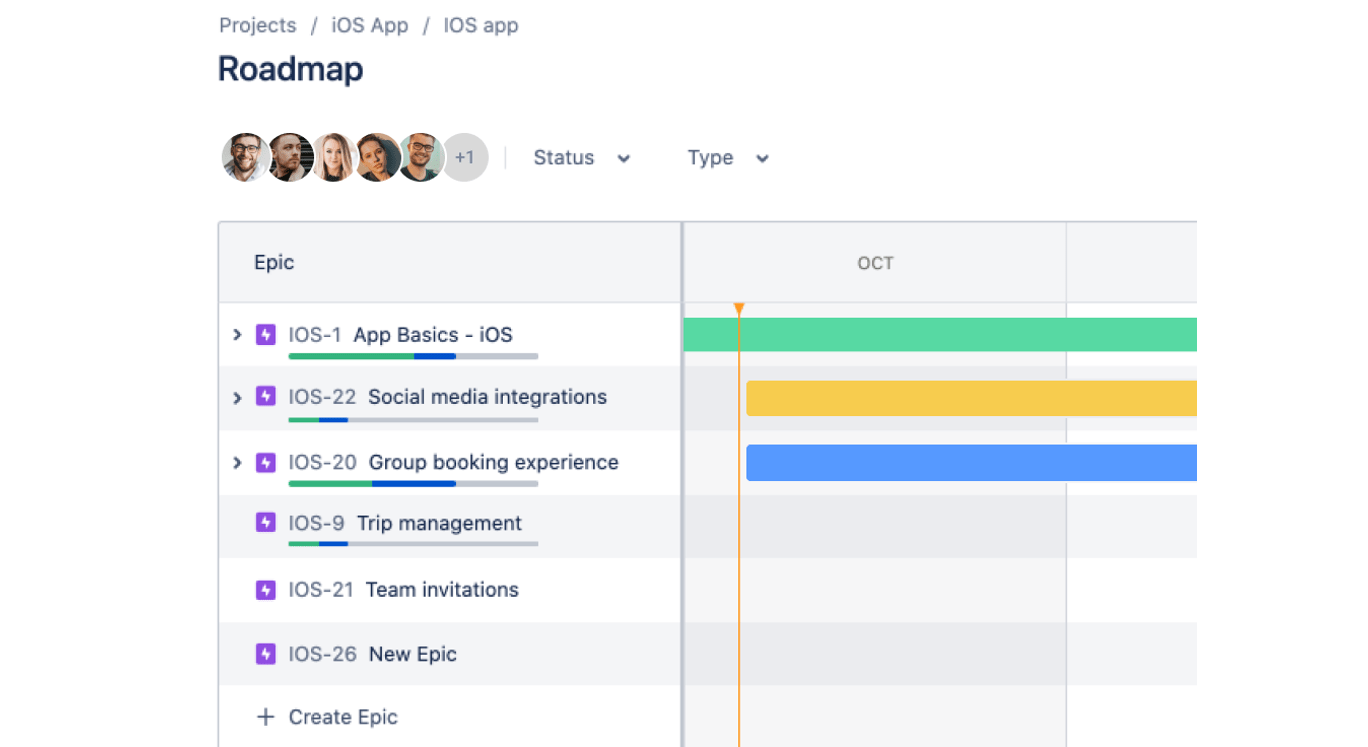
This built-in timeline is ideal for small to medium-sized teams who need a straightforward tool to organize work. Here's how it works and how it differs from the Premium subscription's Advanced Roadmaps:
Default Timeline in Jira
The default Timeline allows teams to:
Visualize Epics: view epics on a timeline with clear start and due dates.
Plan Work Easily: drag and drop issues to adjust schedules, ensuring they align with deadlines.
Track Progress: monitor the progress of individual tasks and their relation to larger goals.
Dependencies: identify and manage task dependencies to avoid bottlenecks.
Premium Subscription: Advanced Roadmaps
For users on the Premium plan, Jira unlocks Advanced Roadmaps, which significantly expand the functionality of the Timeline tool.
Advanced Roadmaps are designed for larger teams and organizations managing work across multiple projects. Key features include:
Multi-Project Planning: consolidate and track progress across multiple Jira projects in a unified view.
Resource Management: analyze team capacity and allocate resources effectively. Custom Hierarchies: Go beyond epics by creating custom issue hierarchies tailored to your workflow.
Scenario Planning: build “what-if” scenarios to model different approaches to scheduling and resource allocation.
Advanced Dependency Management: visualize complex dependencies across projects for better coordination.
Streamline Jira timeline with Planyway
Planyway app is super handy for those who want to bring more visibility across projects without excessive complexity.
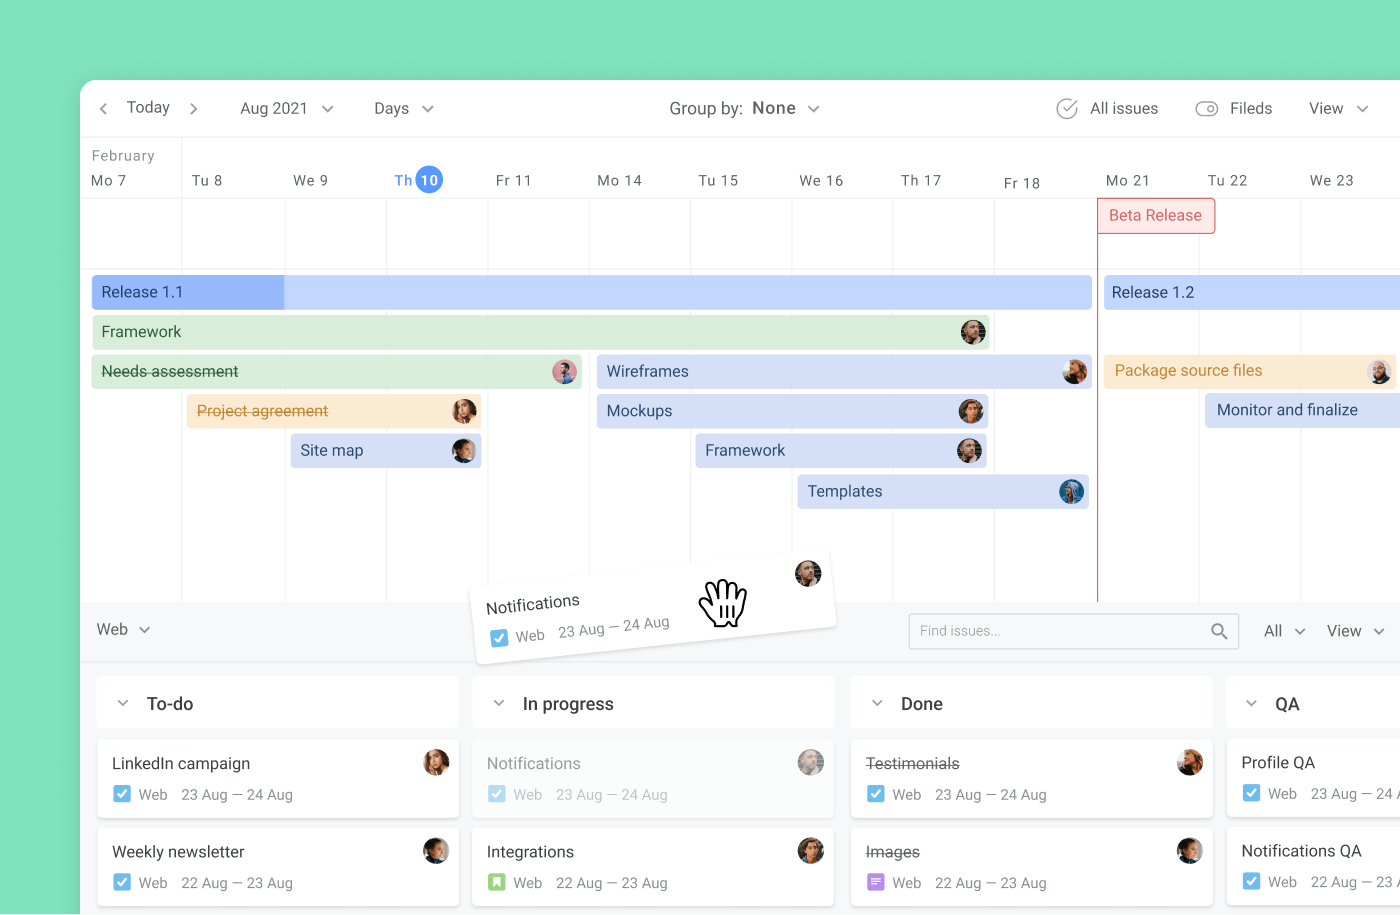
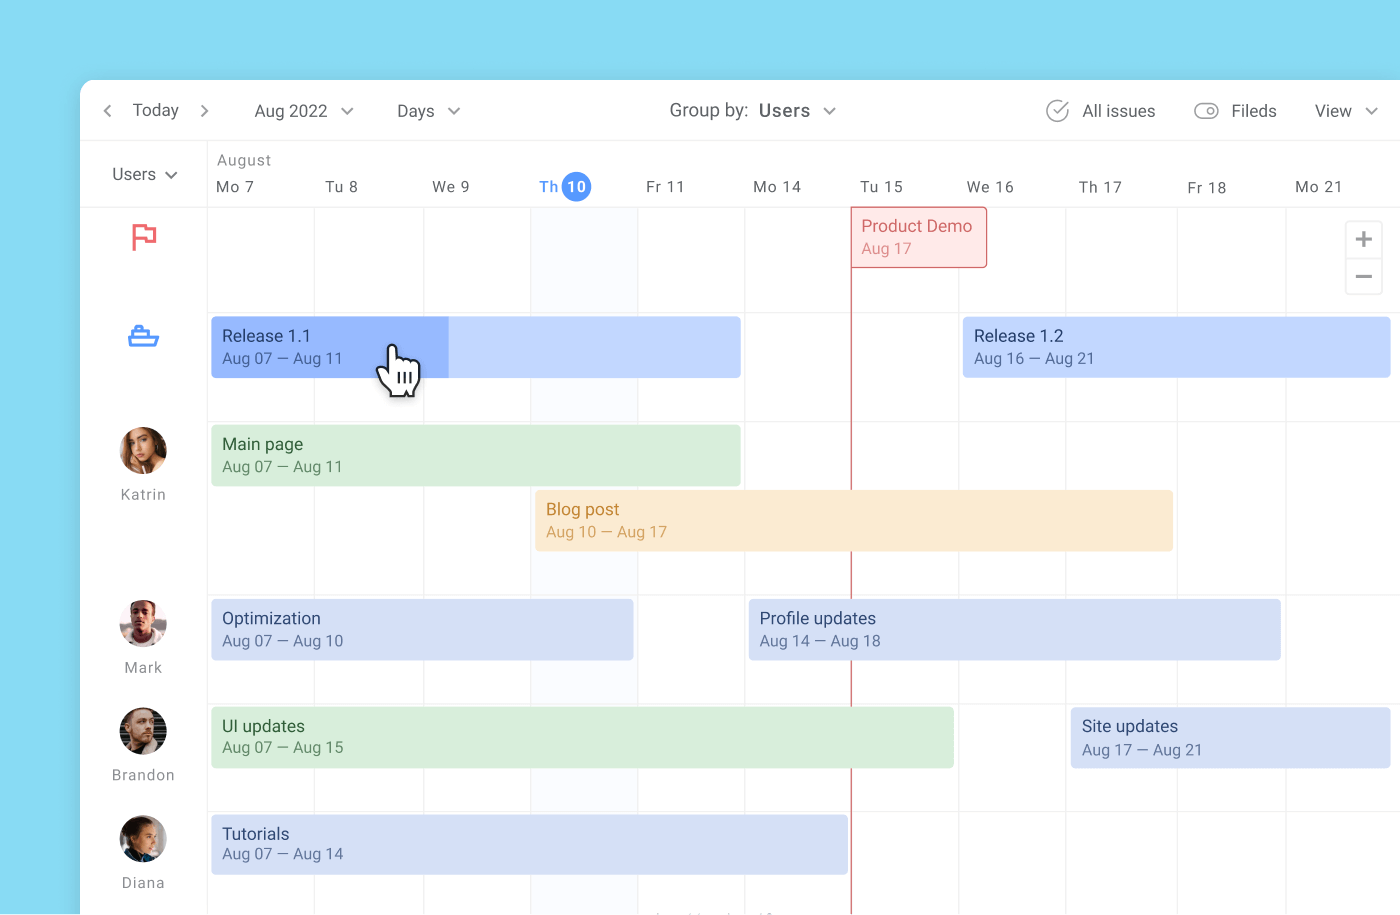
Group timeline by users, projects, and epics
Planyway allows you to visualize your workflow from different angles. Instead of just having the basic timeline view, you can also group it by team members for easier resource planning. by Jira epics, and projects to make a project portfolio.

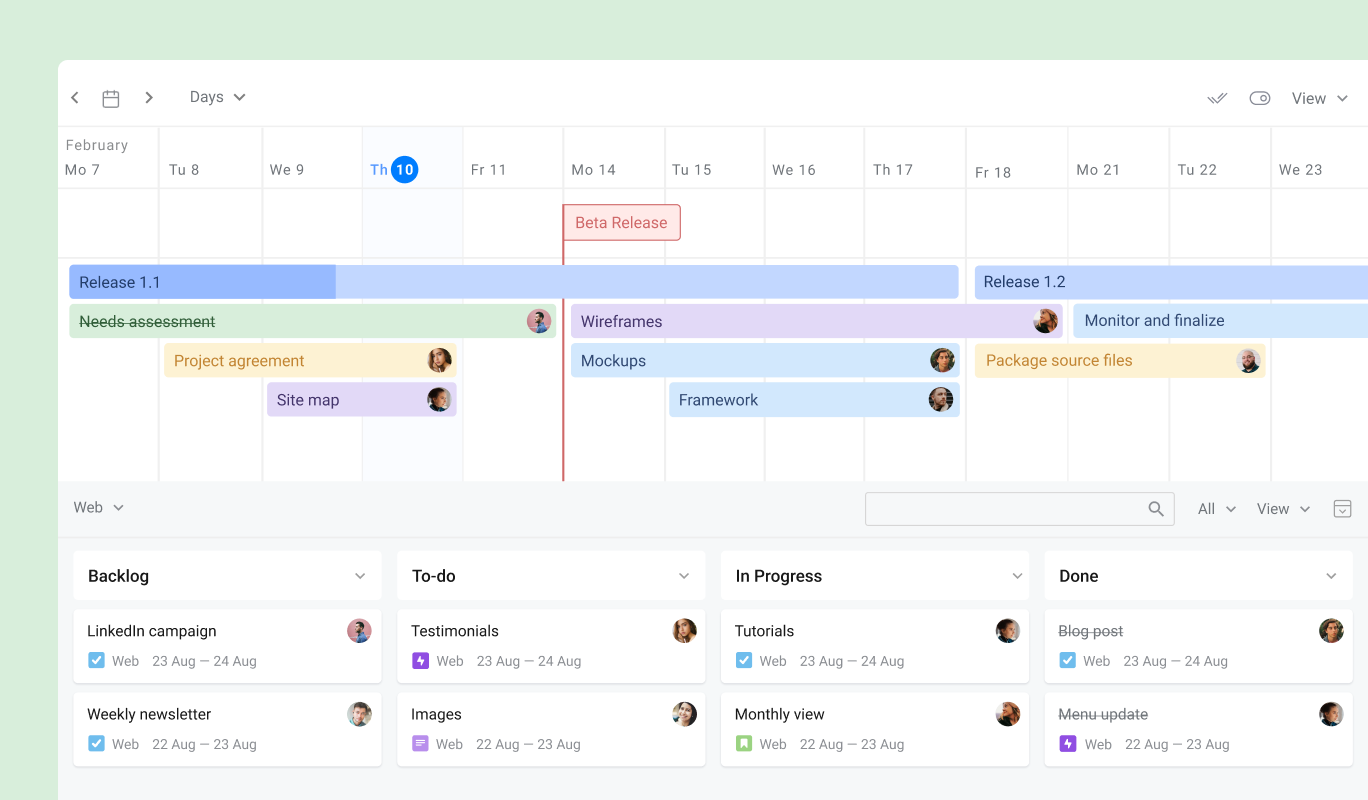
Schedule issues with drag and drop
Simply drag issues from your Jira board to the timeline and drop them on the right date to schedule.
Make subtasks visible
While the majority of alternative plugins show only issues on timeline, while Planyway can visualize your subtasks on the Jira roadmap too. Once you add dates to a subtask, it shows up along with regular Jira issues on the timeline. At any moment, you have a choice to hide them and return to a more high-level planning.
Plan team workload
This way is super handy when you’d like to allocate new work pieces based on the current workload and availability, as you can easily spot potential candidates. The workload mode will also help you balance the workload to make sure no one in the team is overloaded.

Plan across multiple projects
When your team works on multiple projects, make use of the multi-board view. Connect all the projects you want to keep track of at the same time and see their issues visualized together on one timeline.
Highlight milestones and releases
There is no project plan without milestones and releases. You can plan out releases along with your Jira issues and see how much work is done already. Milestones play the role of key date trackers that visually remind you of important due dates.
⭐️ Learn more about how to create a timeline in Jira!
5 More Tools to Create a Timeline in Jira
1. Project TimeLine
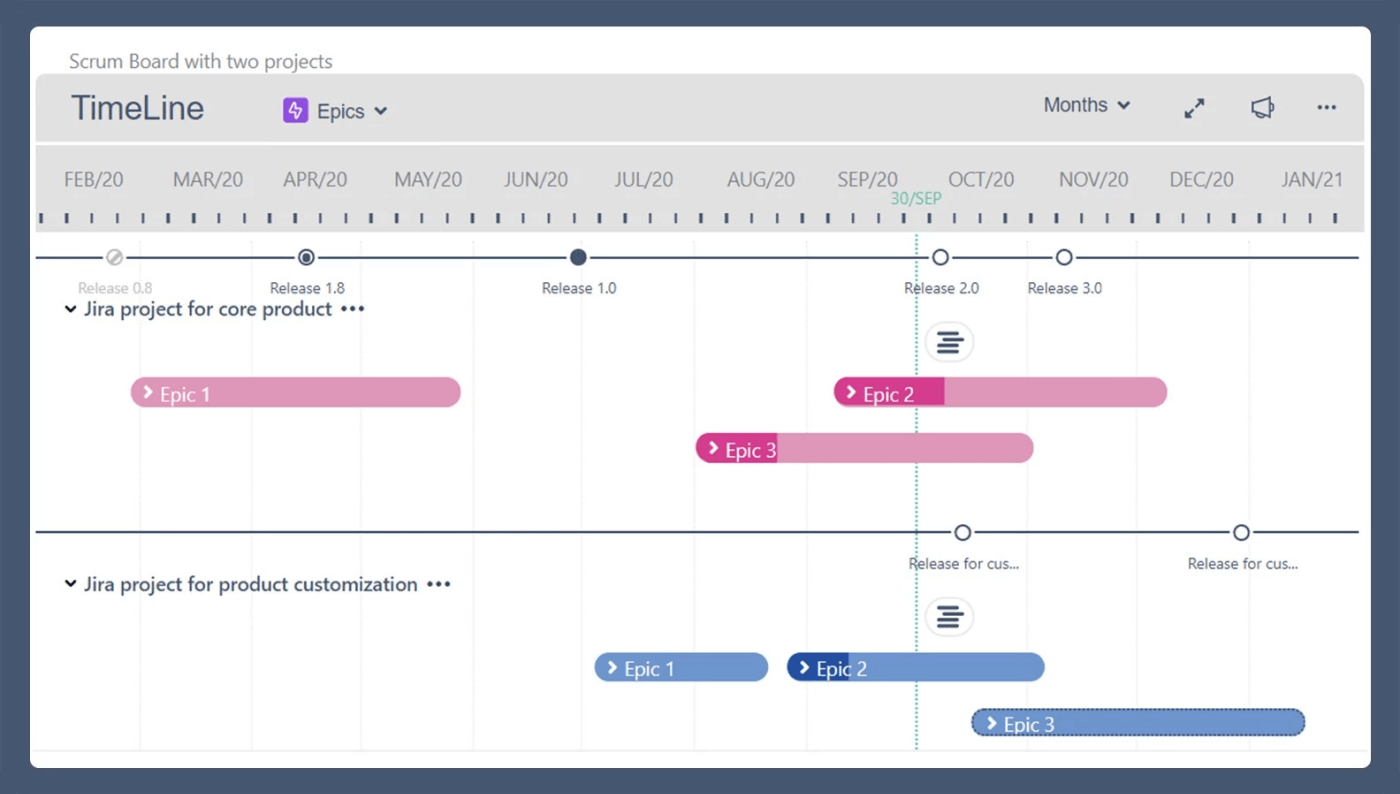
Project TimeLine allows you to keep track of epics on the annual Jira timeline chart along with the scheduled releases. The epics are represented with the progress bar and can be rolled out to see included issues. Project TimeLine also has the forecasting feature to predict completion dates and possible delays.
Price: Starts at $10.00 per user monthly
2. Timeline by Addonrock
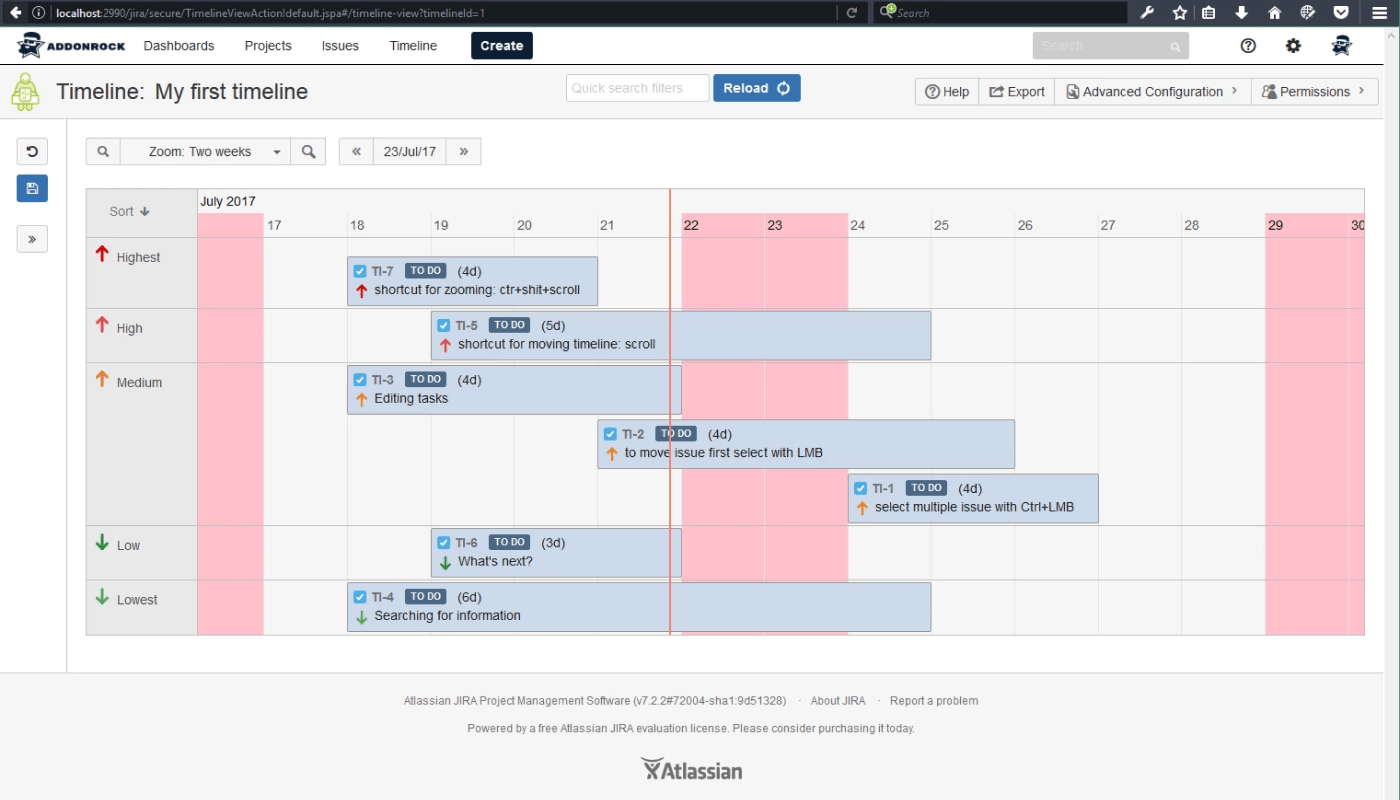
Timeline, with its uncomplicated name, is a Jira add-on from Poland that makes it possible to group your timeline by any Jira field like version, assignee, reporter, epic, etc. This timeline add-on offers a scheduling issues option on a Gantt-like chart. Also, you can sort issues by priority, assign permissions and find issues by name or author.
Price: Available only as a Cloud and Data Center version. Annual pricing begins at $270 for teams of up to 50 users.
3. Timeline for Jira by Doitbetter
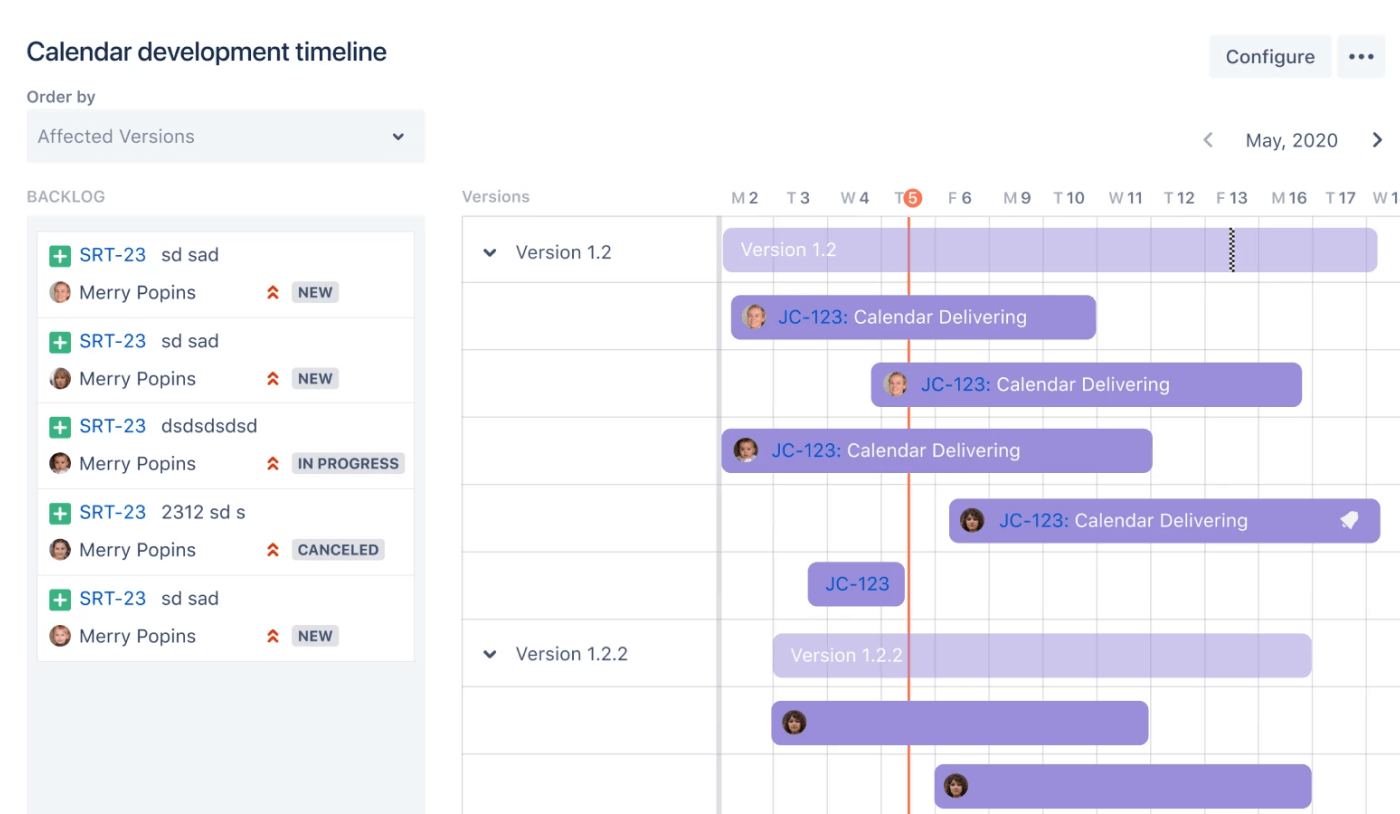
Timeline for Jira is an extension that primarily lets you use the timeline in two ways: ordered by team members or by versions. It has a nice and easy-to-use interface, but unfortunately the app doesn't work with DateTime fields, so you have to use date custom fields which might not be very convenient.
Price: paid plan starts for teams bigger than 10 users from $0.35 per user monthly
4. Activity Timeline
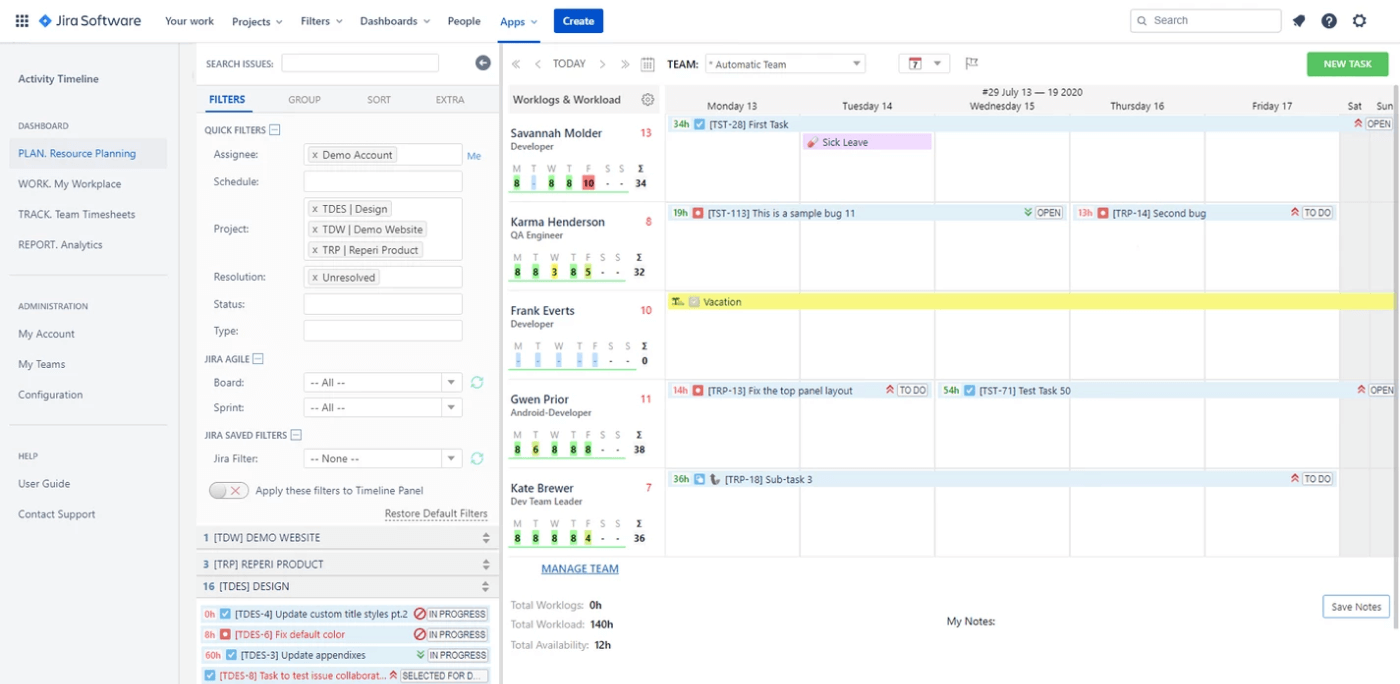
Activity Timeline is mainly focused on the team capacity planning and workforce utilization on the cross-project basis. Here you can get representation of your Jira issues not only by users but by teams as well. Team grouping lets you plan on the high level and becomes a great choice when you need to plan the workflow for multiple teams at a time.
Price: cloud version starts from $2.5 per user monthly
5. Staffing Timeline
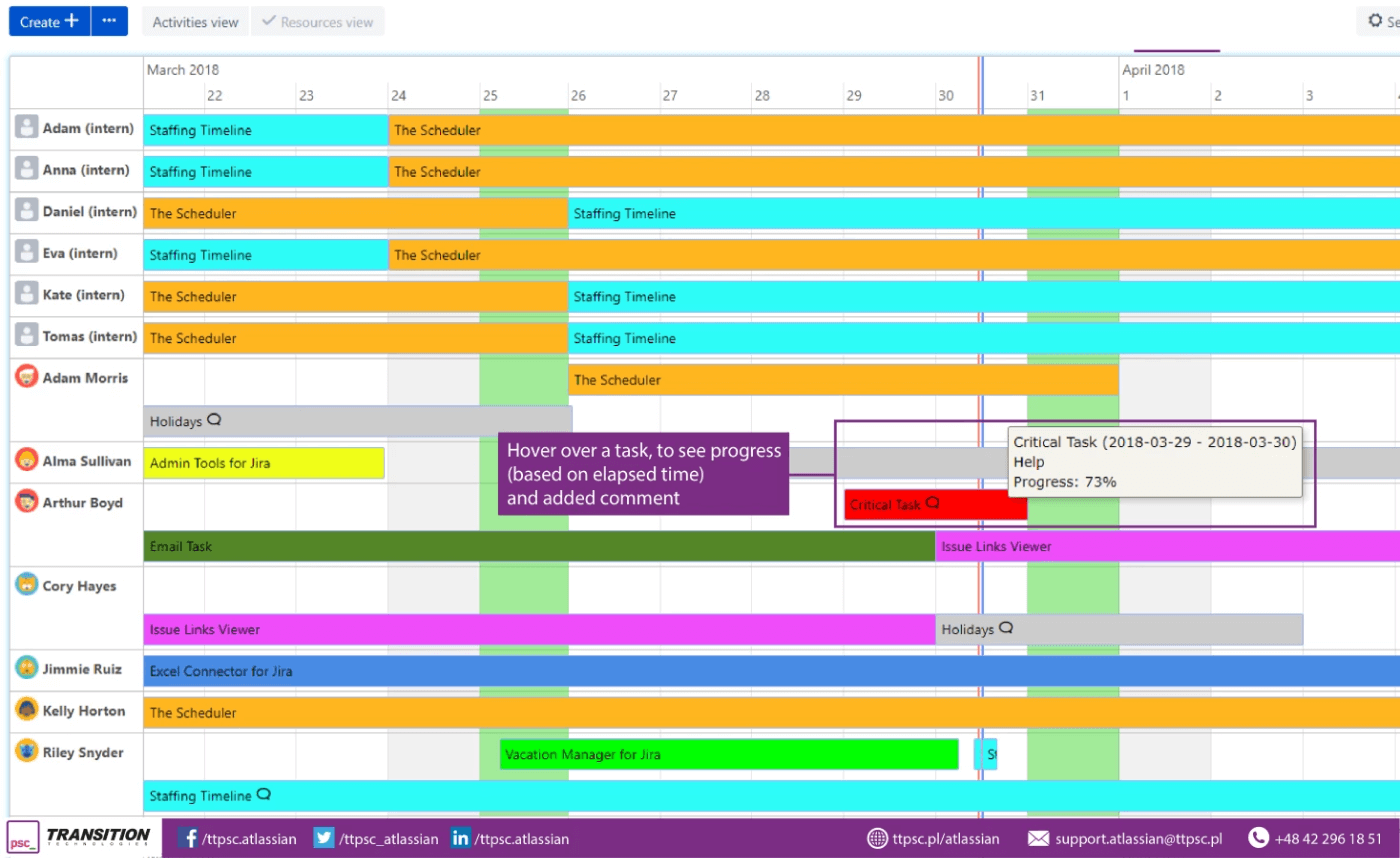
Staffing Timeline is another planning app to keep track of your resources to plan work on projects, vacations, or any other activities. Here you can manage work on a daily and hourly scale, limit the number of working hours, and block holidays and leaves.
Price: Starts at $1.75 per user monthly
Jira timeline vs Roadmap
Many project managers routinely confuse these two terms, a timeline and a roadmap. Although these terms complement each other, let’s see the difference.
A project roadmap is a high-level overview of a project that outlines the overall goals, objectives, and milestones that need to be achieved to complete the project. It typically provides a strategic view of the project, with a focus on long-term goals and outcomes. A project roadmap is used to communicate the project's vision and direction to stakeholders and team members, helping to align everyone's efforts towards a common goal.
On the other hand, a project timeline is a detailed view of a project that shows the specific tasks, activities, and milestones that need to be completed to achieve the project goals. It provides a more granular view of the project, with a focus on short-term goals and deadlines. A project timeline is used to plan and schedule project activities, track progress, and ensure that the project is completed on time and on budget.
In project management, it is used to say that a roadmap is about intentions and plans for the project's realization, while a timeline is about your actual actions scheduled to reach the project's completion.
Project timeline vs Agile timeline
A project timeline and an agile timeline are two different approaches to managing the time and resources required to complete a project.
The project timeline is usually a linear schedule that outlines the start and end dates for each task, as well as the dependencies between tasks. It is typically created at the beginning of the project and is updated as the project progresses
On the other hand, an agile timeline is a more flexible approach to project management that is commonly used in software development projects. Instead of creating a detailed plan at the beginning of the project, the agile timeline is created in shorter increments called sprints. Sprints typically last for one to four weeks and focus on completing a set of prioritized tasks or features. The agile timeline is constantly reviewed and updated during each sprint based on the progress made and the feedback received.
Jira timeline for free
Jira roadmap timeline for tasks may be used for free, if your team consists of 1-10 members. Go planning with Planyway – and save precious time and team forces.
Start creating your Jira project timeline now. Make use of our tips on how to get started with adapting your workflow to the visual planning instrument and see that keeping track of projects and teams can be so easy and effective.
