Jira Resource Management: Ultimate Guide to Streamline Resource Planning
Jira Project Management: A Comprehensive Guide to Transform the Way Teams Work
Jira, a widely recognized project management tool, offers robust solutions to streamline project workflows. This comprehensive guide explores the multifaceted features of Jira and how they can elevate your project management to new heights.
What is Jira?
Developed by Atlassian, Jira began as a bug tracking tool but has evolved into a powerful project managing software. It's designed to aid teams in planning, tracking, and releasing software, but its flexibility makes it suitable for various types of project management.
Why Choose Jira for Project Management?
Customizable Workflows
Jira's strength lies in its customizable workflows. Teams can design their processes to reflect their unique work methodology, whether it's agile, scrum, or kanban.
Enhanced Team Collaboration
Jira promotes transparency and collaboration. With features like real-time updates and communication tools, team members can stay informed and engaged.
Robust Reporting and Analytics
With Jira’s advanced reporting tools, tracking progress and productivity becomes straightforward, enabling teams to make data-driven decisions.
How to Use Jira for Project Management
Setting Up Your First Project
Getting started with your first project in Jira is a crucial step towards efficient project management. This section will guide you how to create a projects plan in Jira, detailing each step for clarity and effectiveness.
1. Accessing Jira and Project Creation
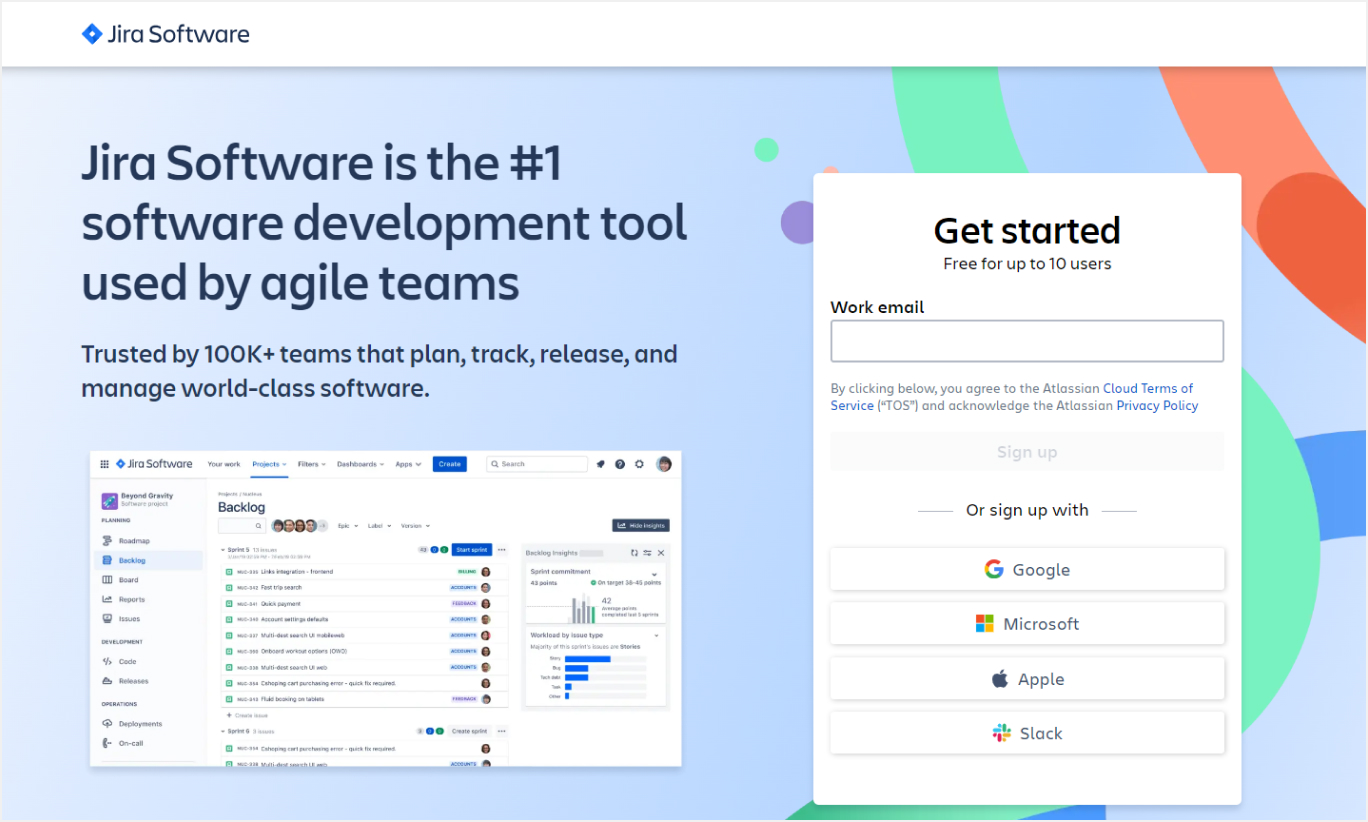
- Log In: Start by logging into your Jira account. If you don’t have an account, you can sign up for one on the Atlassian website.
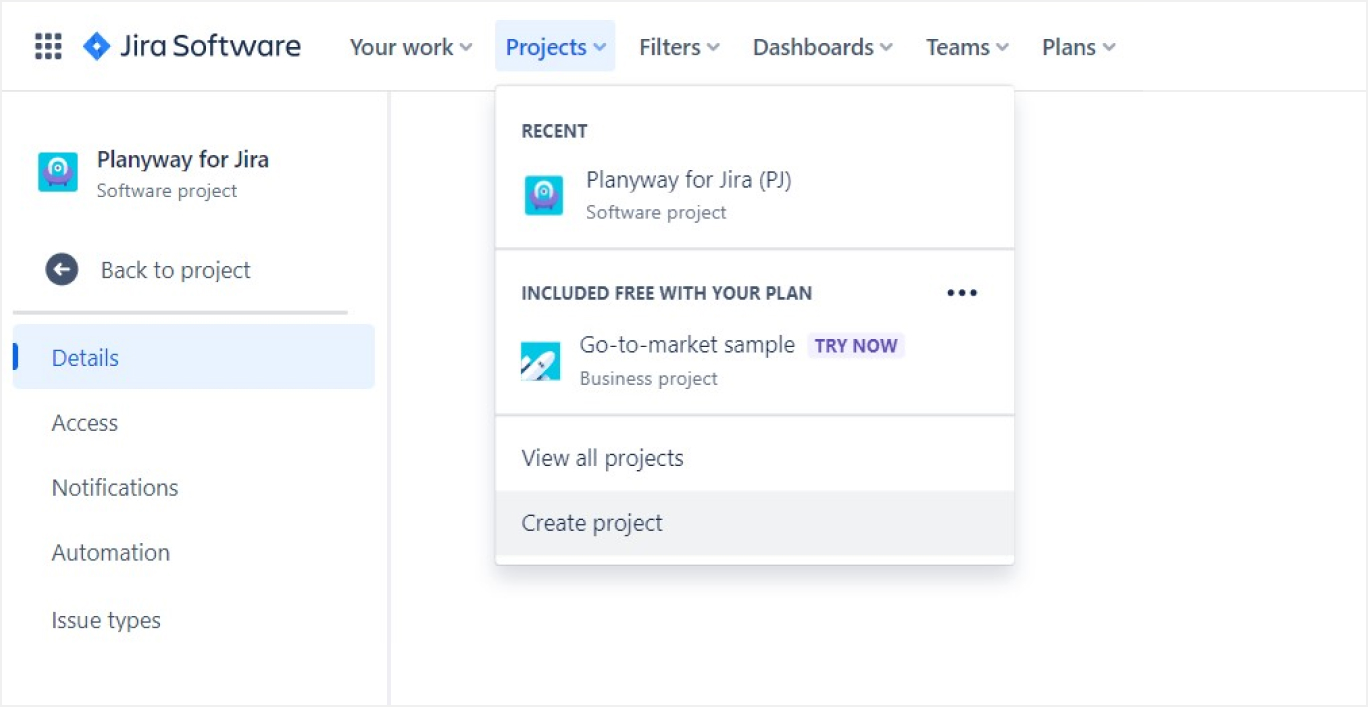
- Create a New Project: On the Jira dashboard, locate the “Projects” menu at the top and select “Create Project.”
2. Choosing the Right Project Template
- Template Selection: Jira offers a variety of project templates such as Scrum, Kanban, Bug Tracking, and Task Management. Choose a template that aligns with your project needs.
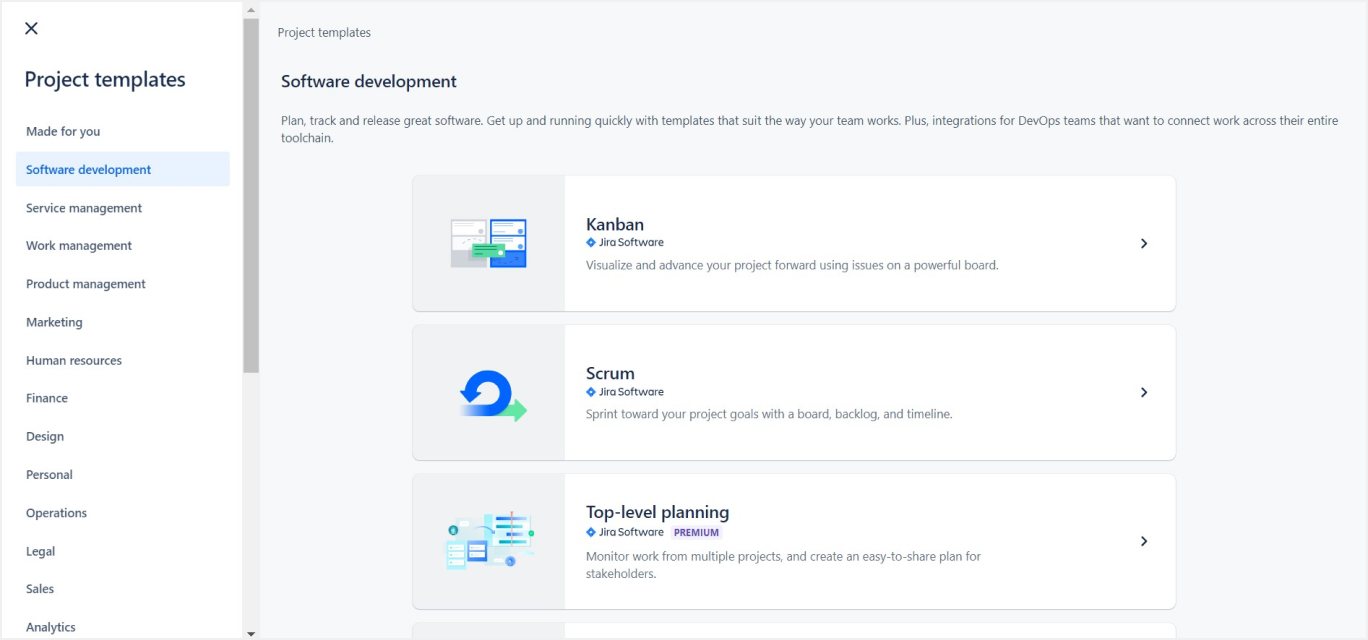
- Template Customization: After selecting a template, you can customize it further. This includes setting up your board, defining workflows, and issue types (e.g., stories, tasks, bugs).
3. Configuring Project Settings
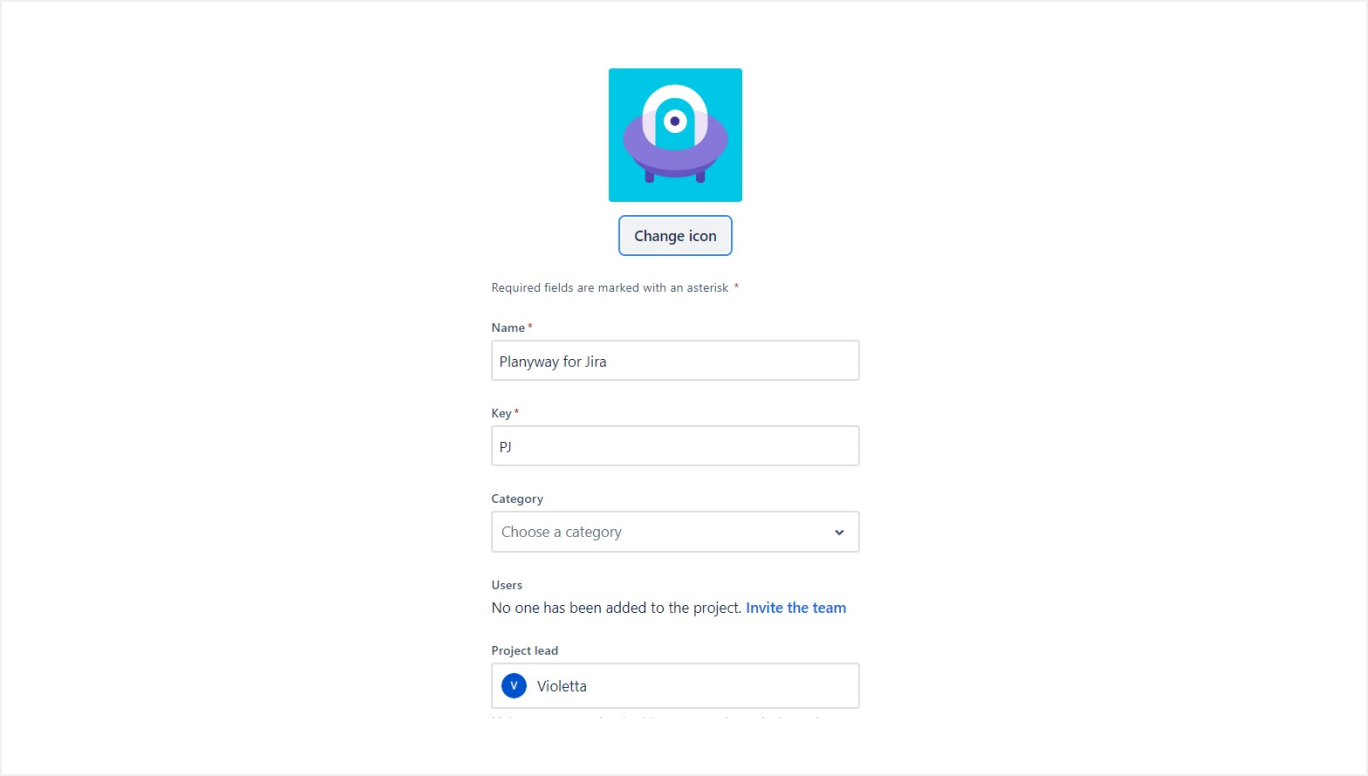
- Project Key and Name: Assign a unique project key and a descriptive name to your project. The project key is used as a prefix for all issues created within the project.
- Project Lead: Designate a Project Lead. This is typically the person responsible for managing the project in Jira.
- Project Description: Add a detailed description of the project to help team members understand the project’s objectives and scope.
4. Setting Up User Roles and Permissions
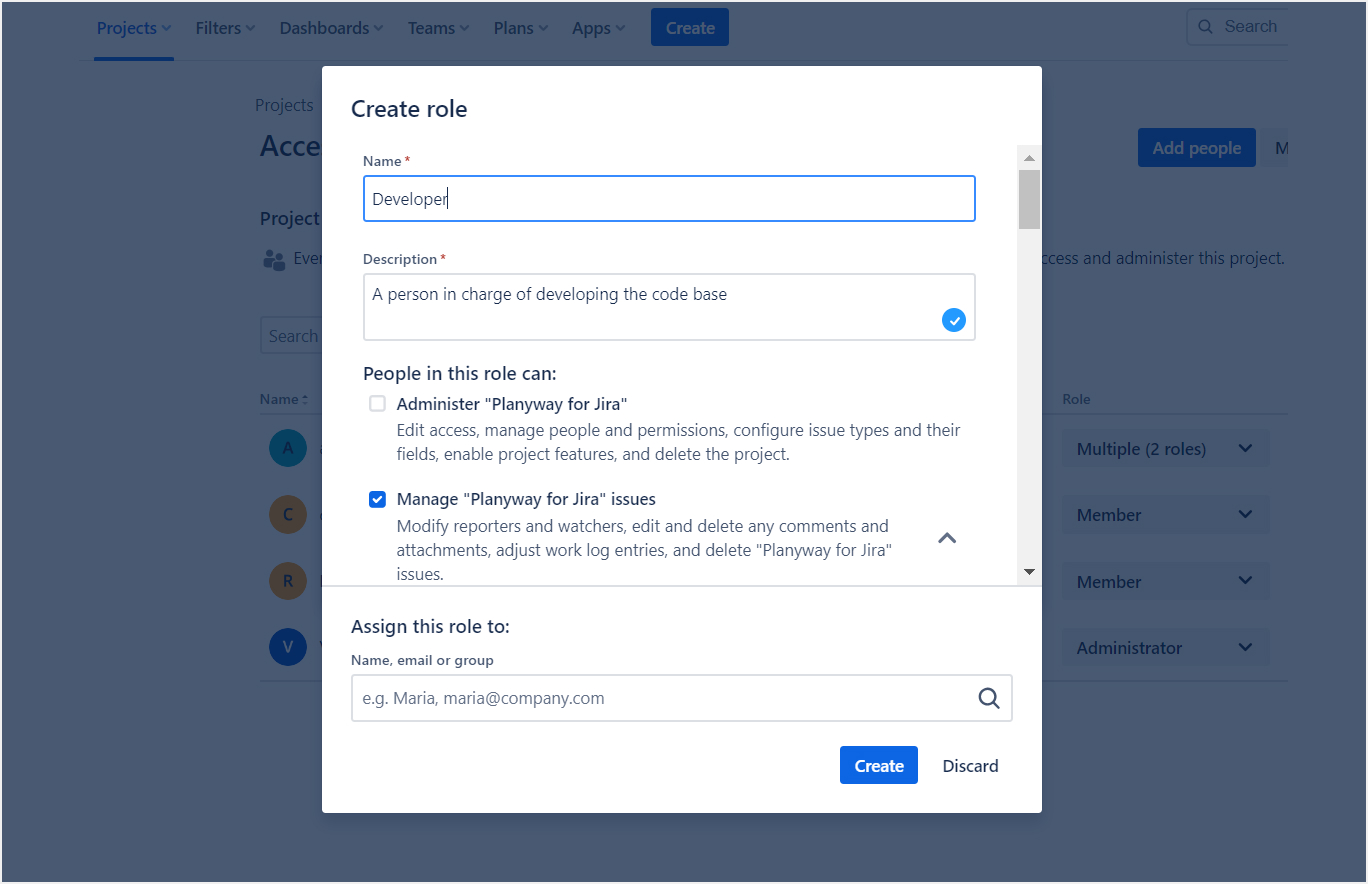
- User Roles: Define roles like Admins, Developers, and Testers. Assign team members to these roles based on their responsibilities.
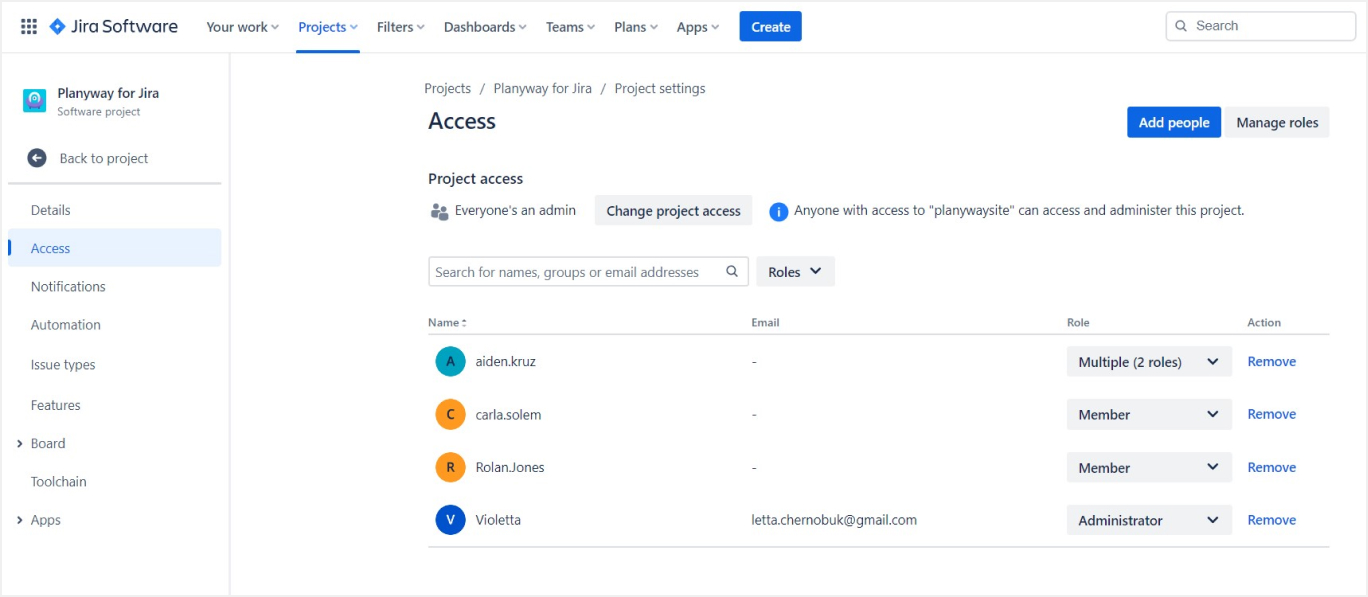
- Permissions: Configure permissions for each role. Control what each role can view, create, edit, or delete within the project.
5. Creating Issues and Tasks
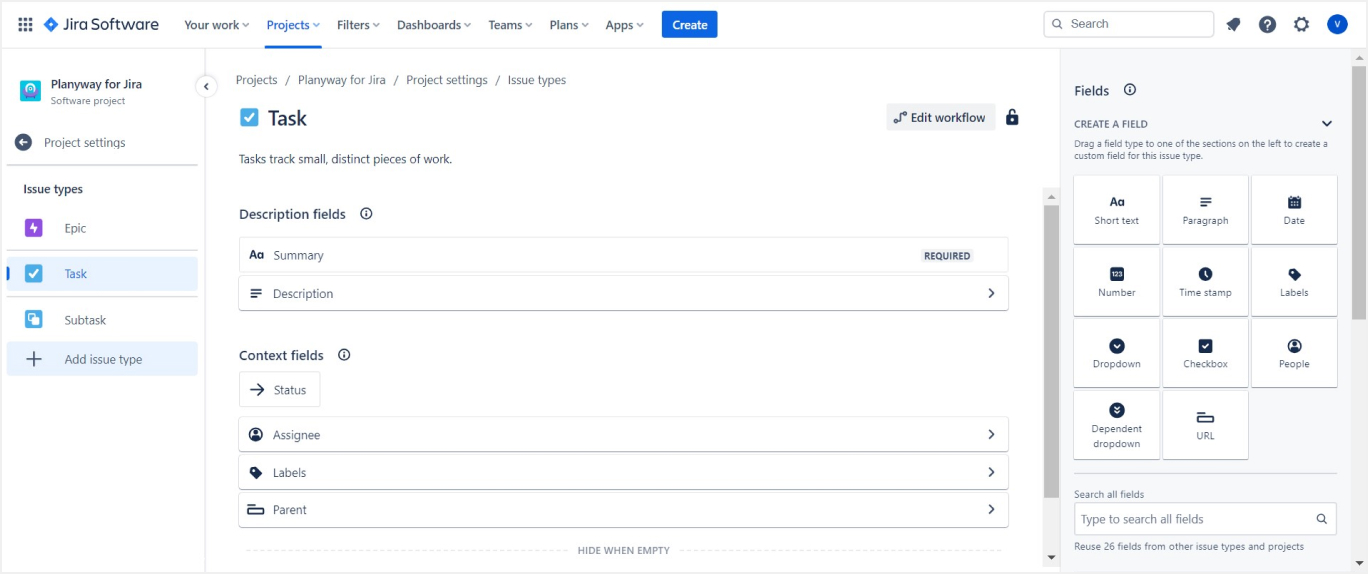
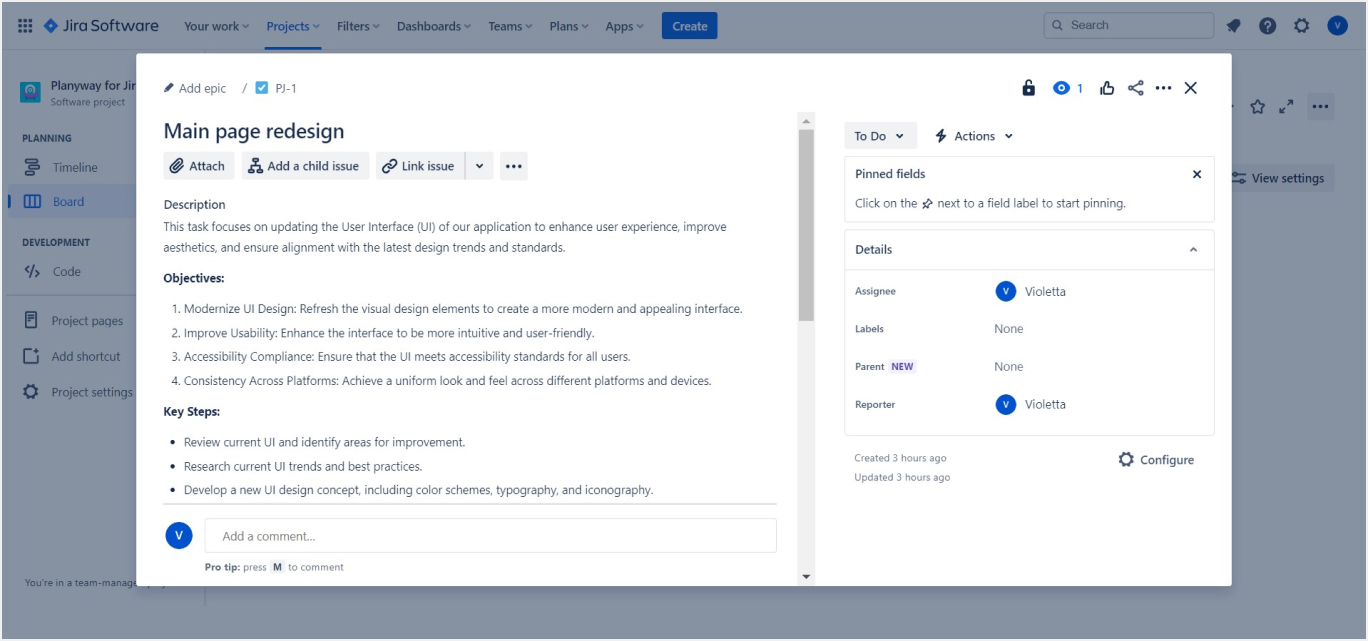
- Issue Types: Familiarize yourself with different issue types in Jira such as Epic, Story, Task, and Bug. Create issues by clicking on the “Create” button at the top of your screen. You can also create custom issue types.
- Issue Details: Fill in details for each issue, including summary, description, assignee, and due dates.
- Workflow Editor: Access the workflow editor to customize the stages that an issue goes through during its lifecycle. You can add, remove, or rename stages like To Do, In Progress, and Done. You can use the default workflow or create a custom one to match your team's process.
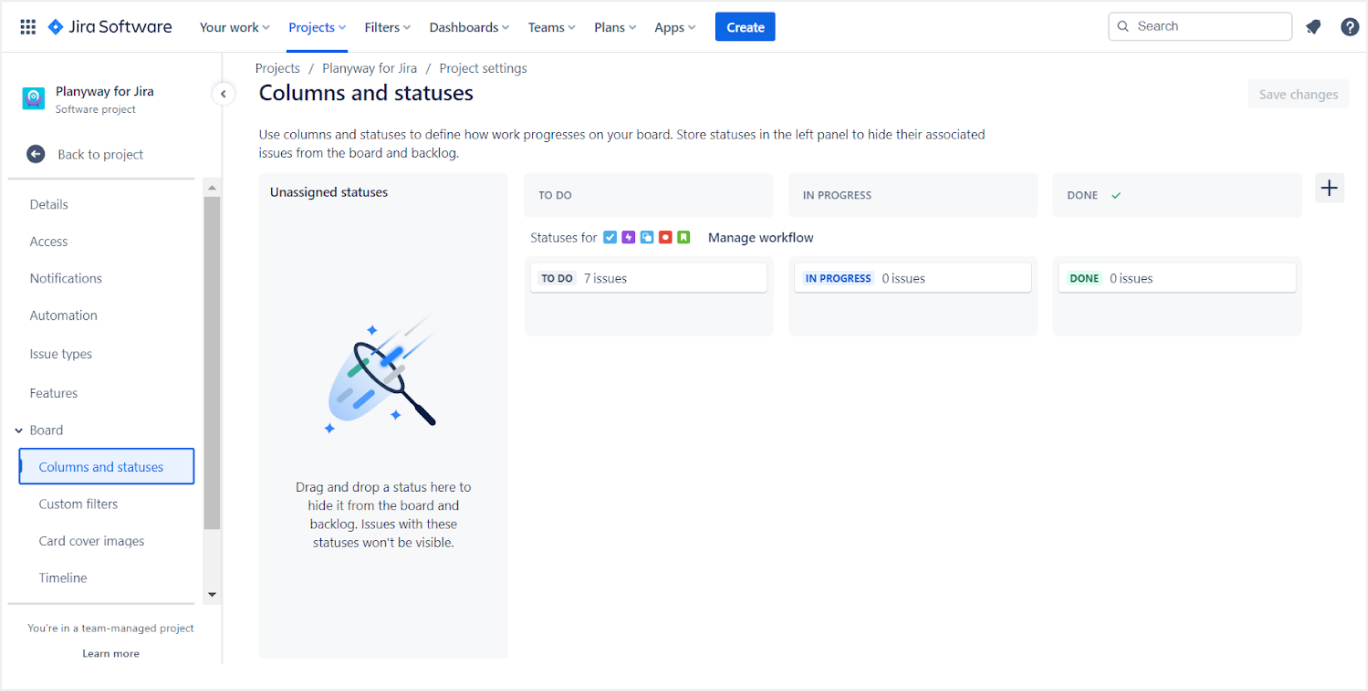
6. Custom Fields
- Custom Fields: Add custom fields to capture specific information related to your project. Create custom fields to ensure that team members provide the necessary information for each issue.
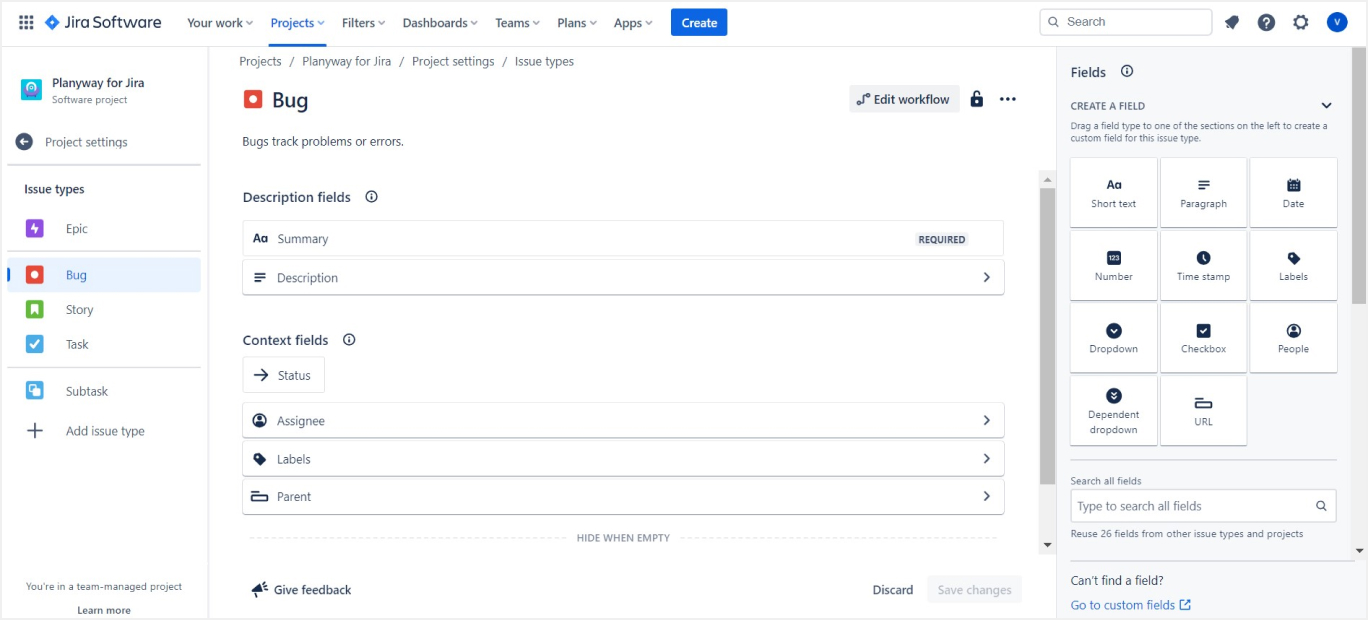
7. Organizing with Epics and Sprints
- Epics: Group related tasks under an Epic for better organization, especially in larger projects.
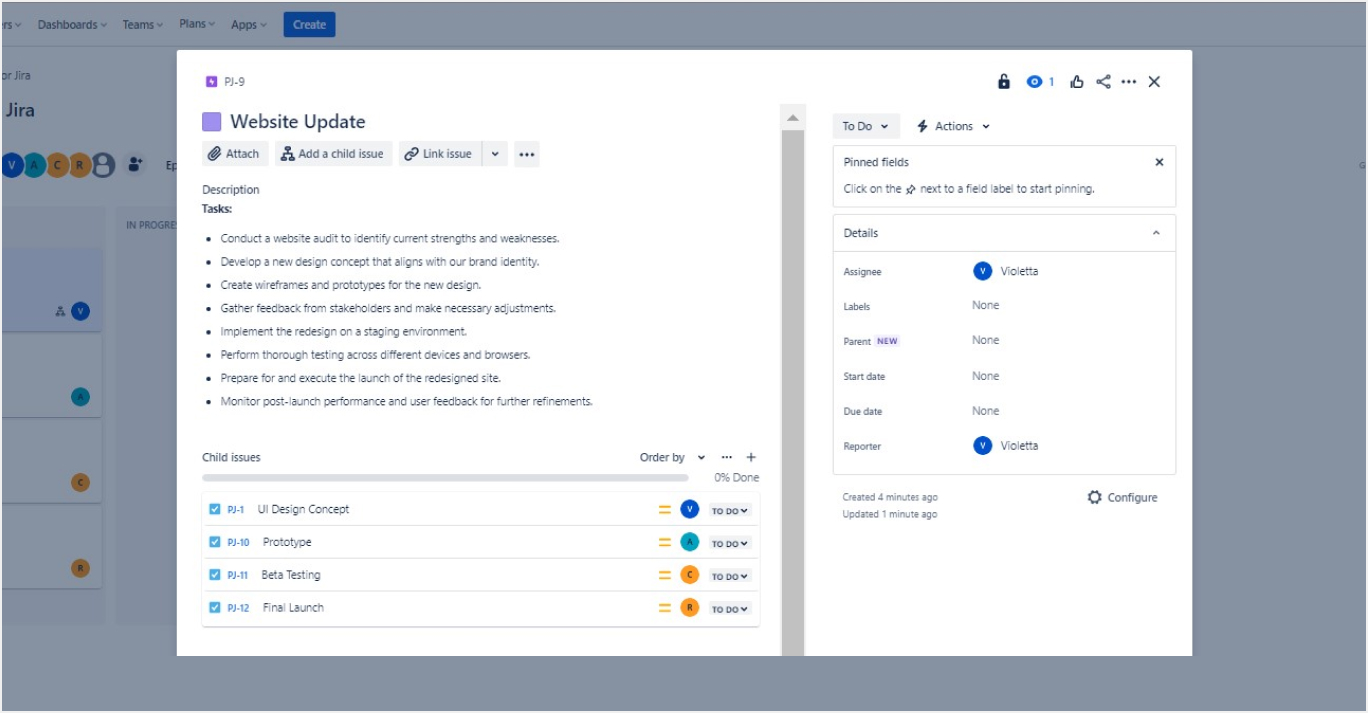
- Sprints: If using a Scrum template, organize your work into Sprints. Plan your sprint by selecting issues and defining the sprint duration.
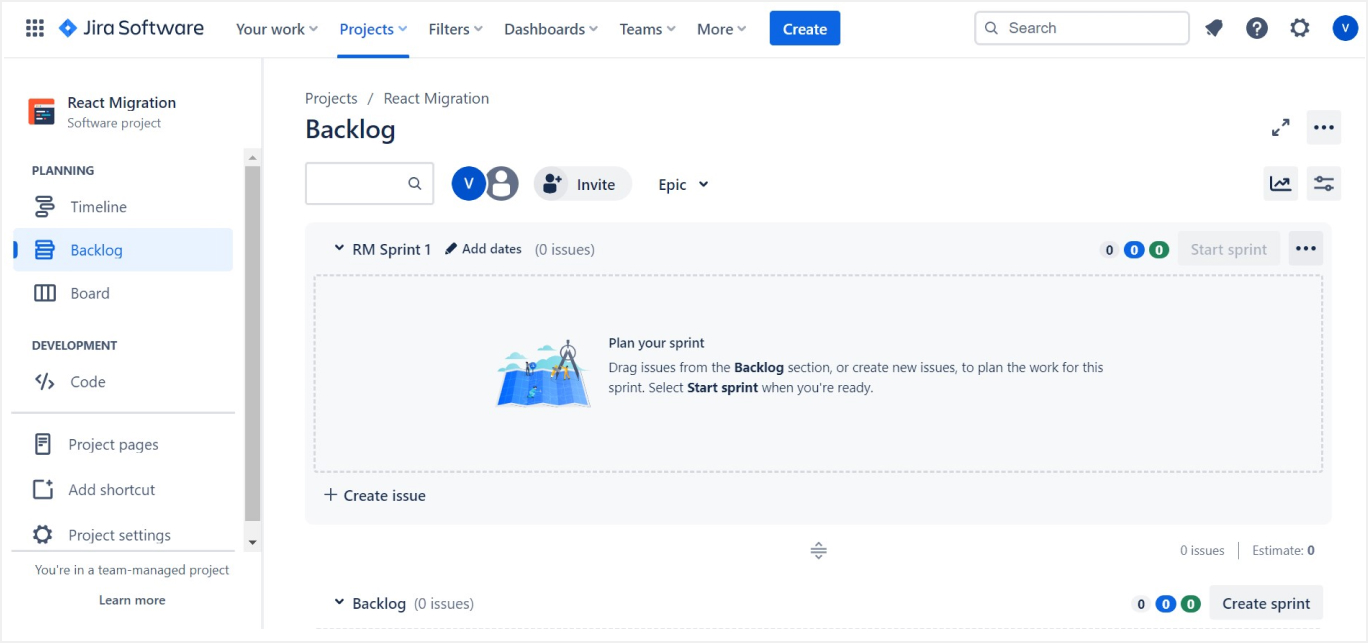
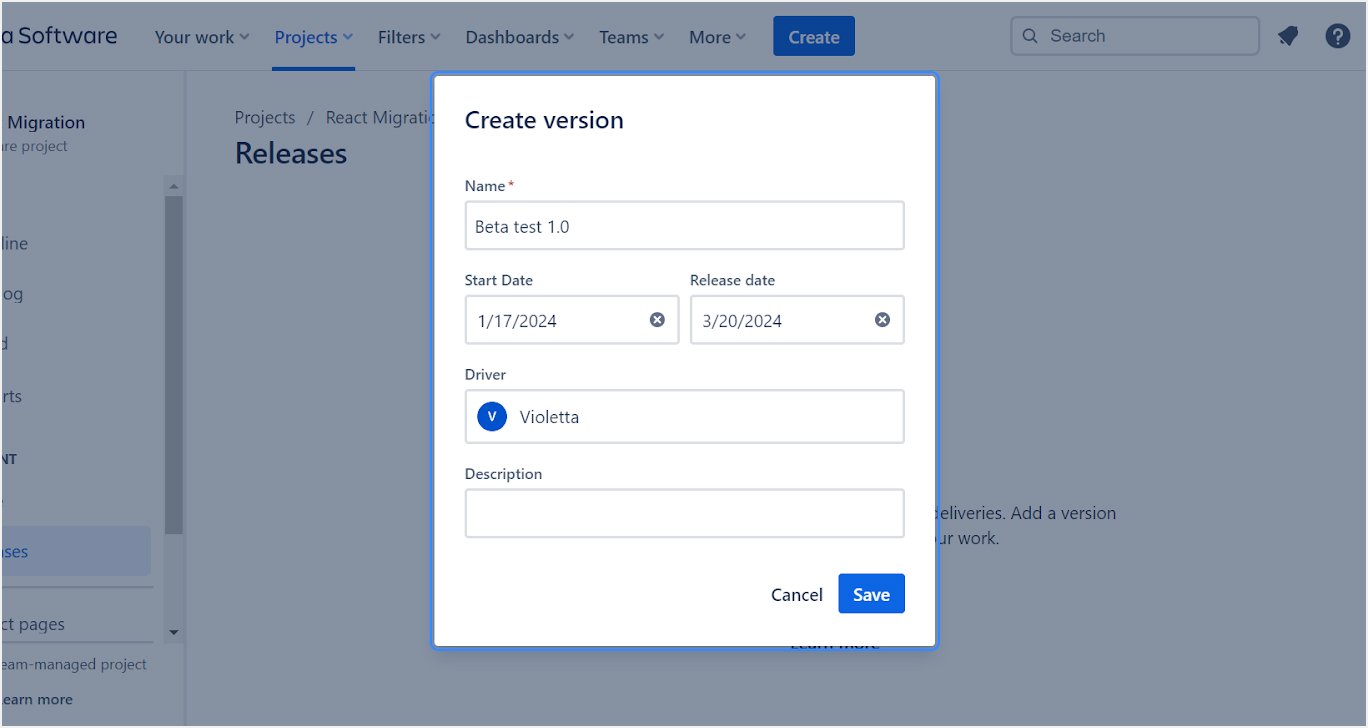
8. Versions
- Versions: Manage your project's versions or releases. Set up future versions to track progress towards releases or use them for sprint planning.
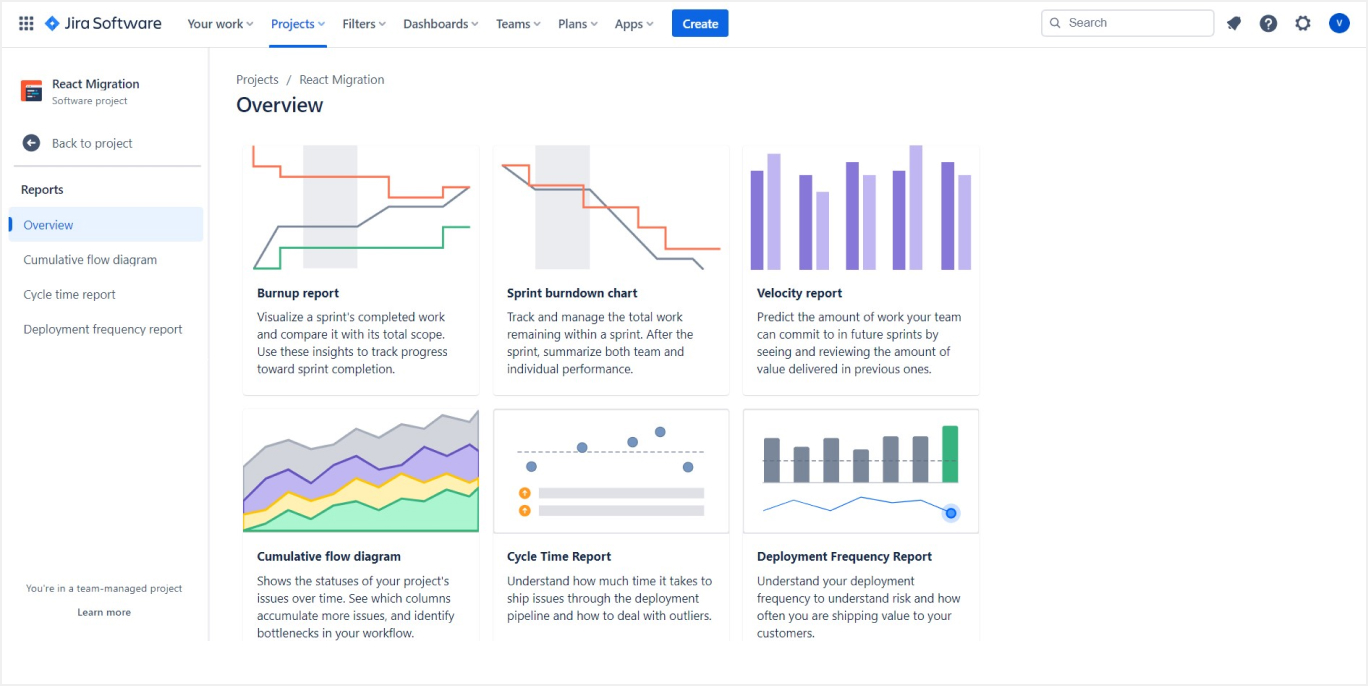
9. Project Reporting
- Utilize Reports: Jira project management software offers a range of reporting tools to track progress, velocity, and team performance. Familiarize yourself with different reports like Burn-down Charts, Sprint Reports, and Velocity Charts.
Integrations
Jira can integrate with various types of tools, including version control systems, continuous integration/continuous deployment (CI/CD) tools, communication platforms, and document management systems. Integrating Jira with Jira plugins can significantly enhance its functionality and streamline your project management processes. Here's a detailed guide on how to integrate Jira with popular tools and platforms.
1. Integration with Confluence
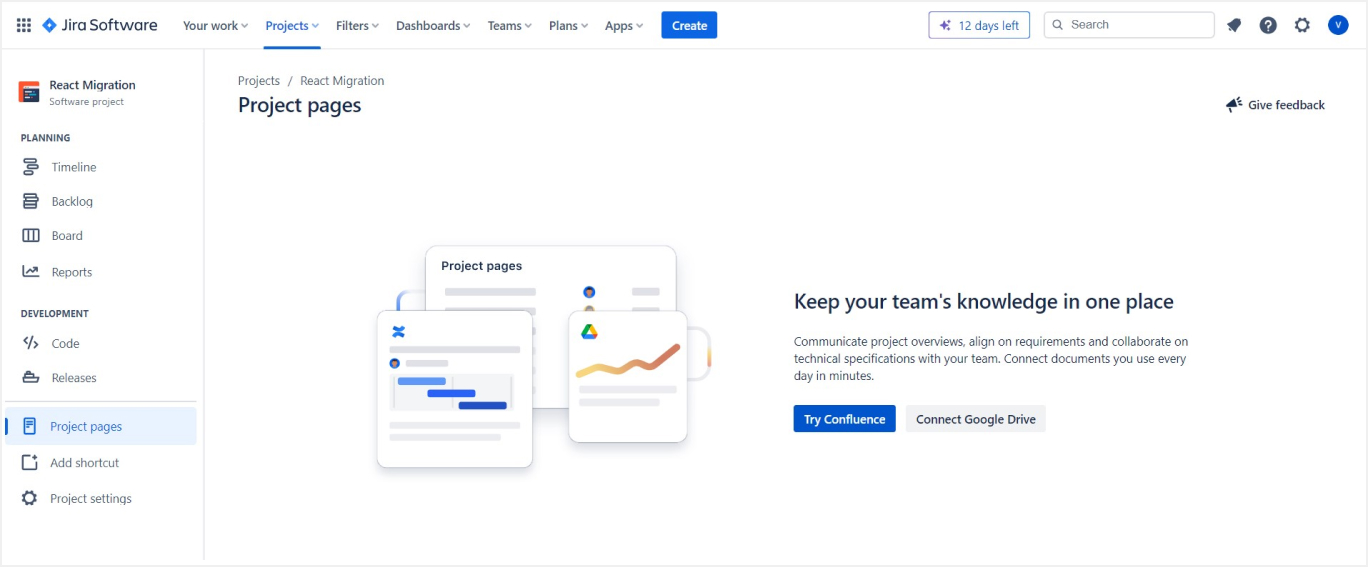
- Why Integrate: Confluence is a collaboration tool that complements Jira. Integrating the two allows for seamless connection between project documentation and tracking.
- How to Integrate: In Jira, go to 'Project pages' and choose 'Try Confluence'. Follow the prompts to install and configure the Confluence integration.
- Use Cases: Create Confluence pages directly from Jira issues, link Jira issues to existing Confluence pages, and view linked pages in Jira issues for easy reference.
2. Integration with Bitbucket or GitHub

- Why Integrate: Integrating with version control systems like Bitbucket or GitHub links code changes to tasks and bugs in Jira.
- How to Integrate: For Bitbucket, use the 'Bitbucket for Jira' app available in the Atlassian Marketplace. For GitHub, use the 'GitHub for Jira' app.
- Use Cases: Track commits, pull requests, and branches directly in Jira. Automate issue transitions based on git actions.
3. Integration with CI/CD Tools
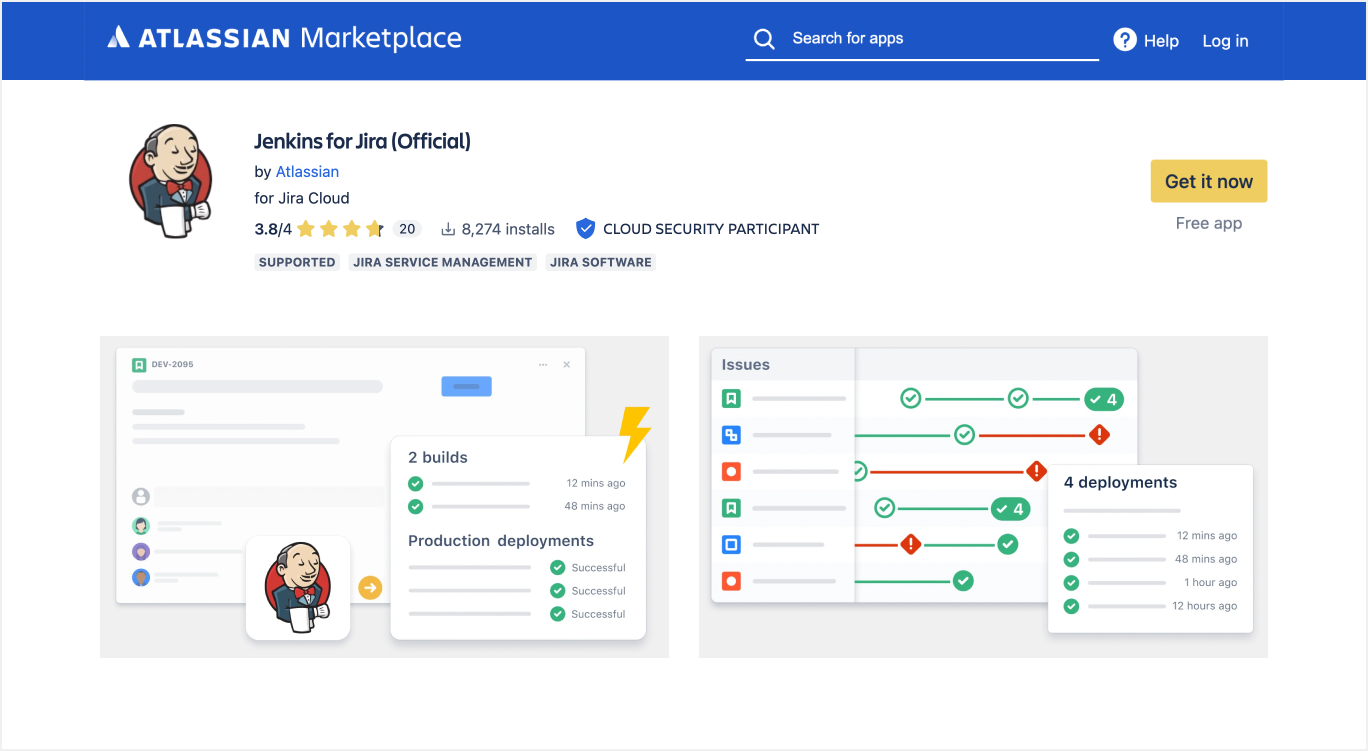
- Why Integrate: Linking CI/CD tools like Jenkins, Bamboo, or CircleCI with Jira enhances the visibility of build and deployment status within Jira issues.
- How to Integrate: Use respective apps from the Atlassian Marketplace or set up webhooks for integration.
- Use Cases: View build statuses and deployment information in Jira issues, and automate Jira workflows based on build results.
4. Integration with Communication Platforms
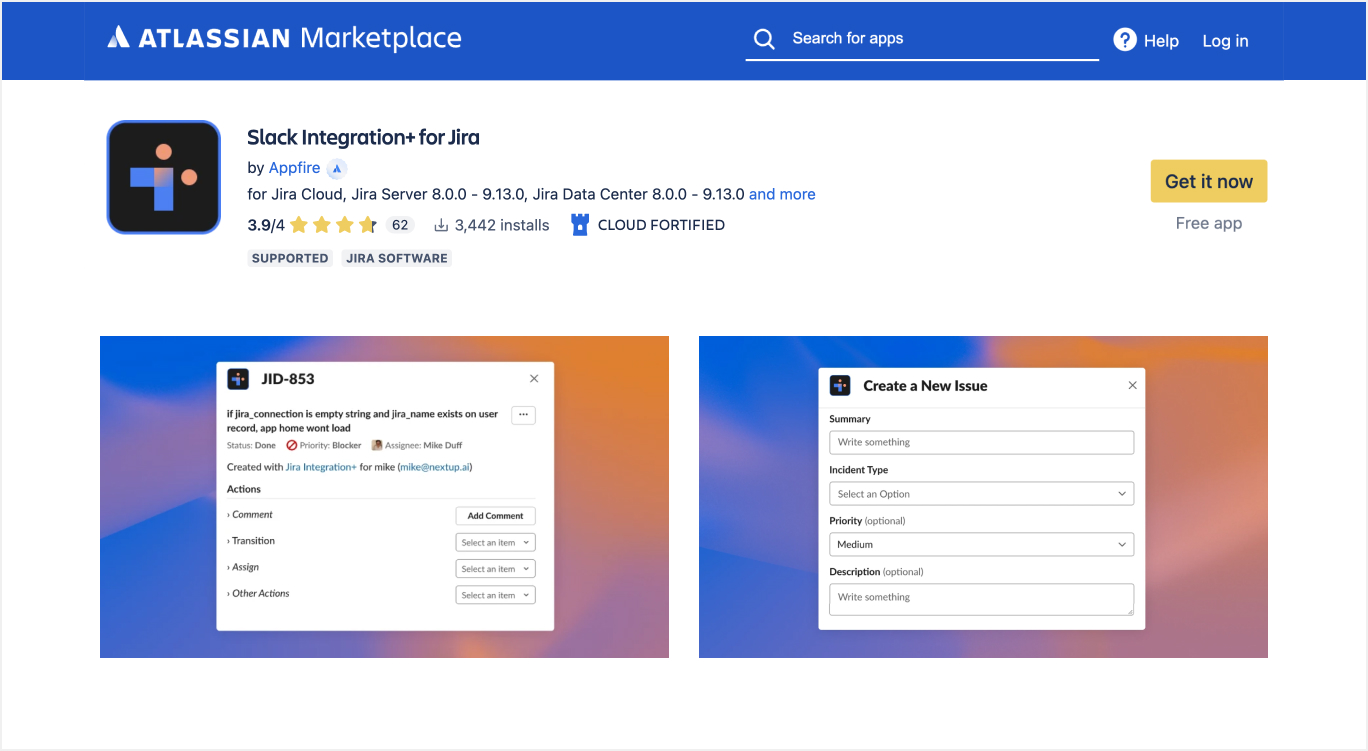
- Why Integrate: Tools like Slack or Microsoft Teams can be integrated to enhance team communication and issue tracking.
- How to Integrate: Use the Slack for Jira Cloud or Microsoft Teams for Jira Cloud integrations available in the Atlassian Marketplace.
- Use Cases: Receive Jira issue updates in Slack channels or Teams chats, create Jira issues from messages, and collaborate efficiently.
5. Integration with Resource Management Tools
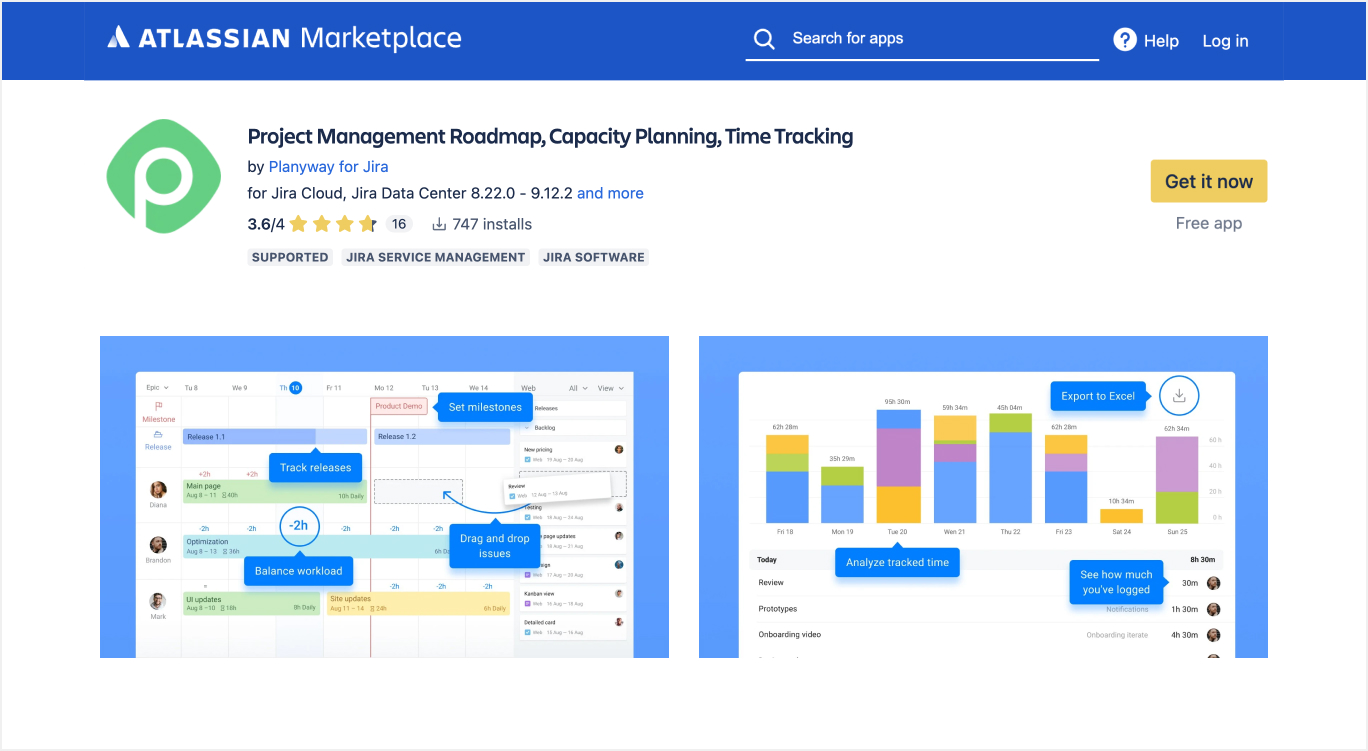
- Why Integrate: Add-ons like Planyway will help you improve Jira capabilities in terms of resource planning and capacity management thanks to its advanced roadmap/timeline for Jira with useful swimlanes, plus it provides you with the calendar view.
- How to Integrate: The app is available on the Atlassian Marketplace.
- Use Cases: Get a better visibility of your team work across projects on the Jira roadmap, create project portfolio, optimize workload, and efficiently distribute issues across team members. All data can be easily transformed into reports, and exported in Excel.
6. Integration with Time Tracking and Reporting Tools
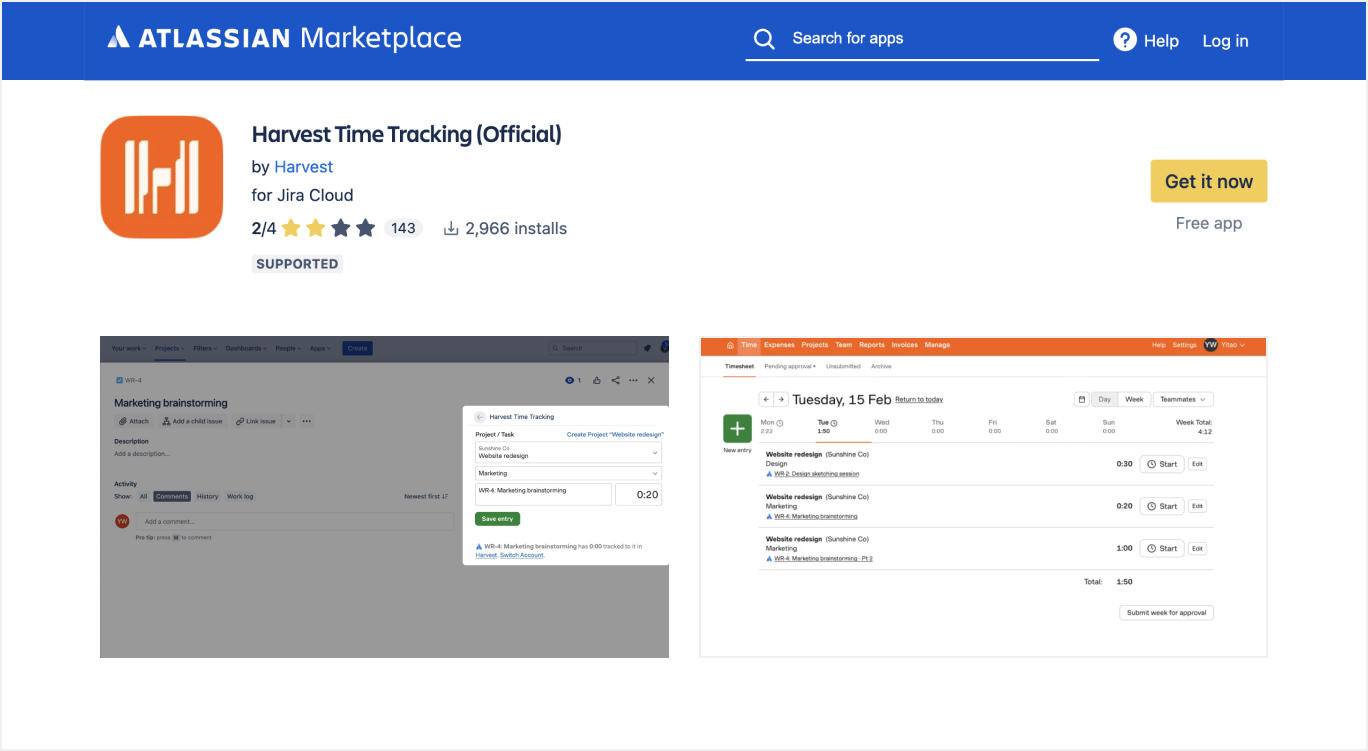
- Why Integrate: Tools like Tempo Timesheets, Harvest or Planyway provide enhanced time tracking and reporting capabilities.
- How to Integrate: Find these apps in the Atlassian Marketplace and install them.
- Use Cases: Log work hours directly on Jira issues, generate detailed time reports, and manage project budgets.
7. Custom Integrations via APIs
- Why Integrate: For tools without a direct integration, Jira’s robust REST API allows for custom integrations.
- How to Integrate: Use Jira’s REST API to create custom integrations. This may require programming knowledge or the assistance of a developer.
- Use Cases: Automate workflows, sync data between Jira and other tools, and create custom features.
Conclusion
Project Management with Jira stands out as a versatile and powerful tool for teams striving for efficiency and effectiveness. By leveraging its customizable features and fostering a culture of collaboration, teams can navigate the complexities of project management with ease and precision.
