How to make a Jira time tracking report in 2026

Know how to use it, and a Jira time-tracking report gives you a clear understanding of where your working hours vanished. There's a catch, though: native Jira time tracking is primarily a data-collection mechanism. The reporting and analysis part is largely up to you.
If you need a ready-made, cross-project tracking report, you're choosing between three paths: Jira's native reports, which give you clean per-version data with almost no setup but stop at project boundaries; a custom dashboard built from gadgets, which trades that structure for flexibility you configure yourself; or a Marketplace app.
In 2026, all three paths still work. Which one makes sense depends on how many Jira projects you're tracking, how much further analysis you're willing to do yourself, and whether you're on Jira Cloud or need to fold in things like third-party calendars or subtasks that native reports don't always surface cleanly.
TL;DR
- Native Jira time tracking reports give clean, version-scoped numbers with little setup; dashboards trade that for flexibility you configure yourself; a marketplace app buys a finished, cross-project reporting layer instead of assembly time. Which one's worth it depends on how many Jira projects you're juggling and how much upkeep your team will actually sustain.
- Keep estimates and time logs up to date. Stale original estimates and inconsistent logging can turn a “data-driven” report into little more than a guess. Treat overruns as a signal to review estimates and workflows, rather than discouraging people from logging their actual time.
- The report doesn't fix anything on its own — the gap between planned and actual time does, and only if someone owns it. Without one person checking it on a regular date range, even the best-built report won’t do any good.
What is a Jira time tracking report?
A Jira time tracking report is a report that shows how much time was logged against Jira issues and compares actual time spent with the time originally estimated.
But here’s where it gets confusing. The term can mean two things in Jira. In a broad sense, it's any report or view built from Jira's time-tracking data — who logged the time, on what issues, how actual time compares to planned, and how much time a given project or team member burnt through. It's less a specific report and more a type of analysis that you can put together several different ways, whether that's a native gadget, an export, or a Marketplace app.
Also, Jira does have one specific, named Time Tracking Report — a native report tied to a Fix version. It shows Original Estimate, Estimated Time Remaining, Time Spent, and Accuracy for the work items in that version, so you can see at a glance how your estimates held up against reality. Worth flagging, though: this is one of the reports Atlassian currently lists as retiring, so its future — and the future of this kind of native reporting in Jira more broadly — isn't entirely clear right now.
Either way, whether you mean the broad idea of a time tracking report or the specific native one, the underlying Jira time tracking fields are the same four data points Jira stores for every issue:
- Original estimate — the total time you initially estimated for the issue.
- Time spent — the total logged hours your team has recorded against the issue.
- Remaining estimate — the time still expected to complete the issue.
- Work logs — the individual time entries that make up the time spent total, including who logged them and when.
These numbers can help you answer questions like: Are we burning through our estimates faster than expected? Who's logging the most hours on this project? Which issues are taking way longer than we planned?
How to enable time tracking in Jira
Before any of this works, Time tracking has to be switched on. If you work with Team Managed Projects (for Company Managed Projects, time tracking will be enabled by default).
Here is a one-time setup step, usually handled by a Jira administrator.
1. Check that time tracking is enabled
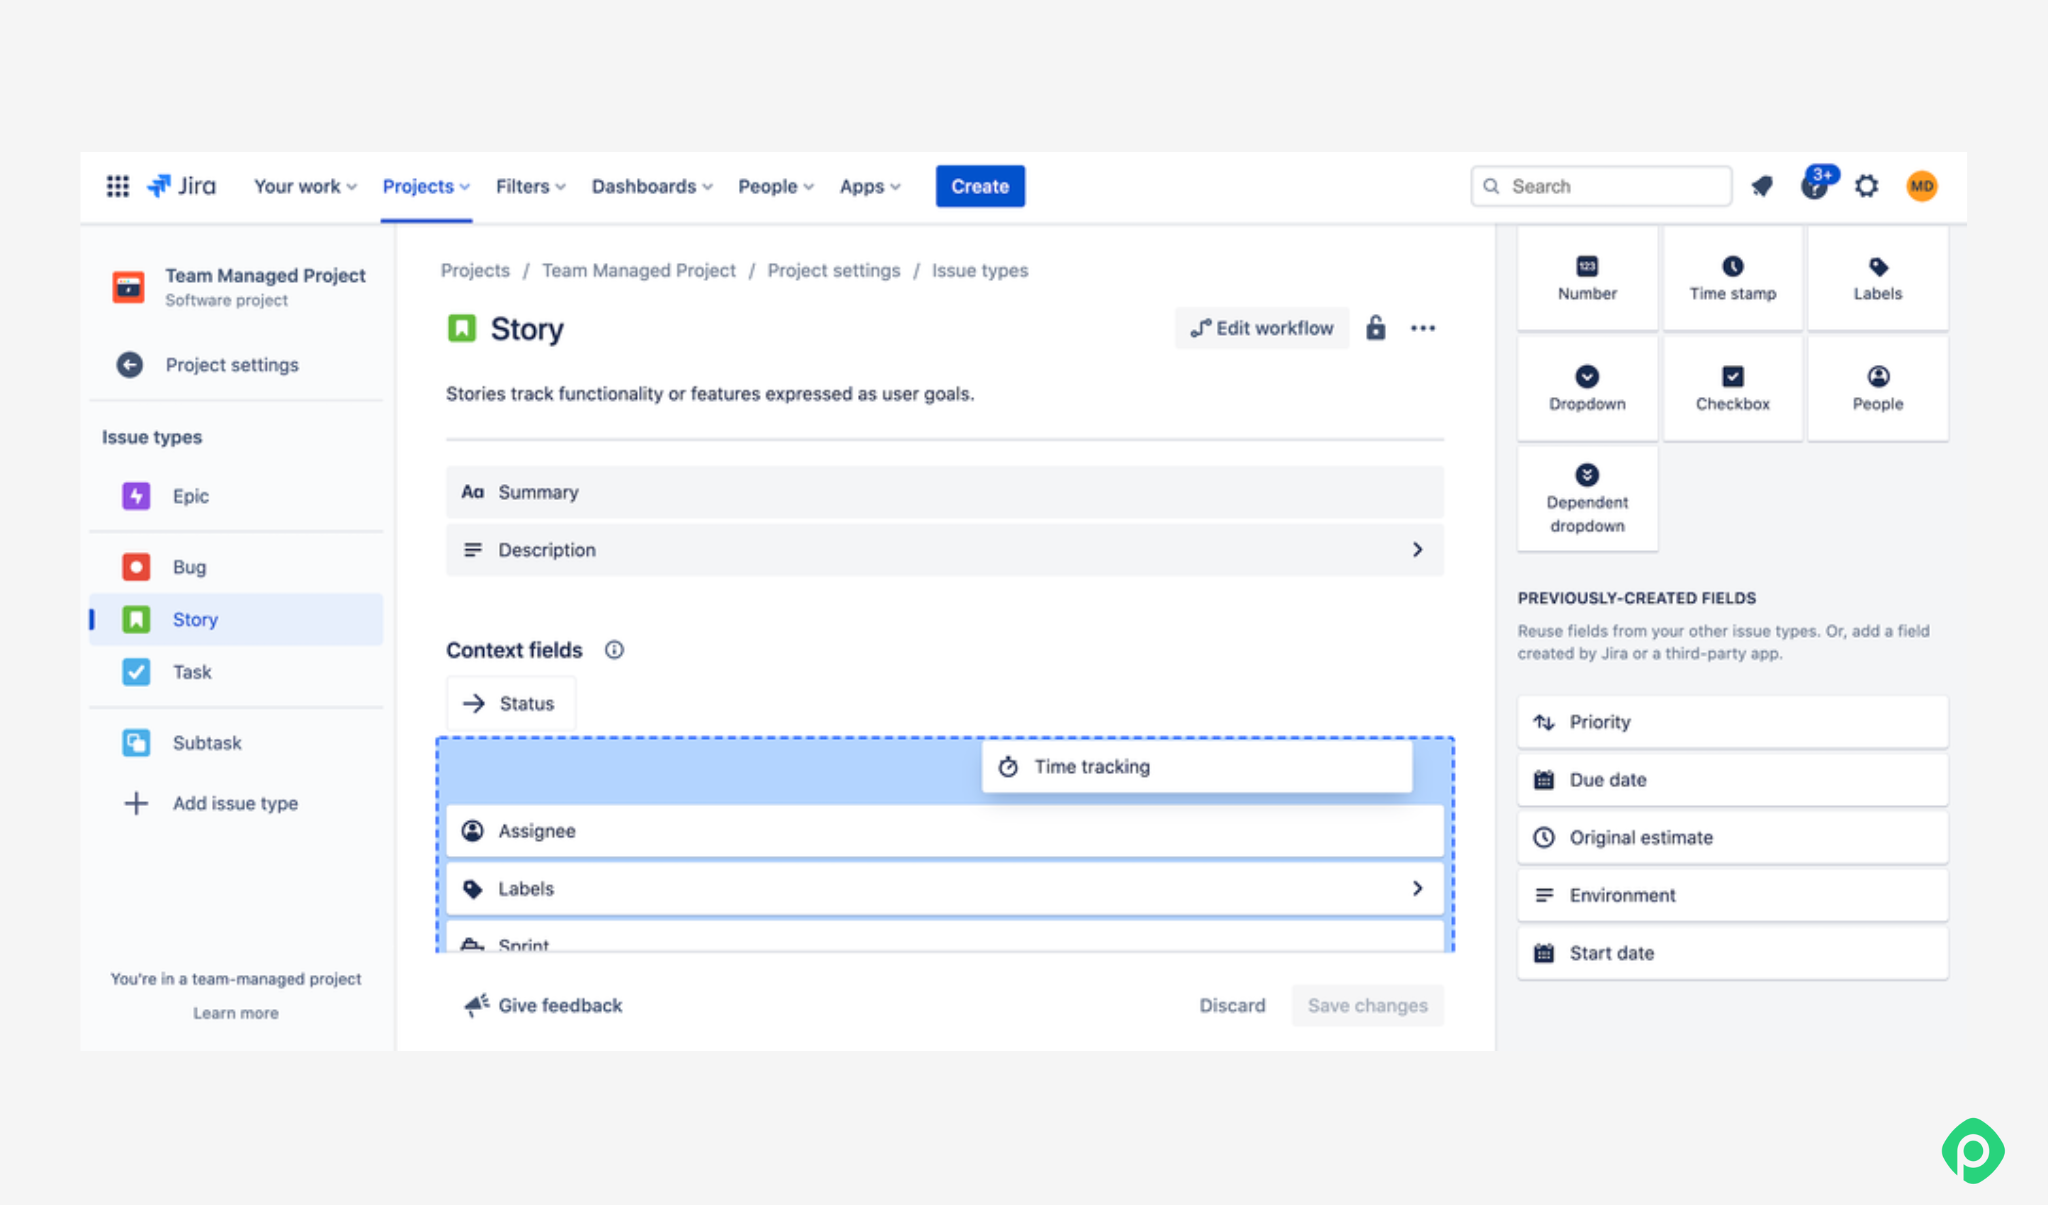
Enable time tracking from your Jira administration settings (in Project Settings or global admin, depending on your instance). Confirm that:
- Time tracking is turned on for the relevant projects.
- The appropriate scheme grants users permission to log work.
- Your tracking settings (hours per day, days per week) match your team's working hours.
2. Add estimates to Jira issues
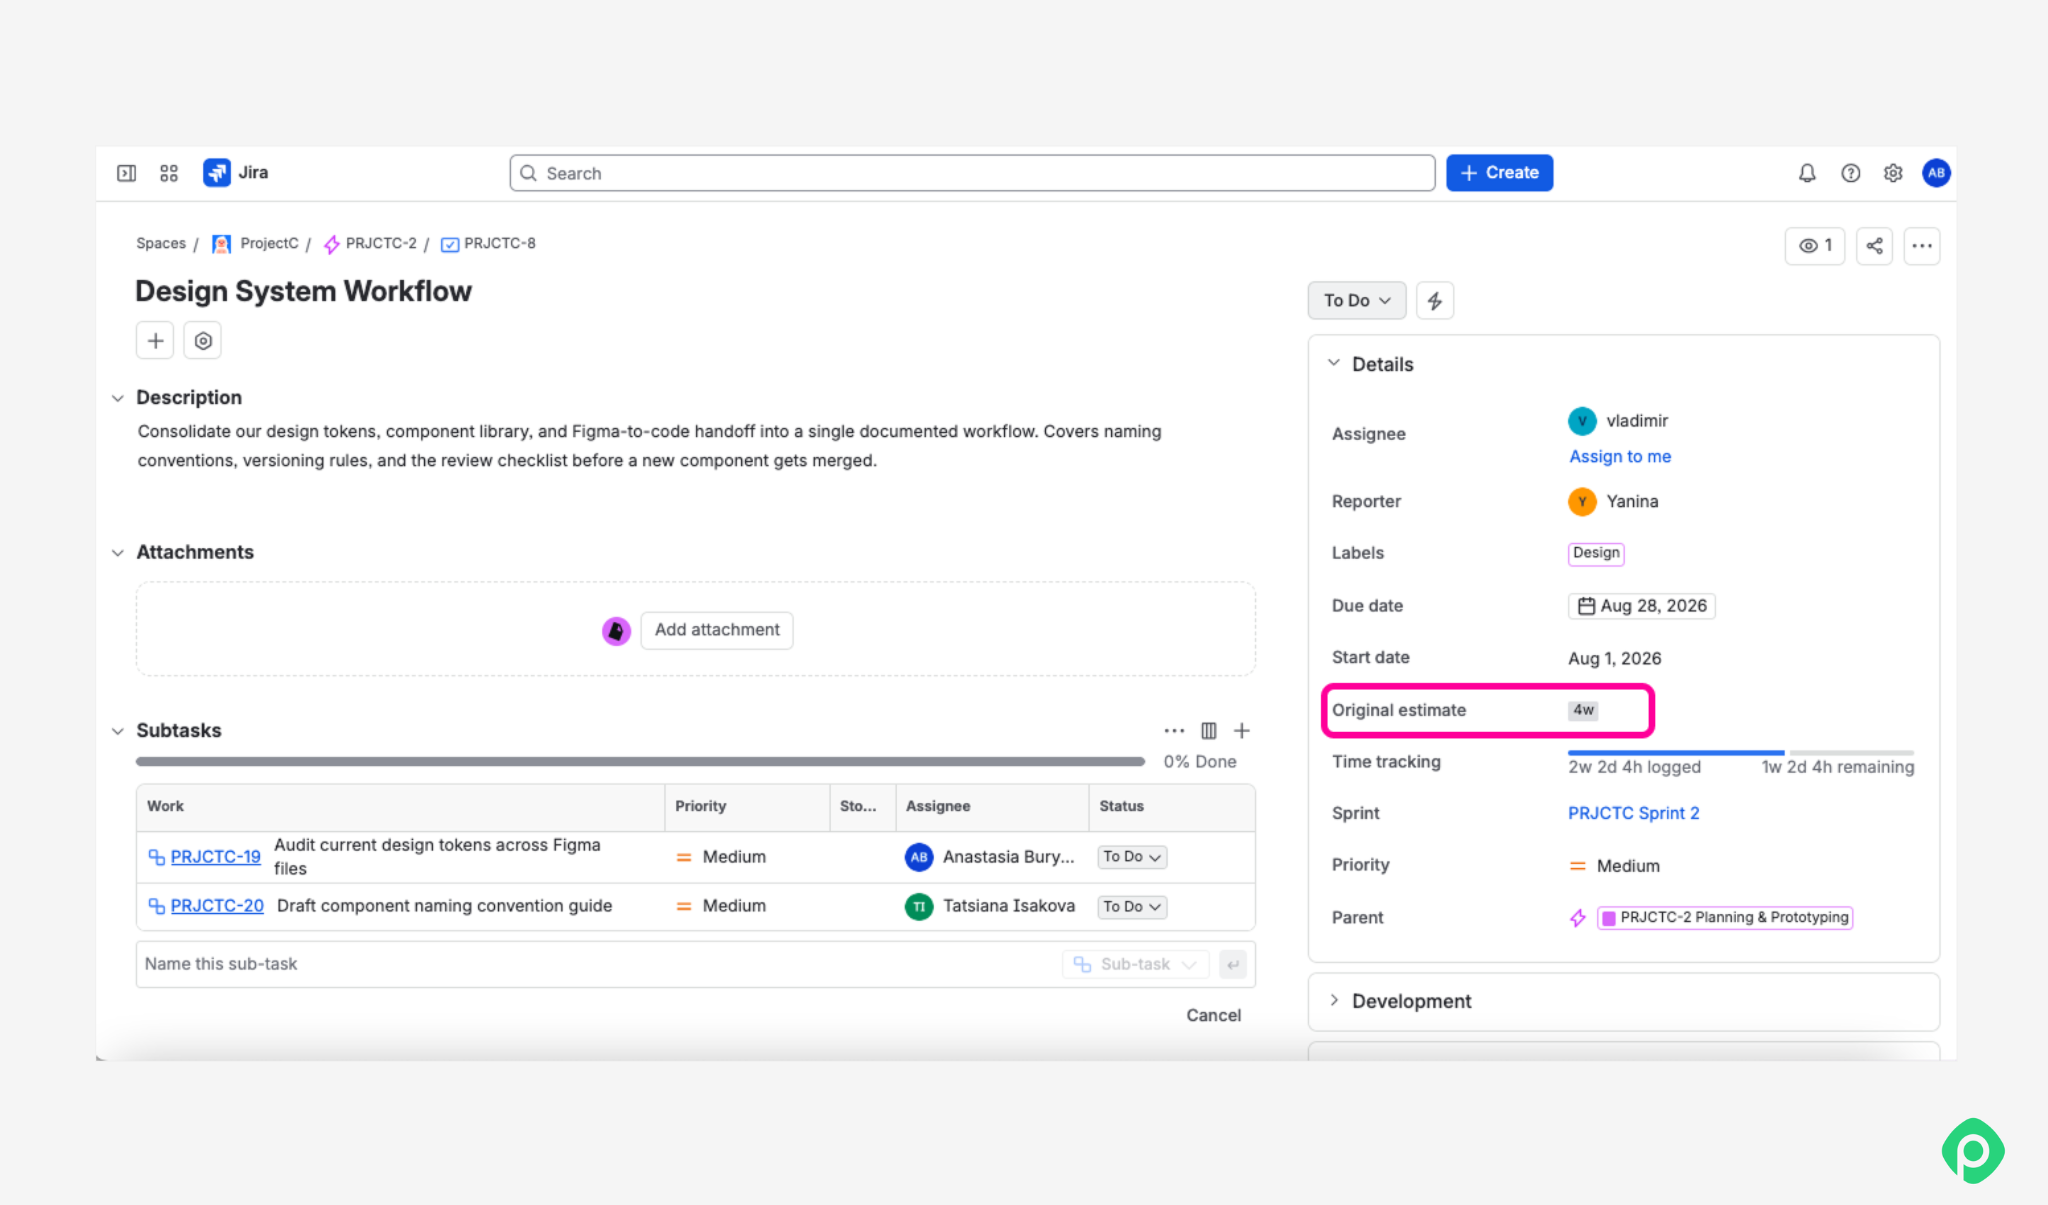
For Jira time tracking to be meaningful, issues need time estimates. Add an original estimate (and update the remaining estimate as work evolves) so your native Jira time tracking can compare planned with actual. This is especially important for software development teams using story points alongside time estimates, since time tracking reports rely on these fields to show variance.
You do this right on the issue itself: open it from the backlog or board, and there's a spot to enter an original estimate directly in the time-tracking field: some teams use hours, others translate story points into rough hours for planning purposes. Either way, an estimate with no basis in reality just produces a report that looks precise and means nothing. If a task usually runs long, say so up front.
3. Log work on issues
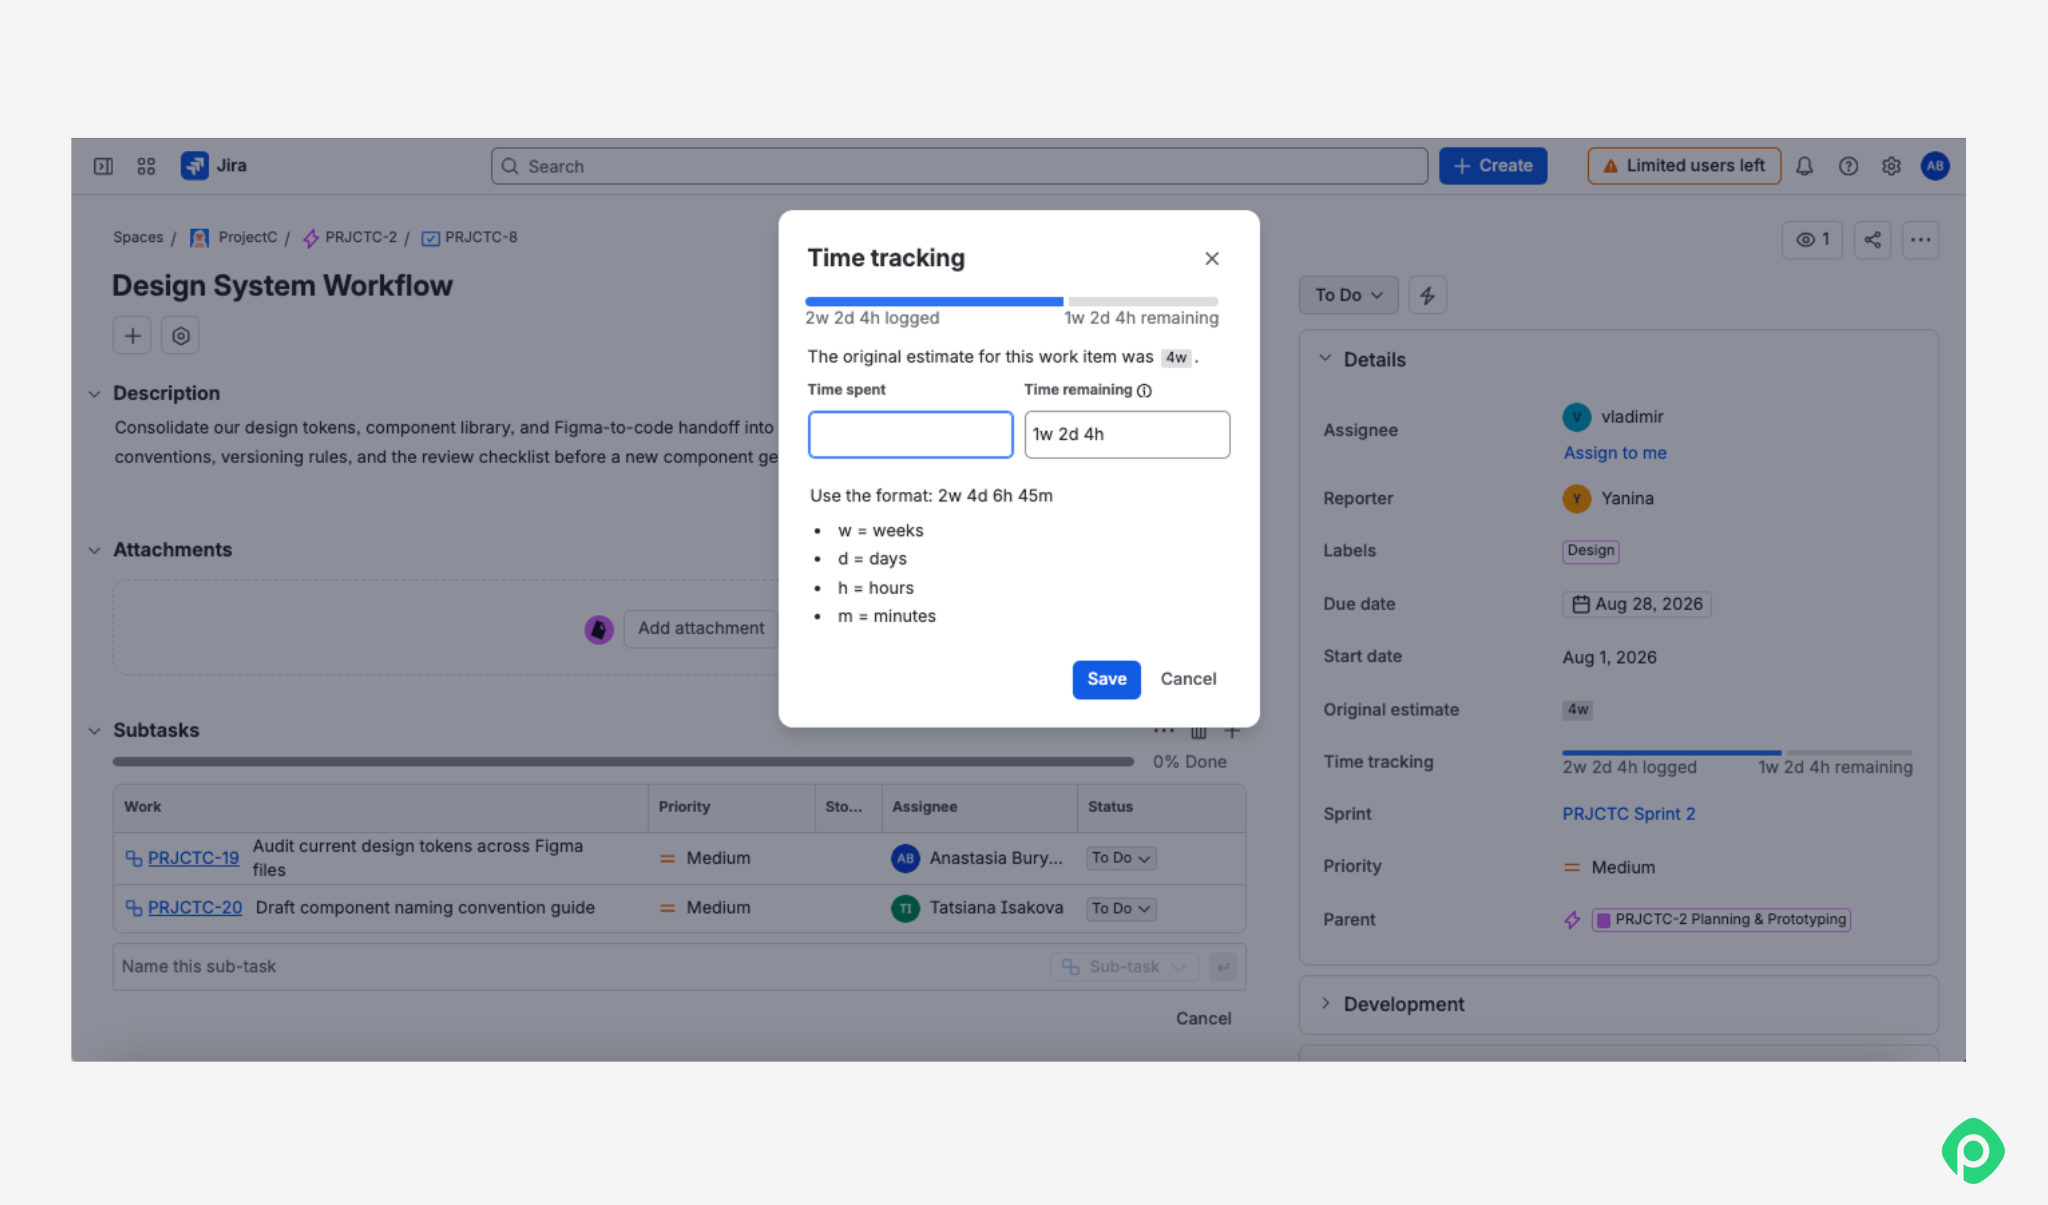
With time tracking enabled and estimates in place, your team can start logging time. There are three main ways to do this in Jira:
- Log work manually through the issue's work log section: enter the time spent and optionally a comment.
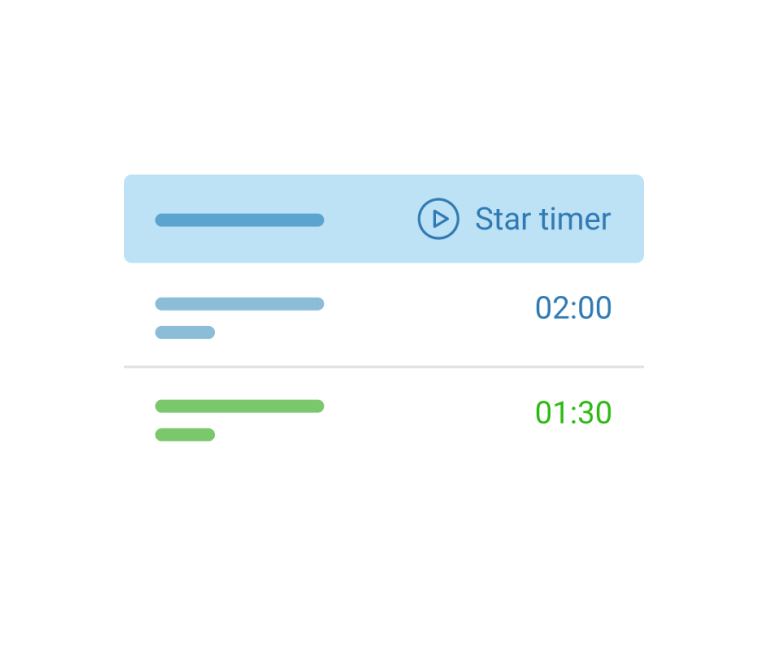
- Use a start-stop timer if you have a time tracking app installed (Planyway includes one).
- Add worklog entries through the Jira interface or via API.
The goal is consistent time logging so your tracking report reflects reality. Missing or inconsistent logged hours create blind spots in project progress and make resource allocation decisions risky.
More on time tracking in Jira ⇒
How to get a Jira time tracking report?
Jira does ship with a Time Tracking Report, but it's tied to a single version, so you won't get a cross-project snapshot of who logged what, or a breakdown of hours by work type across different projects. For anything wider, you're left to assemble it from filters and dashboard gadgets, or offload the job to a marketplace extension.
Option 1: Use Jira's native reports
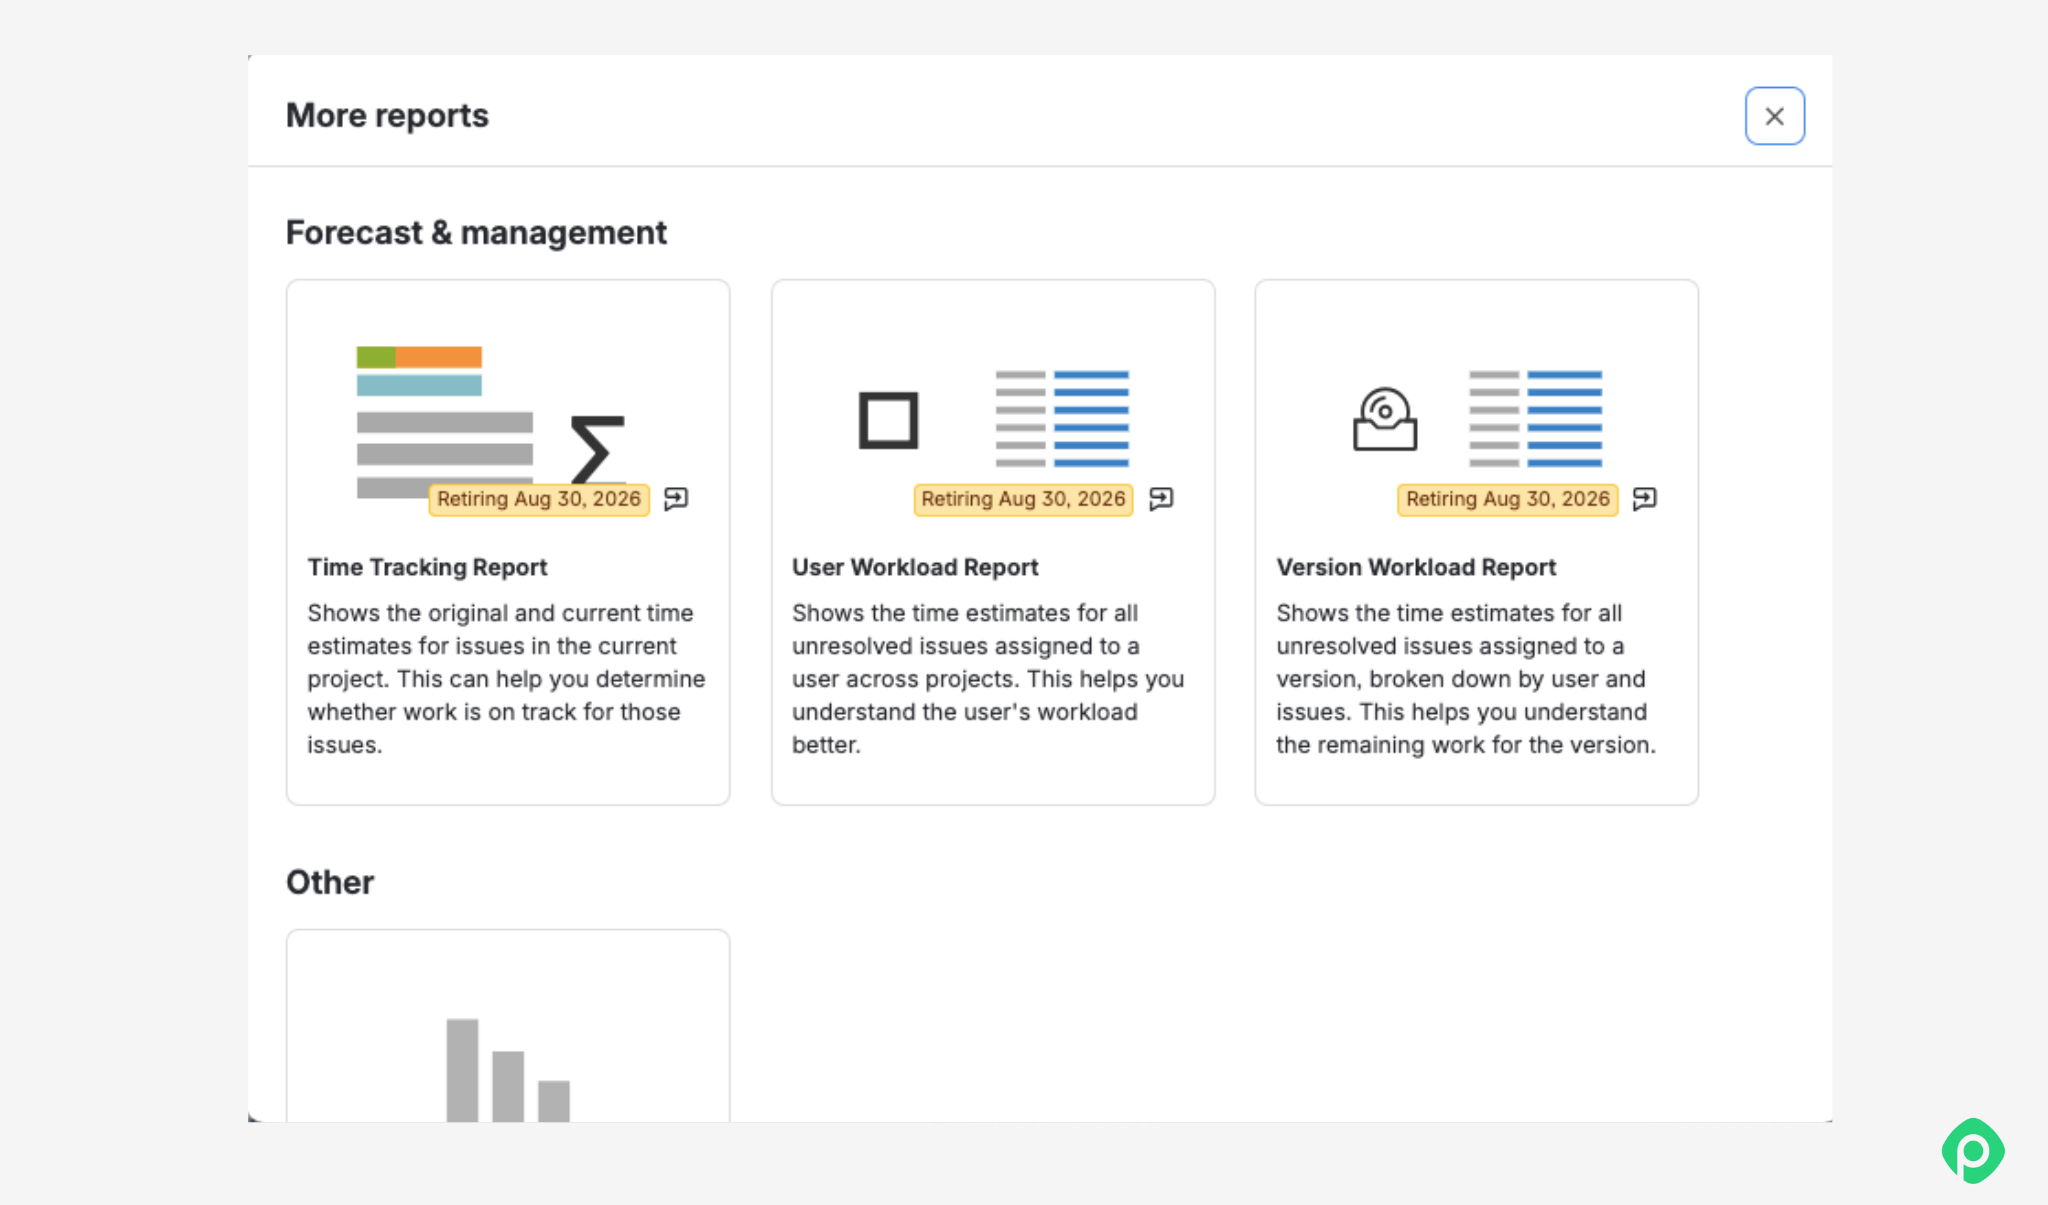
Jira ships with several built-in time tracking reports: Time Tracking Report, User Workload Report, Version Workload Report. These three only show up on company-managed projects. If your project is team-managed, you won't see this section at all, and you'll need to skip straight to dashboards or an app.
To find the reports, open your project, go to Reports, and scroll down to the Forecast & Management section.
- Time Tracking Report — pick a Version from the dropdown and hit Next. You'll get a per-issue breakdown of original estimate, remaining estimate, and time logged for everything tied to that version — useful for checking where a release stands. You can also export it to Excel from the link at the top if you want to work the numbers elsewhere.
- User Workload Report — pick a team member and see how much time they have left across their assigned issues. It's basic, but it's a fast way to spot who's overloaded.
- Version Workload Report — the same idea, but grouped by version instead of person: how much time is remaining on every issue tied to that version.
None of these three let you report across multiple projects at once, and they don't cover work types or teams broadly — each one is scoped to a single project and, for two of the three, a single version.
Option 2: Use Jira dashboards
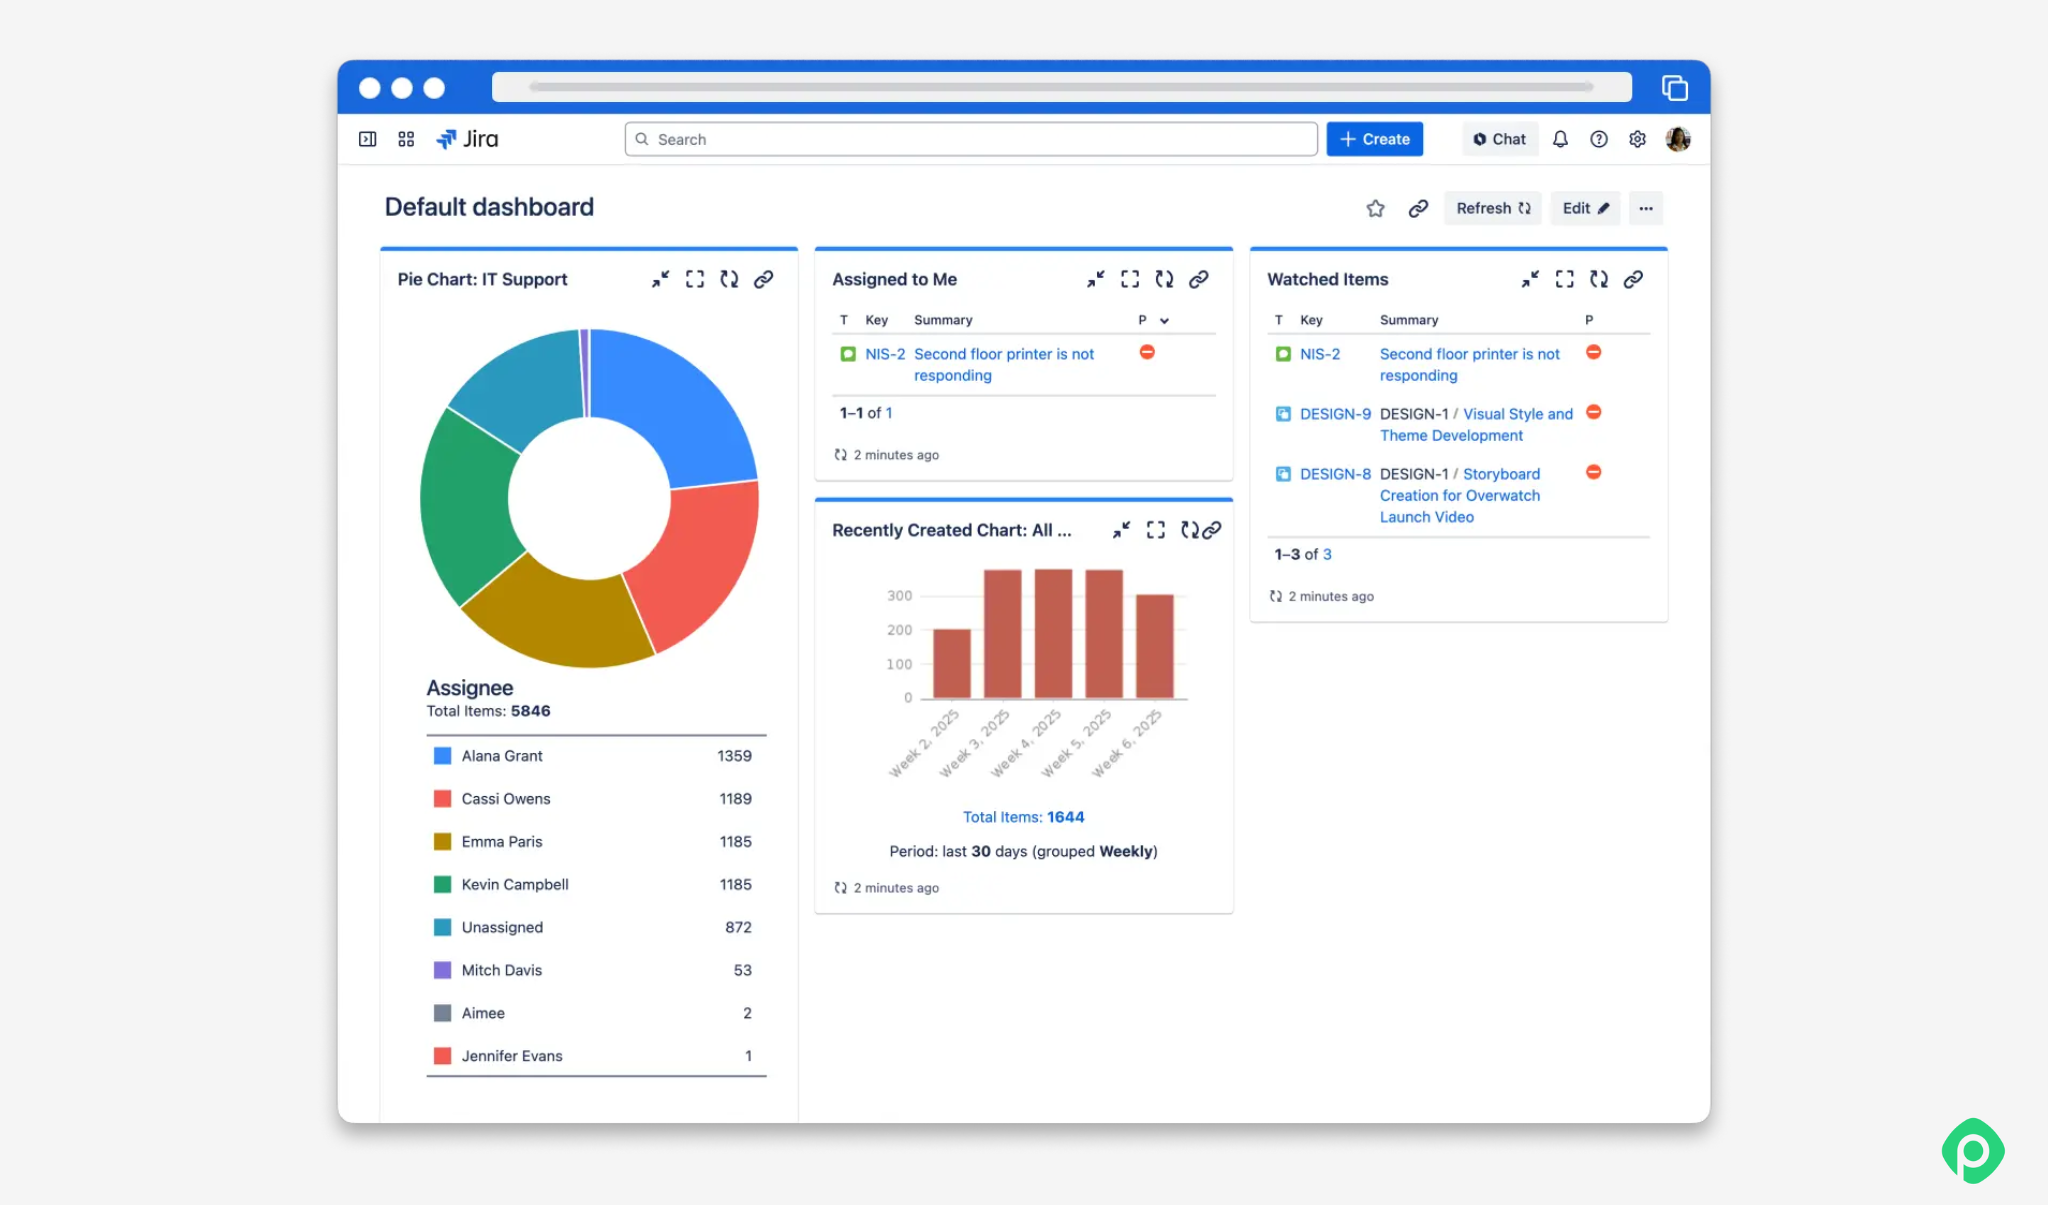
Dashboards in Jira are customizable home pages made up of gadgets — small, configurable widgets that pull live data from your Jira projects and display it in charts, tables, or metrics. Think of them as building blocks: each gadget answers one question (e.g., “How many hours did this team log this week?” or “Which issues are overdue?”), and together they give you a real‑time picture of project progress without running separate reports every time.
To build a Jira time tracking report dashboard:
- Open Dashboards → Create dashboard. Give it a clear name (e.g., “Team Time Tracking – Q3 2026”) and choose who can view it.
- Add gadgets related to your time-tracking needs:
- Filter Results gadget displays issues from a saved filter in a table. Add columns like Time Spent, Original Estimate, and Remaining Estimate to see logged hours and estimates side by side. This is your core tracking report view for specific tasks.
- Workload Pie Chart Report is a native Jira report that shows the relative workload of assignees for a project or filter. Configure it to report on Time Spent, Original, or Current Estimate to visualize how effort is distributed across multiple users.
- Created vs Resolved Chart gadget plots issues created vs. resolved over time. Pair it with time-tracking filters to see whether delivery trends match time-spent trends.
- Configure each gadget's filter by project, team, assignee, or date range.
- Arrange gadgets so the most important time reports sit at the top.
Tips to get more from gadgets:
- Save filters with clear names (e.g., “Backend – Time Tracking – Current Sprint”) and reuse them across gadgets and dashboards. This keeps your tracking settings consistent and makes further analysis easier.
- Use separate dashboards for different audiences: a team‑level view focused on logged hours and remaining estimate, and a leadership view focused on project progress across multiple projects.
- Revisit gadget configurations every few sprints. As your agile processes evolve, you may want to track different fields or adjust date range windows.
Option 3: Use a Jira time tracking app
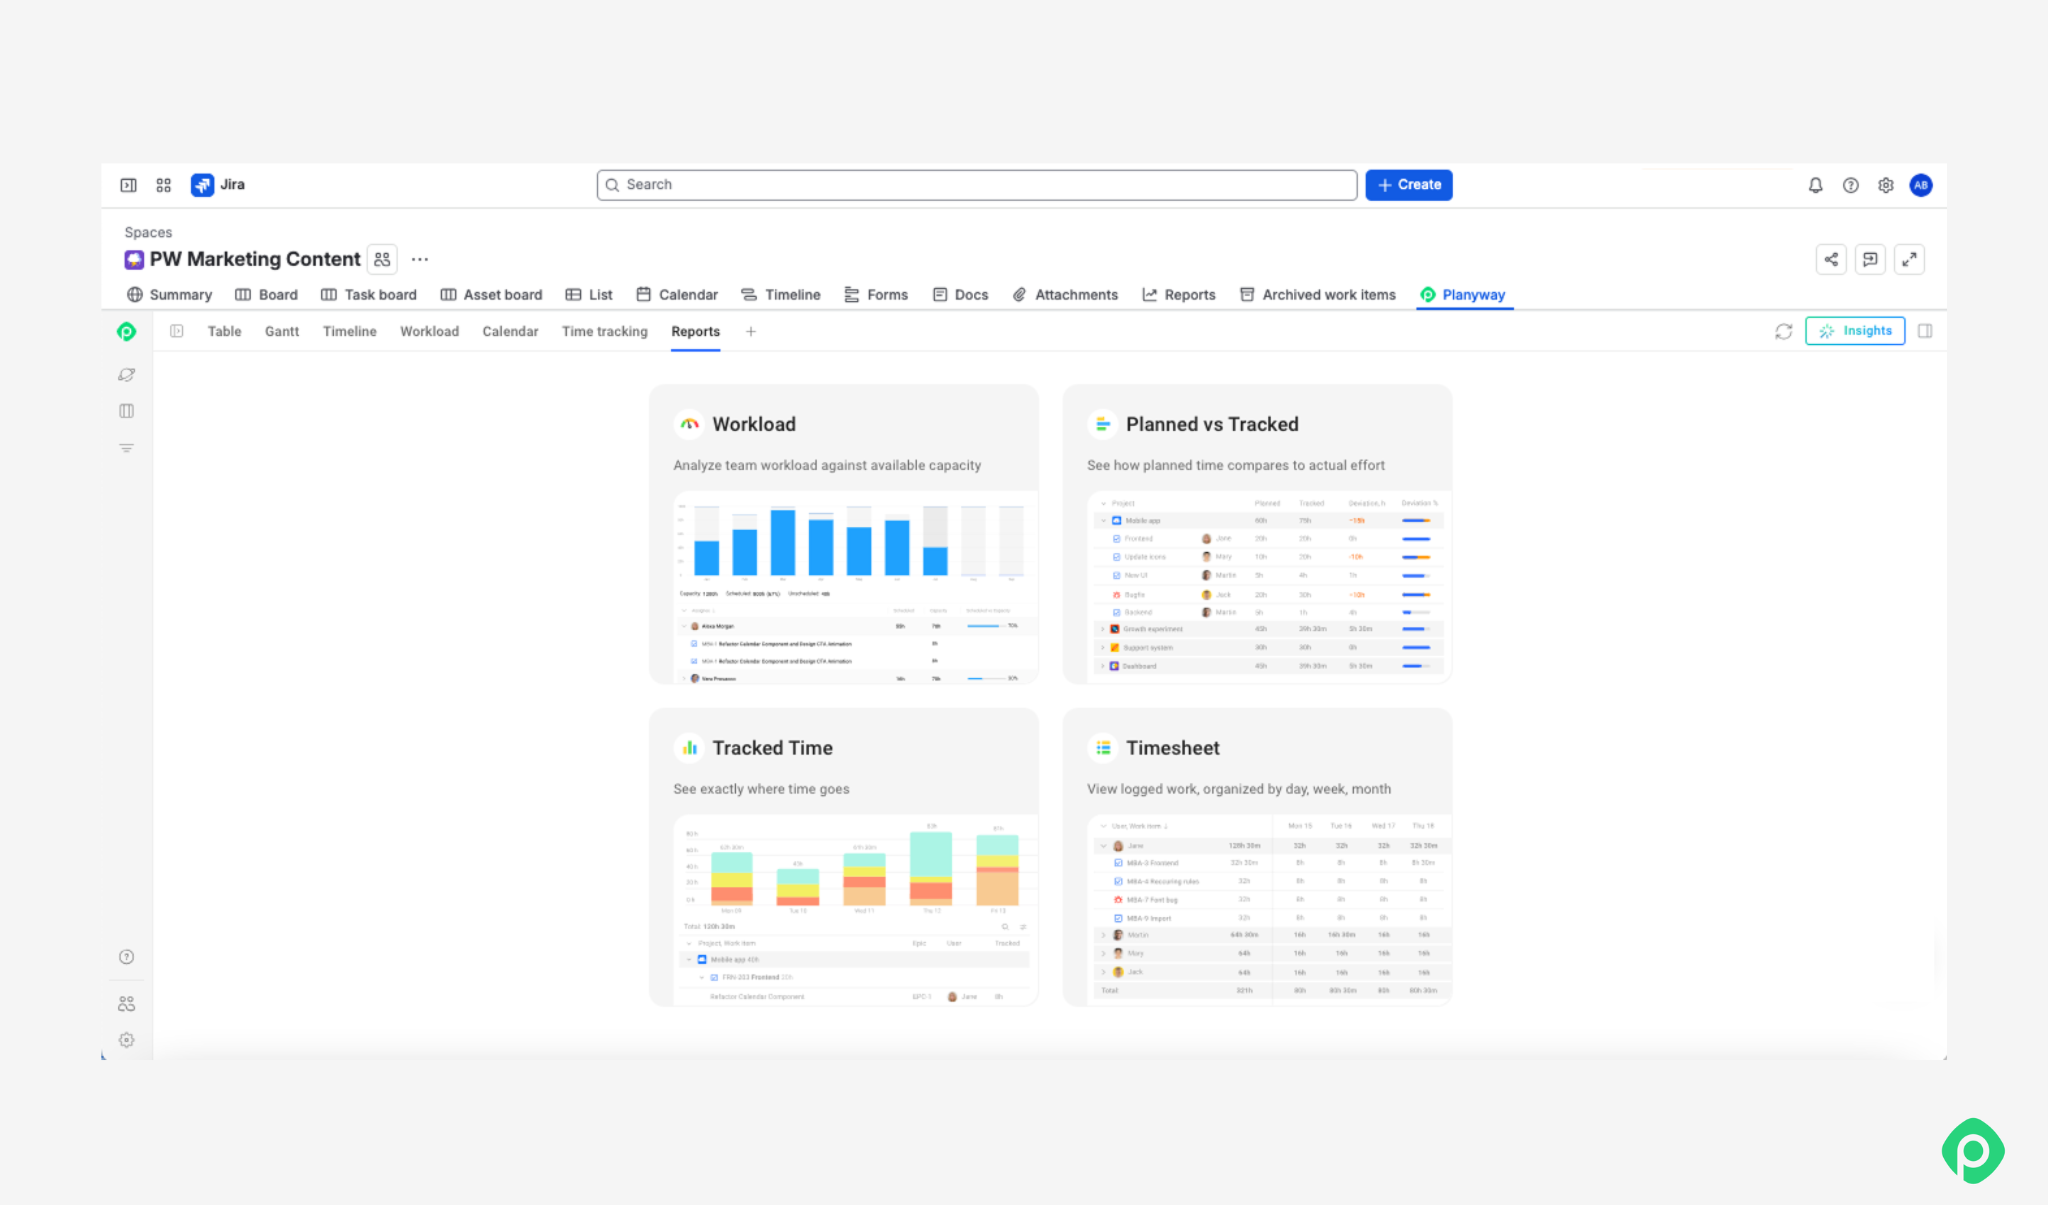
If your team needs regular time reporting, especially across multiple projects, a Marketplace app can fill the time tracking gaps in native Jira. Planyway for Jira is one of those apps.
Planyway combines time tracking with ready-to-use reporting: time logged via Planyway's timer or manual entries is automatically aggregated into dedicated reports. This includes the Time Tracking Report for an overall view of logged time, Planned vs. Tracked for comparing actual effort with estimates, Workload for comparing scheduled work with available capacity, and Timesheet for reviewing time by team member and period.
How to use Jira time tracking reports for project decisions
Time reports are only useful if they change what you do next. Here's how to turn tracking data into decisions that improve project progress, resource allocation, and estimation quality in agile project management.
- Spot estimation gaps early. Open the native Time Tracking Report for a Version and look at the accuracy indicator — issues where time spent has pushed past the original estimate get flagged. If certain issue types consistently run over, adjust your original estimate templates or add buffers for similar specific tasks in future sprints.
- Rebalance workloads before deadlines slip. The User Workload Report shows the remaining estimate per person across their assigned issues. If one team member is carrying most of the remaining work while others have room, reassign tasks or push non-critical work. This catches invisible bottlenecks before they turn into missed deadlines.
- Validate sprint commitments mid-sprint. Build a dashboard gadget with Time Spent, Original Estimate, and Remaining Estimate columns for your current sprint filter. If the numbers say you won't hit the end date, negotiate scope or bring in help now rather than at demo time.
- Improve forecasting for stakeholders. Export work logs by epic or project across a few sprints and look at how actual time compares to what was planned. Use those trends to build more realistic estimates for upcoming initiatives, instead of estimating from scratch each time.
- Support billing and cost reviews. Export time tracking data to Excel/CSV, combine it with your internal rate tracking, and hand a summary to the accounting department for customer invoices. Jira doesn't distinguish billable work natively, but exported logged hours can still be categorized downstream.
- Tune team processes. If work logs show frequent context switching or a lot of tiny entries on subtasks, consider batching work, reducing handoffs, or clarifying issue status transitions to cut overhead and protect precious time.
The common thread: use time tracking in Jira not as a surveillance tool but as a feedback loop for better planning, fairer workloads, and more honest conversations about scope and capacity.
Best practices for Jira time tracking reports
Good time-tracking habits make your tracking report trustworthy and your decisions sharper.
- Log time on the same day the work happens; only then can you treat those entries as data rather than assumptions.
- Keep your Jira time tracking fields consistent across the team.
- Review the numbers on a date range that matches how you work. Do it weekly if you run short sprints or monthly if you prefer Fix version cycles.
- Don't let third-party plugins multiply without a plan. If your Jira software setup has three different marketplace apps all touching time, there is a good chance that someone's data is getting double-counted.
- Set an appropriate scheme for who can edit logged time after the fact.
- Treat overruns as data. If someone logs more time than planned, use it to understand what affected the estimate and improve future planning. Creating pressure around overruns can make people less comfortable logging their actual time, which ultimately makes your reports (and future estimates) less reliable.
- Watch for holiday schedules and planned time off.
- Keep one owner responsible for the reporting capabilities you've set up.
Conclusion
Jira time tracking gives you the raw numbers, but the useful part starts when you do something with them. Check where actual time is running over estimates, spot uneven workloads, and look for patterns that can help you plan the next sprint or project more realistically.
If you're working with one project or version, Jira's native reports may be enough. But once you need to track time across multiple projects, compare planned vs. tracked effort, or regularly report on workload, building those views yourself can become a lot of maintenance.


FAQ
To make a Jira time tracking report, export your issues with time-tracking fields included, using Jira's native Excel export, then build a pivot table grouped by whatever you're analyzing: person, Jira projects, or issue status. For a more detailed report with user-level breakdowns and planned-vs-actual comparisons, use a marketplace app like Planyway for Jira that exports directly to Excel with all filters and sorting preserved.
To compare estimated vs actual time in Jira, use the native Time Tracking Report (under Reports in a project) to see logged vs. estimated time at the issue level. For a more structured comparison across projects, Planyway's Planned vs. Tracked Report shows Planned time, Tracked time, Remaining time, Deviation, and Deviation %.
Native Jira supports exporting data from filters and issue lists to CSV or Excel. Planyway extends that with an Excel export on any built-in report, filters and sorting preserved, plus a shareable link option.
Jira's native time tracking doesn't include an automatic timer. However, marketplace apps like Planyway for Jira add a start/stop timer inside Jira issues that logs a worklog entry automatically when stopped. You can also log time by dragging issues onto a calendar in Planyway's Calendar view.
Native Jira time tracking focuses on single‑project views and basic gadgets. It lacks a built‑in cross‑project tracking report with flexible grouping by epic, user, and date. The workload pie chart and Filter Results gadget help, but you'll hit significant limitations when analyzing multiple projects or comparing planned time vs. tracked time at scale.